
Home
Shop
Tools
Empennage
Wings
Wings 2
Fuselage
Fuselage 2
Longerons
Aft Fuse Assembly
Center Fuselage
Assembling Center Sect.
Joining Rear & Center
Fuselage 3
Fuselage 4
Fuselage 5
Fuselage 6
Panel
Firewall Forward
Canopy
Wiring
Miscellaneous
Fuselage 2
|
Date |
Description of Task | Hours |
| Longerons | ||
| 5/5/07 | I bought these 4 sawhorses from
Ron Russ for
$20. He used them when building his fuselage. They
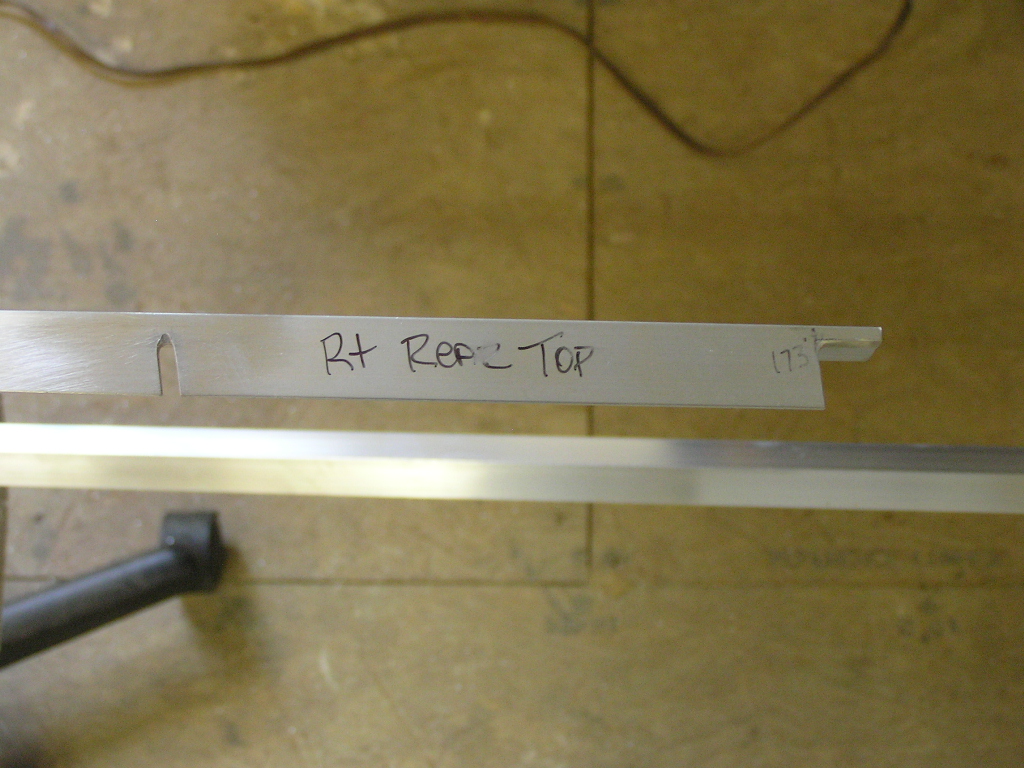
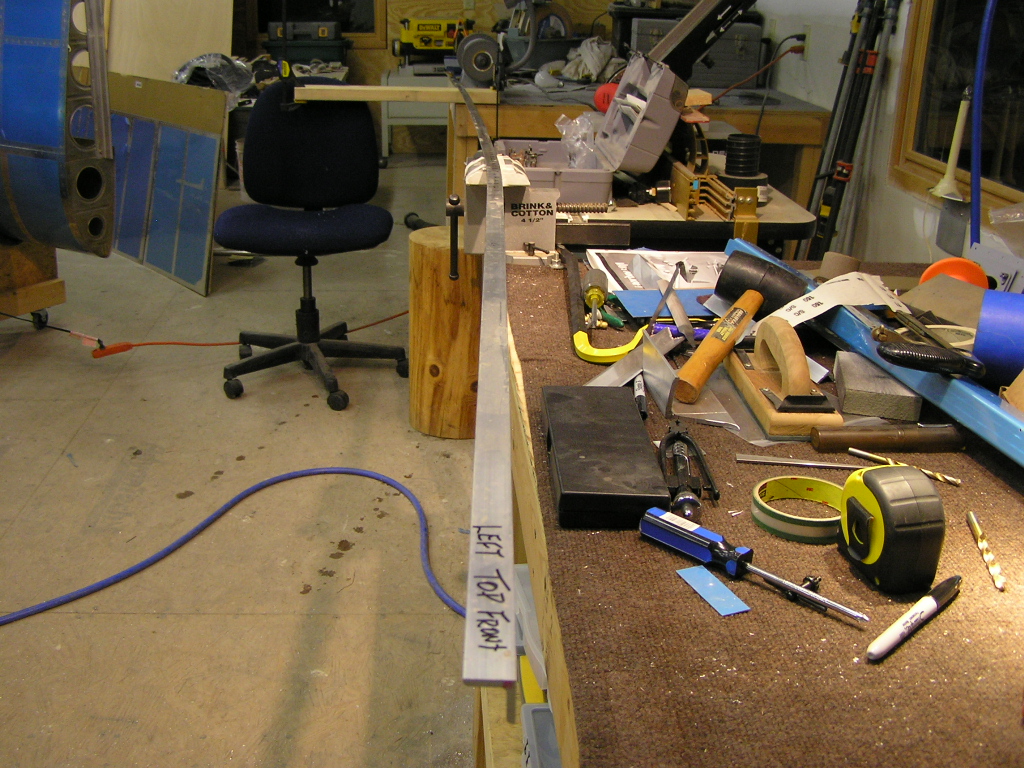
should know what to do.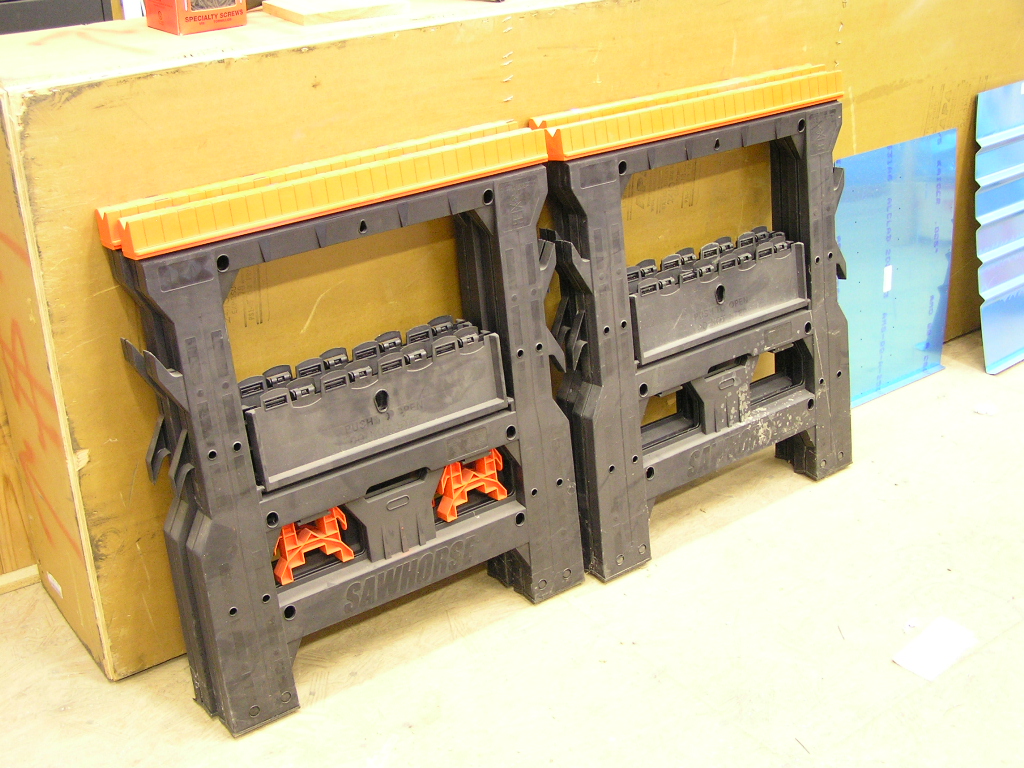 Began working on the longerons by marking the
critical dimensions on the right longeron and cutting to final
length (173 7/16"). I put the
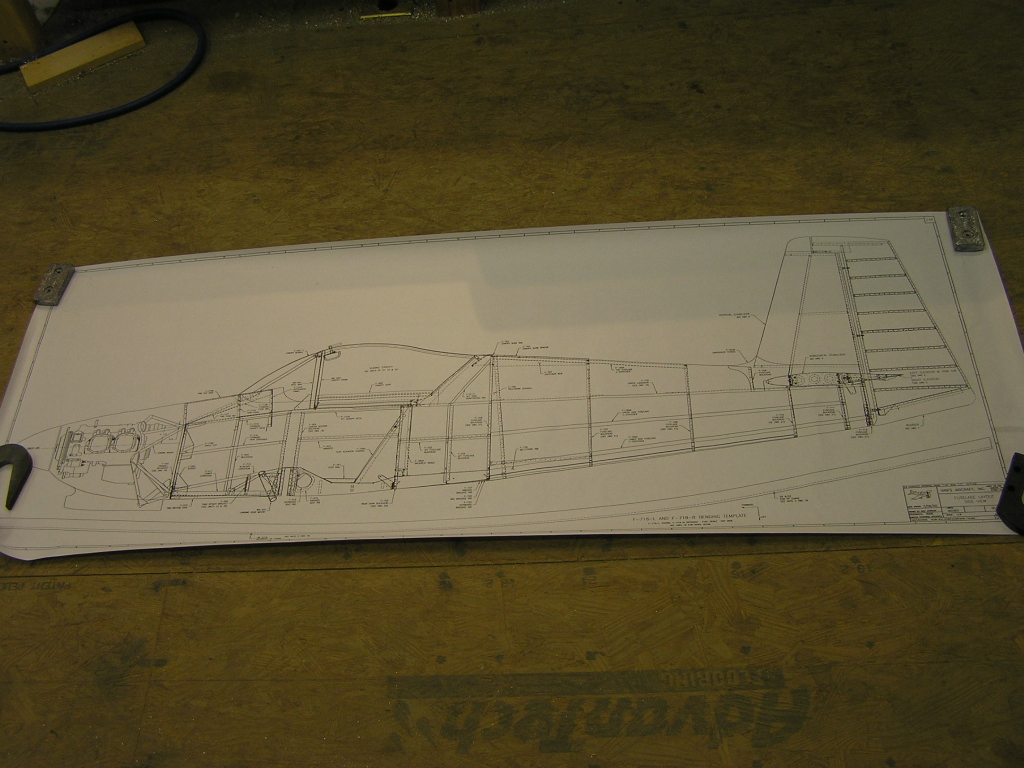
drawing with the longeron curve on the floor to use for
comparison. I cut the notch in the aft end as well as the
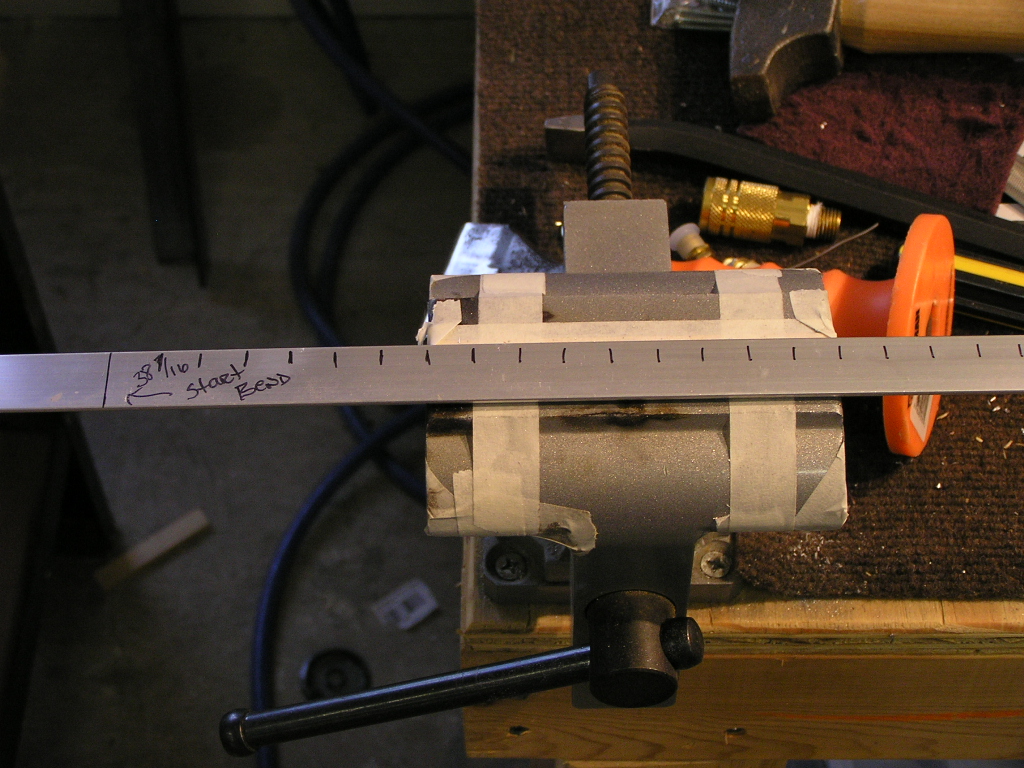
groove. Bending was a true learning experience...Bend by "whacking" with a
rubber mallet with the angle in the vise to a rough estimation
and lay down on the floor to compare to the drawing...Bend some
more and lay down on the floor...Over and over again. No
matter what you do, you WILL get some vertical deformity.
I ended up just using my hands and working the angle until it
was relatively flat. Another thing I did that helped me
was to number each inch in the bend area. This allowed me
to know what area I needed to either "bend more" or "straighten
out" when I checked it against the drawing. After about
30-40 iterations I felt it was as close as possible (within
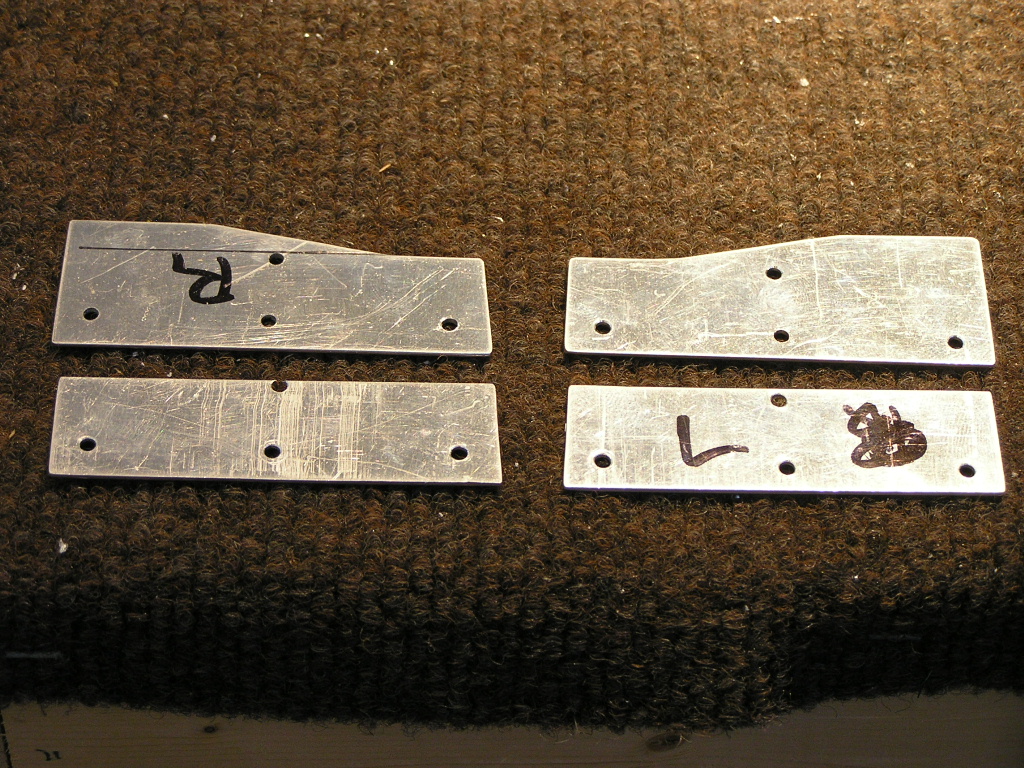
1/16" throughout the bend). I clamped up the left longeron, cut to length and cut the notch and
groove in the aft end. I marked off the critical
dimensions and began bending. |
3.0 |
| 5/6/07 | I finished bending the left longeron and
drilled the F-721B aft canopy decks. Lynne stopped in to
check out the fit.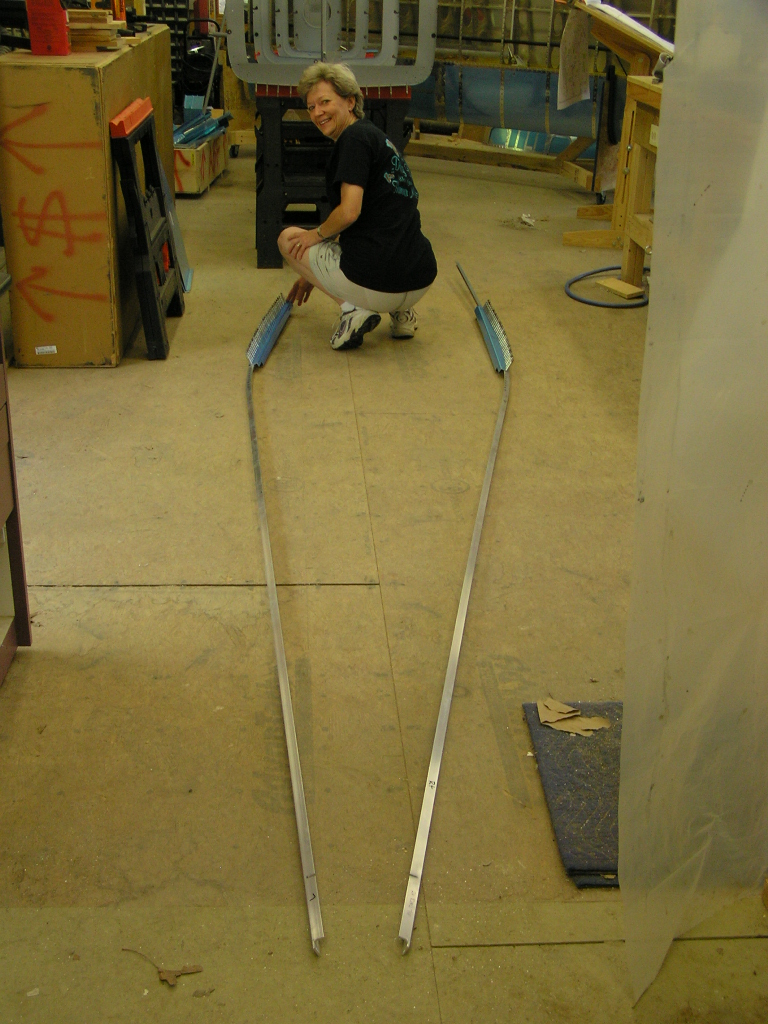 |
1.5 |
| 5/7/07 | Finished the longerons by bending the angle
down at the point indicated in the plans. I used my 36"
rule with a small ruler taped to it as a make-shift gauge.
This worked extremely well.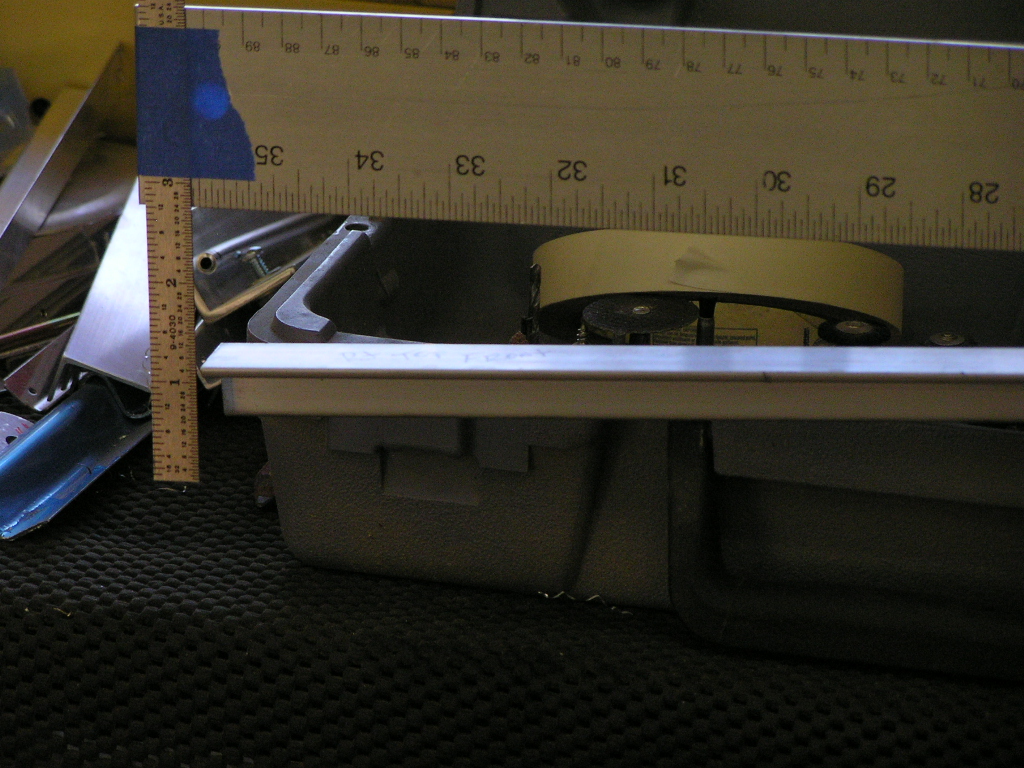  |
.5 |
| Aft Fuselage Assembly | ||
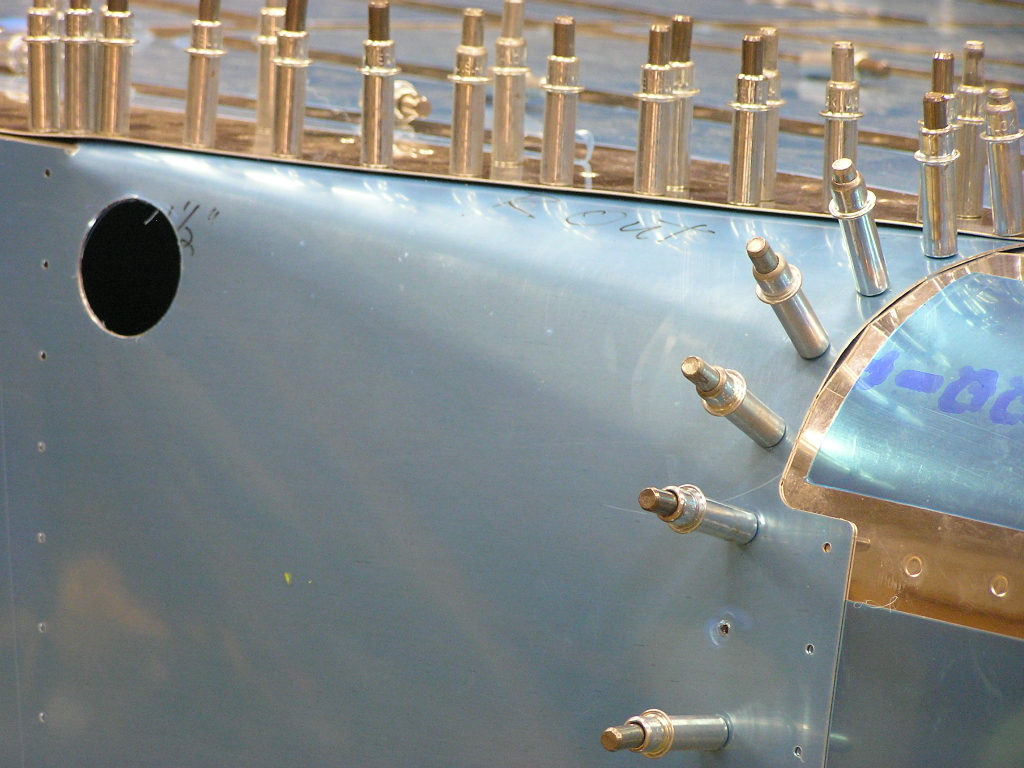
| 5/6/07 | I clecoed the F-779 tailcone skin to the F-711
and F-712 bulkheads. The tailcone skin is pretty thick and
has to be finessed in order to make fit.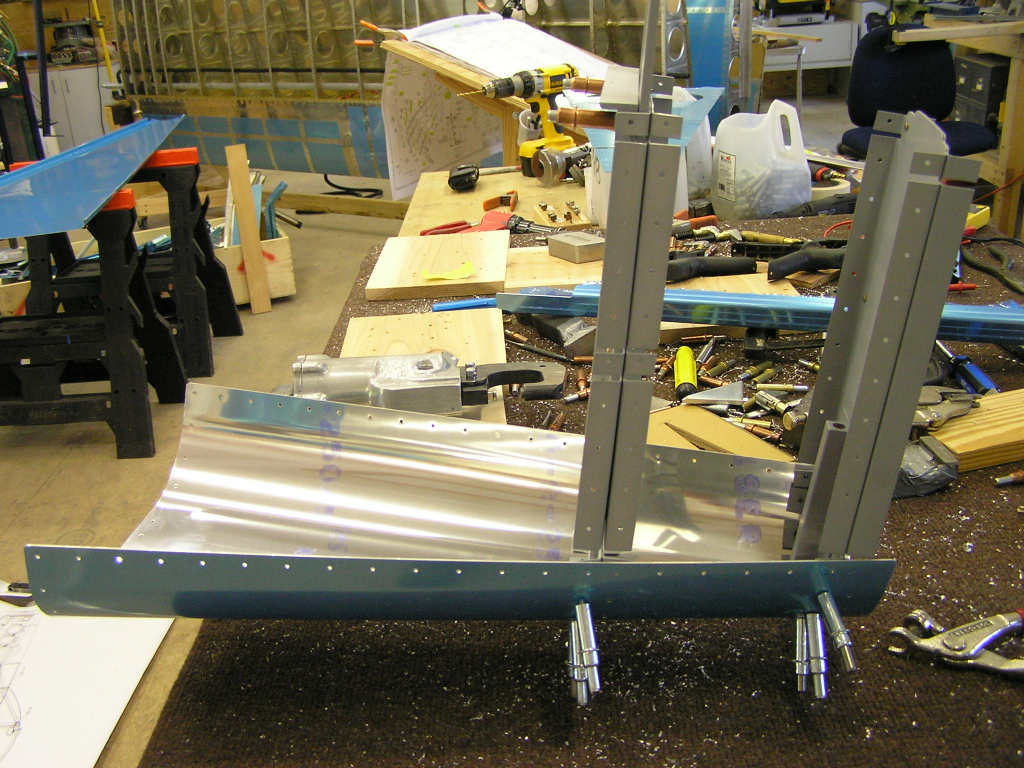
Next, I set up three saw horses and clecoed the F-706, F-707 and
F-708 bulkheads as well as the tailcone assembly and F-710 to
the F-778 aft bottom skin. |
1.5 |
| 5/7/07 | Tonight I started to trim the J-Channels and
discovered that Van's had shipped me the wrong length.
Until I receive the correct channels, I will jump ahead and work
on the Center Section. |
.5 |
| 5/22/07 | I got my replacement J-channels yesterday and I
went ahead and trimmed the ends per the plans. I set them
in the channels of the F-707 & F-708 and temporarily clecoed on
the side skins.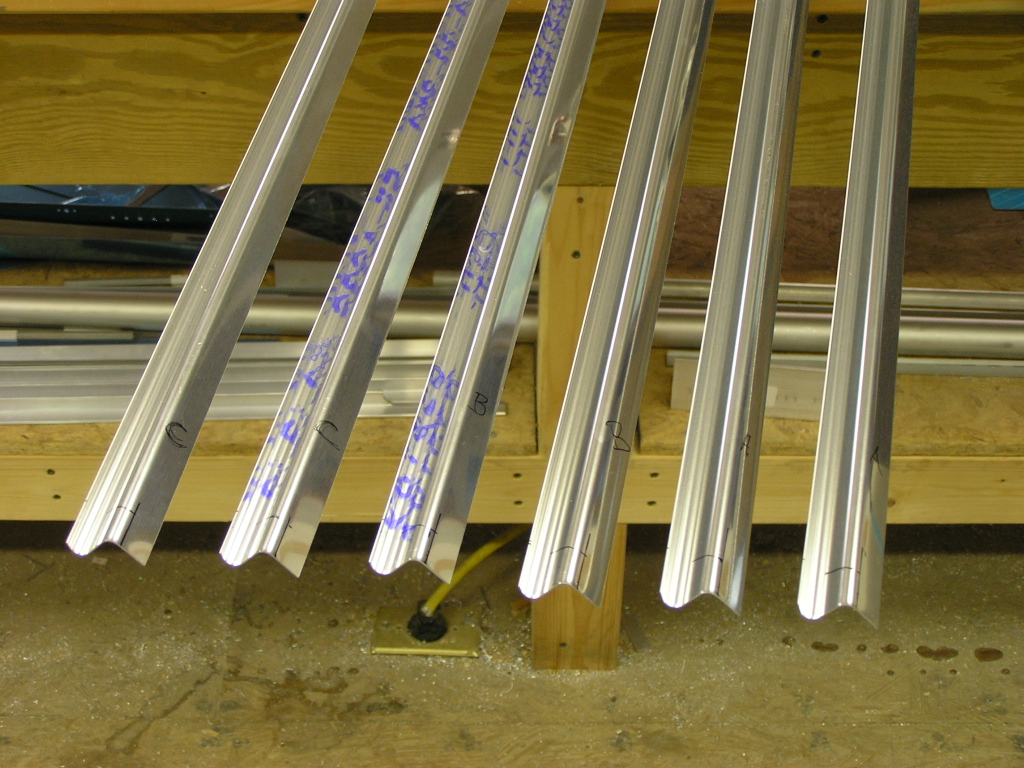 |
1.5 |
| 5/30/07 | I finished clecoing the side skins to the aft
section bulkheads and bottom skin. I then clecoed on the
tail section. Finally, I used the digital level to check
the fuselage at the F-706 forward bulkhead and shimmed until it
was level. Then, I checked the fuselage at the F-710
bulkhead and I found the fuselage to have a twist of 0.6º
or 1/8 inch in 12 inches. The plans offer nothing
as to how to address this twist but stipulates the twist must be
removed before match drilling or the plane will fly like a
corkscrew through the air (just kidding). I will research
this and call it a night. |
2.0 |
| 5/31/07 | After searching the archives of
Matronics and
VAF as well as consulting fellow builders Bill Repucci and
Mark Phillips, I decided to level the forward end of the
fuselage and clamp to the sawhorse. Then, I "racked" the
tailcone against the twist and checked the amount of twist until
it was showing level. All in all it was relatively simple.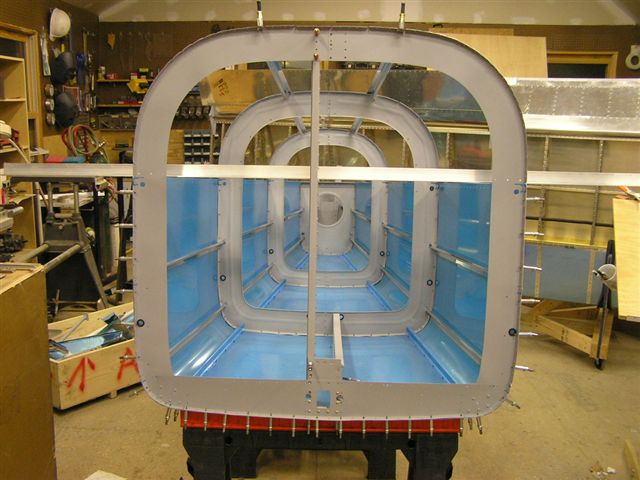 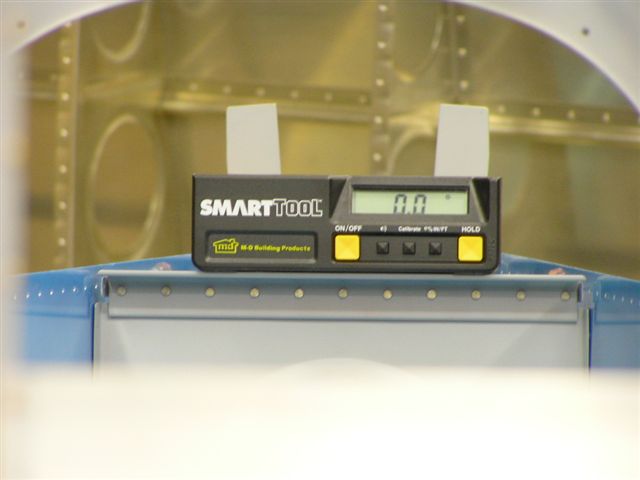
Next, I drilled the four lower J-channels by drilling and
clecoing every fifth hole. I drilled and clecoed fore to
aft, left bottom, right bottom, right middle then left middle.
Next, I drilled between each hole and clecoed following the same
regiment. Lynne wanted to go for a walk so I will finish
tomorrow. |
1.0 |
| 6/1/07 | Tonight I finished drilling the J-channels and
began match drilling the skins.
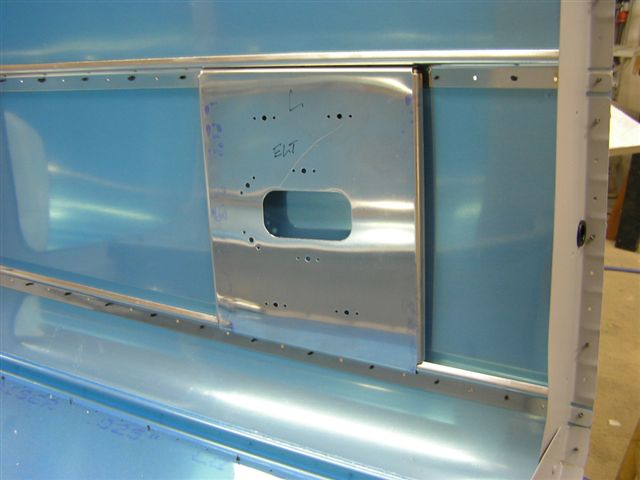
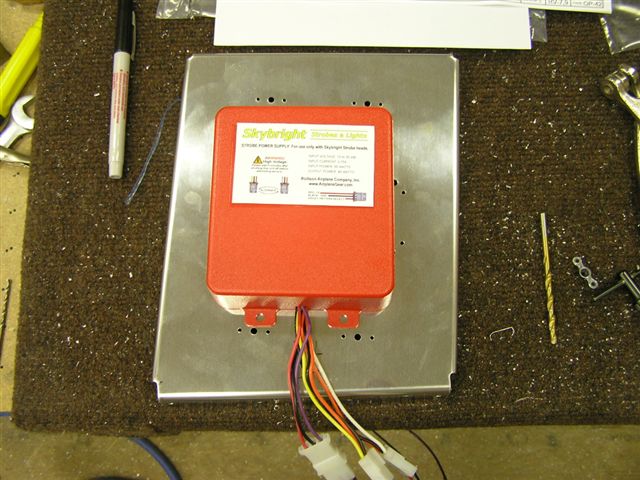
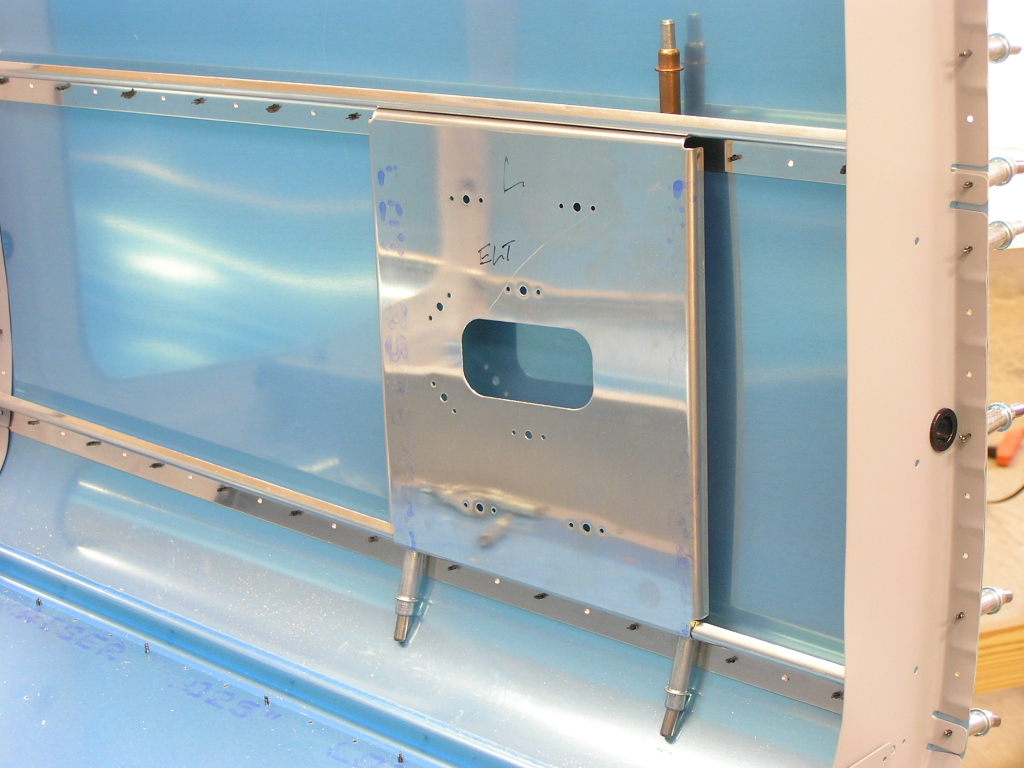
ELT/Strobe Brackets- Some time ago I ordered the ELT
and Strobe brackets from Vans. By installing the strobe on
the right fuselage wall and the ELT on the left wall I will
essentially free up the floor and these brackets will allow easy
access in the future. Because of the way they attach to
the J-channels, it will be much easier to drill them now and
rivet when riveting the aft section. I pulled out my strobe power supply and laid out the holes.
After drilling to #19, I then used my #8 platenut jig and
drilled for the rivets. After deburring and dimpling, I set aside. I don't have
my ELT yet so I will install the pre-drilled platenuts and hope
the hole pattern matches. However, since the brackets
attach to the J-channels with pulled rivets, I could rivet at
any time in the future (as long as I already have the doles
drilled). |
3.0 |
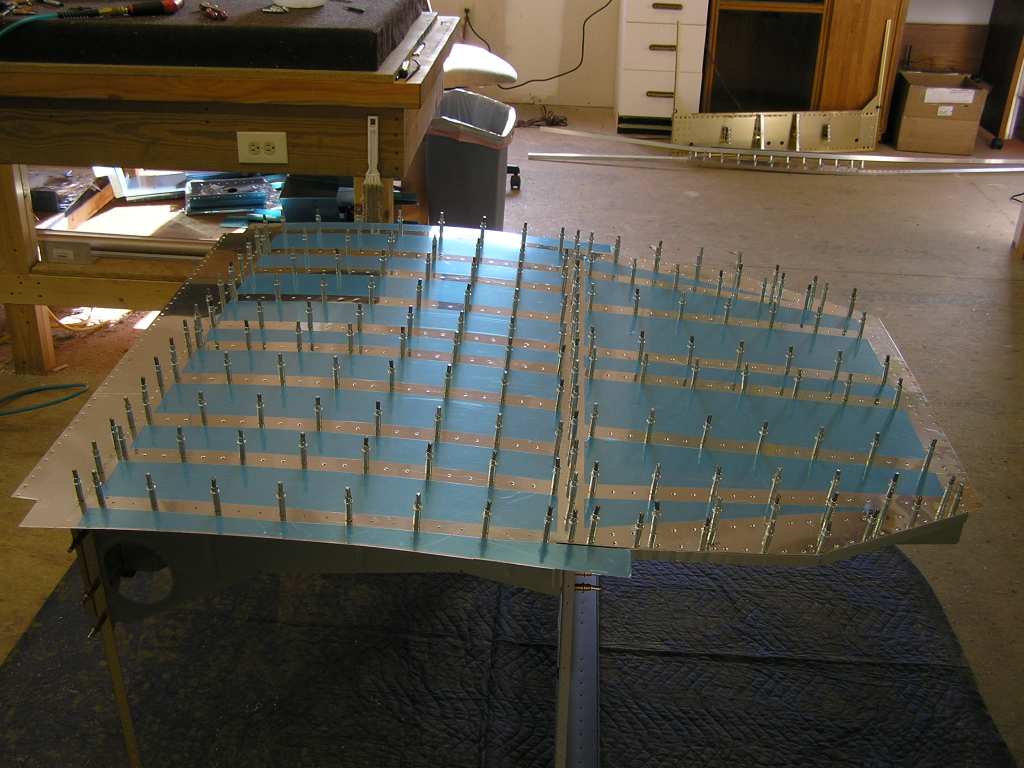
| 6/2/07 | Finished match-drilling the aft fuselage and
took these pics before disassembling for deburring and dimpling. 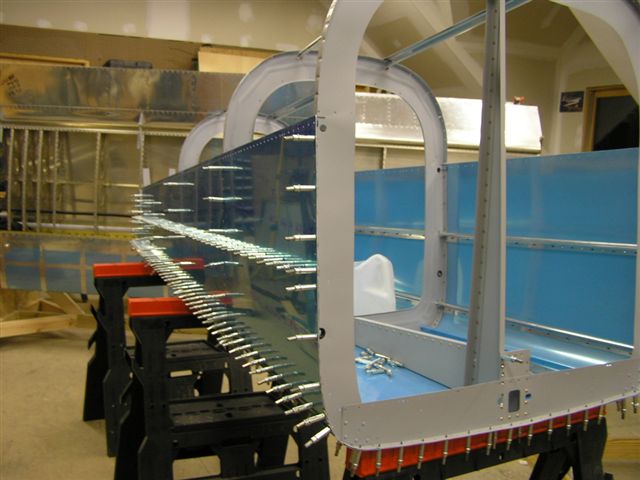 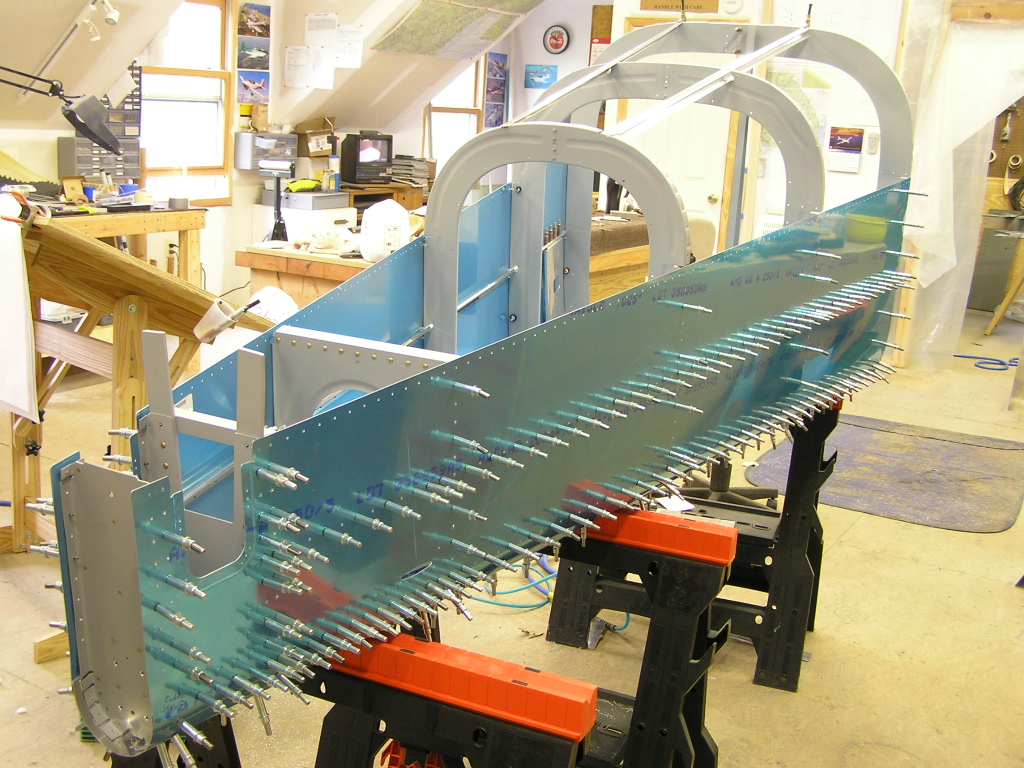
After removing the side skins I was able to drill the ELT/Strobe
brackets to #30. Removed the plastic along the rivet lines. I deburred
the bottom skin and dimpled and deburred the left side skin.
|
7.0 |
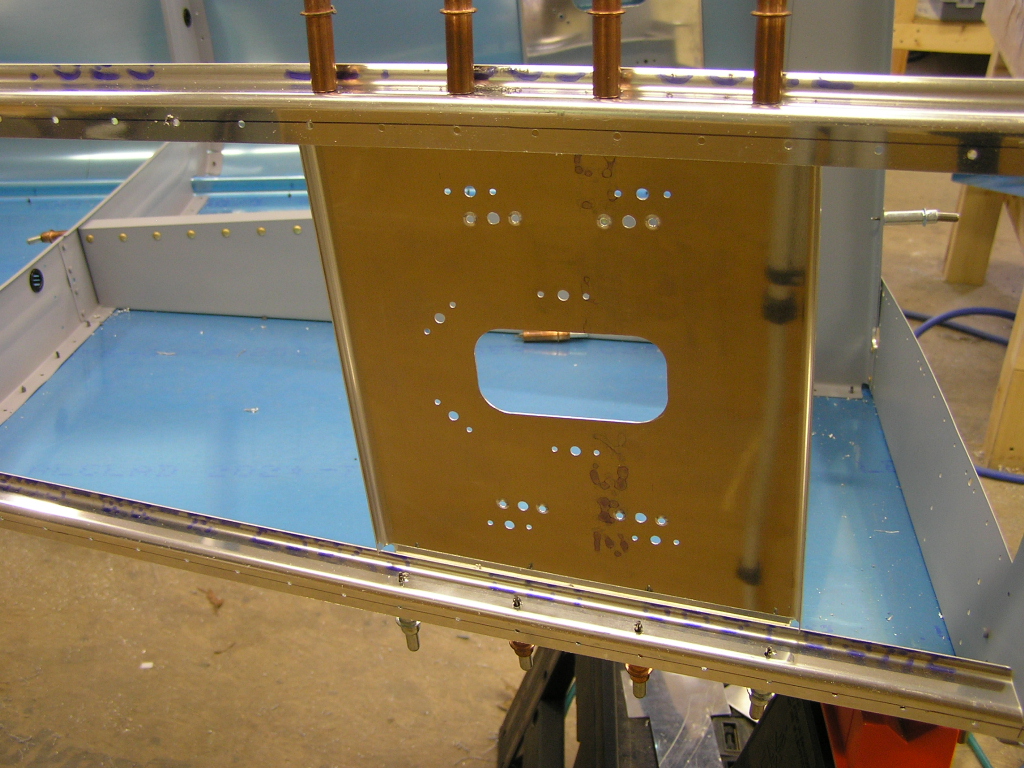
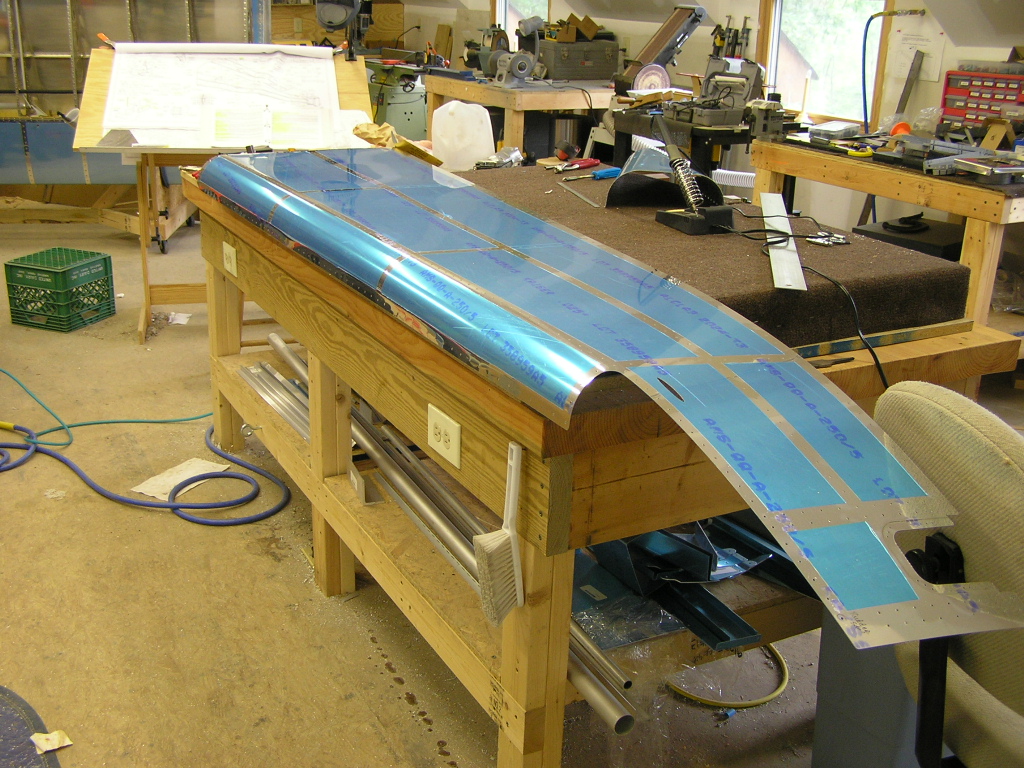
| 6/3/07 | Finished deburring skins and bulkheads.
Dimpled skins and bulkheads. Scuffed and washed skins.
Alodined and primed ELT/Strobe brackets.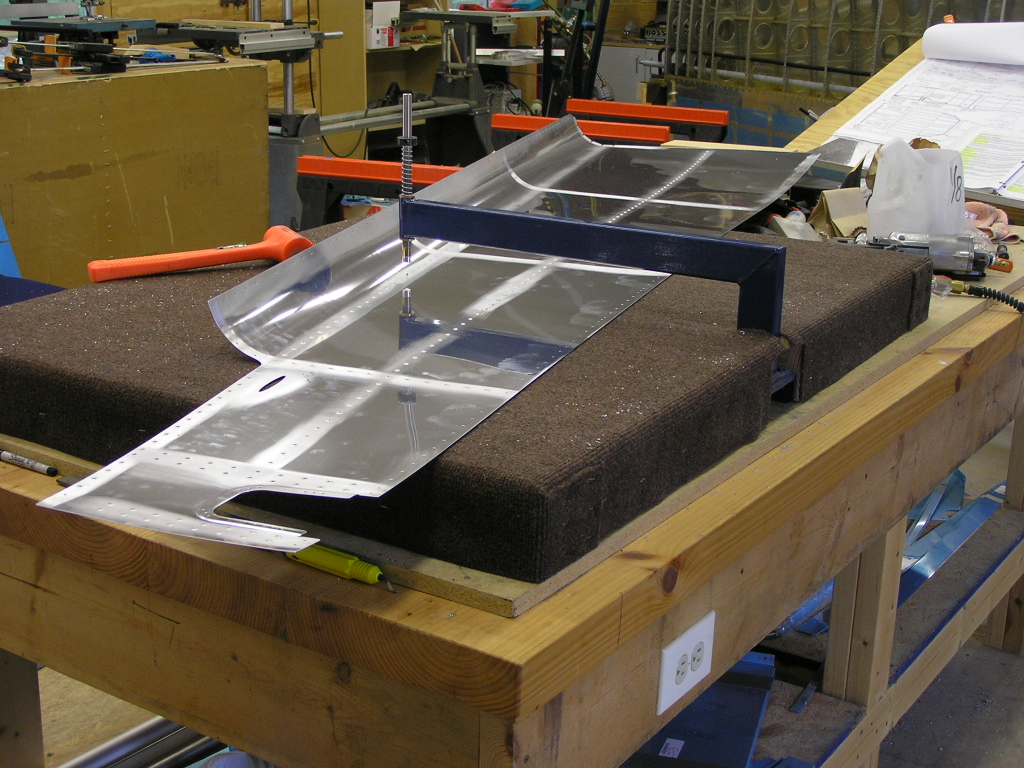 |
3.0 |
| 6/4/07 | Deburred the J-channels. Riveted the
platenuts to the ELT/Strobe brackets. |
1.0 |
| 6/5/07 | Finished deburring, scuffing and washing the
J-channels. SanChem treated the tail skin. |
1.0 |
| 6/7/07 | SanChem treated the inside bottom skin, inside
the side skins of the aft fuselage and the J-channels. |
2.0 |
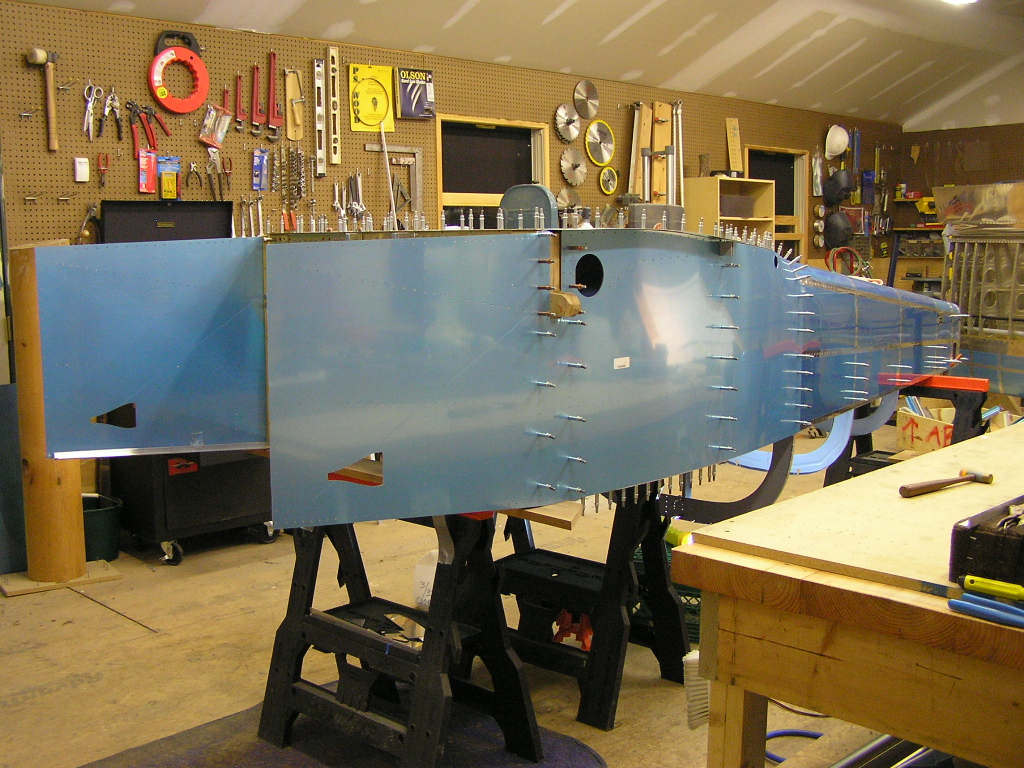
| 6/8/07 | We have been having such great weather and
since things are slow at work I decided to take the day off for
RV building ;) I assembled and riveted the F-711 and F-712
bulkheads to the F-779 tailcone skin and dimpled the J-channels. I had been warned that later when I will be installing the
longerons that they will not fit in the slots punched in the aft
bulkheads. I went ahead and opened these slots with
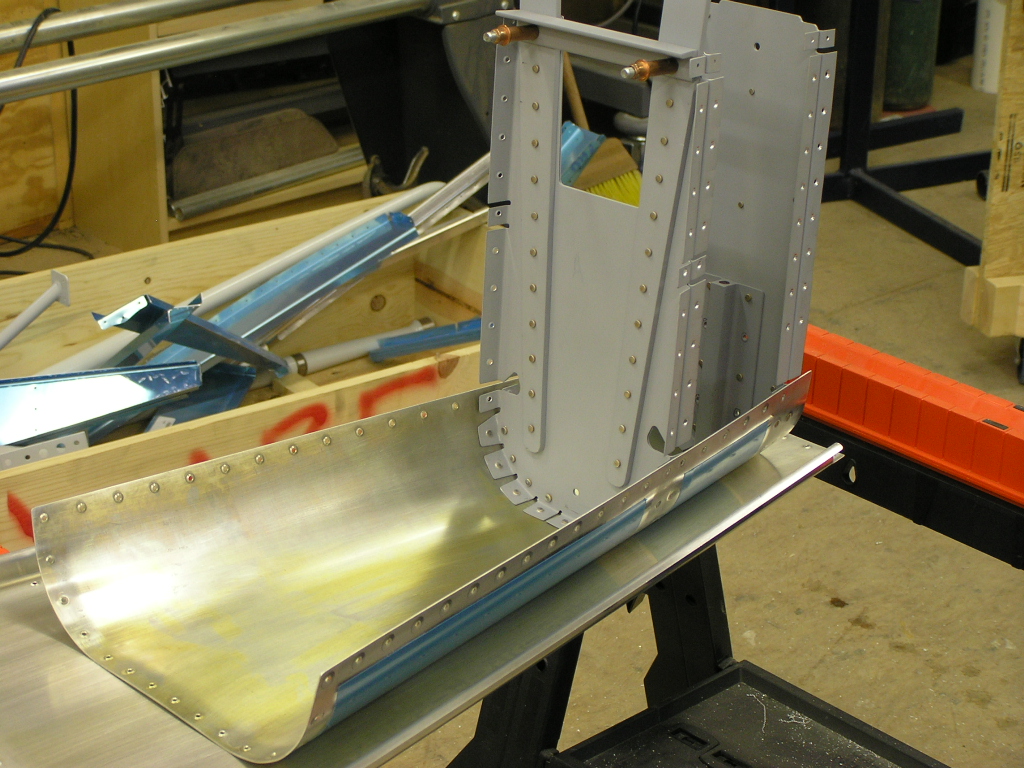
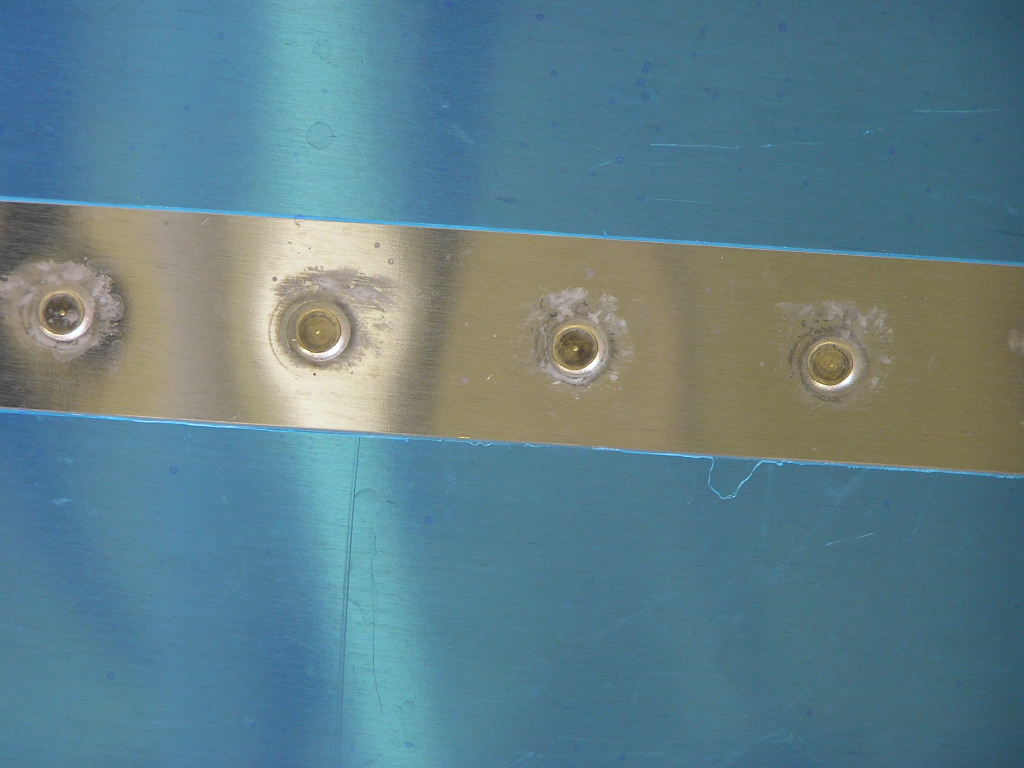
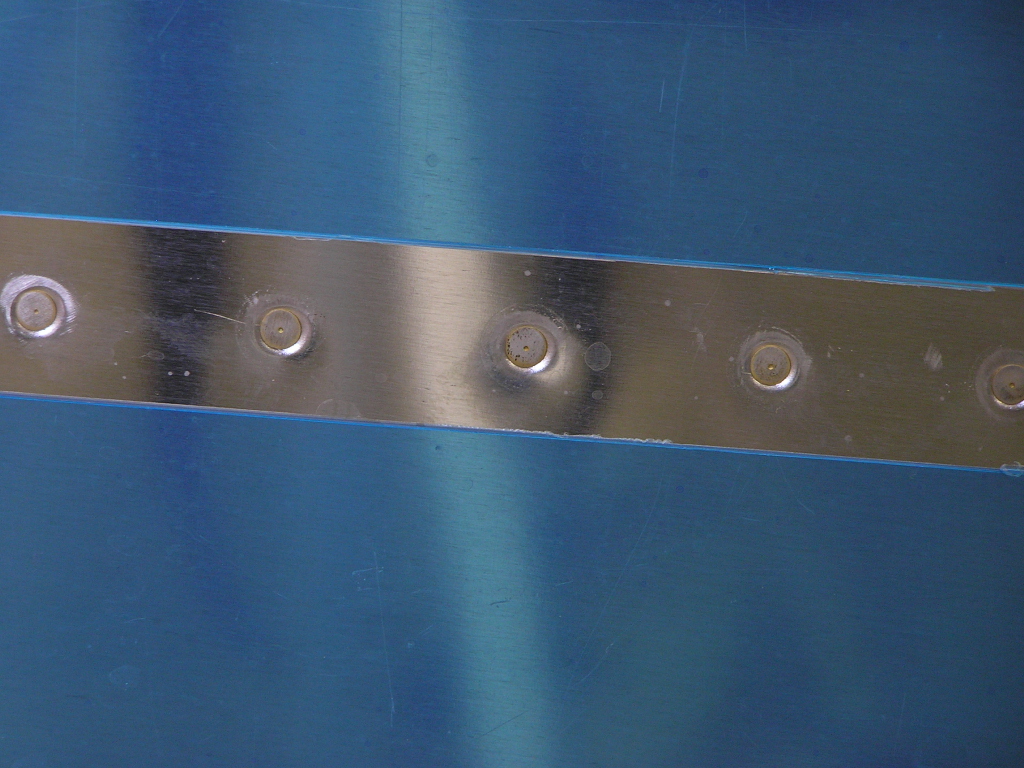
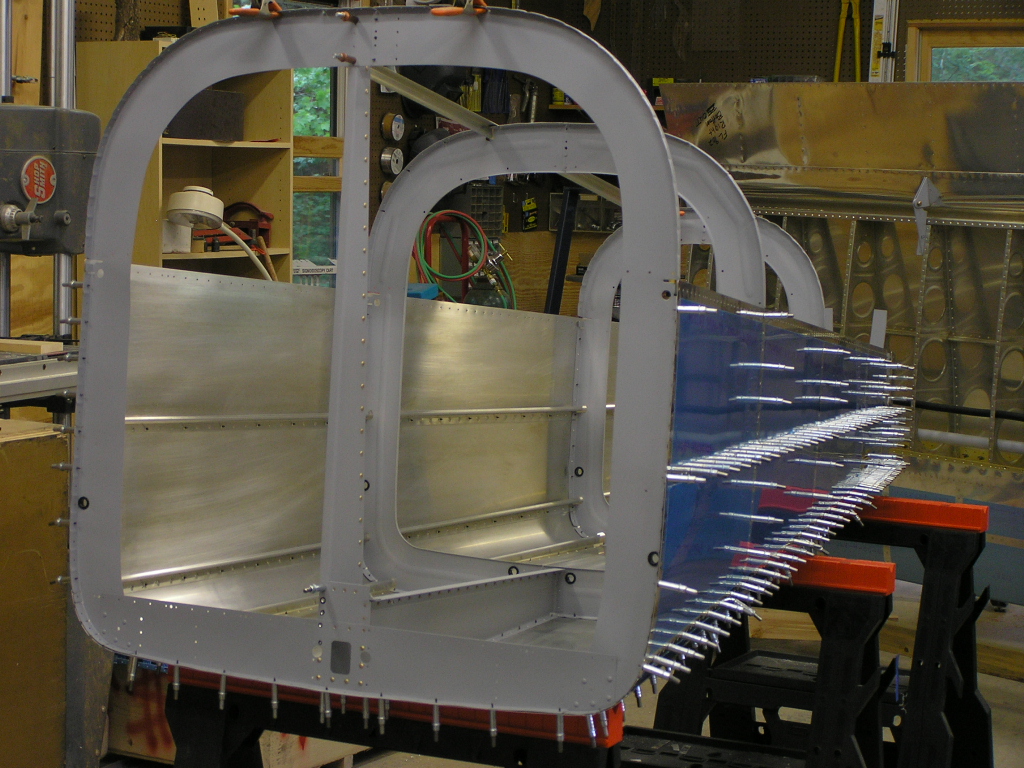
the Dremel tool. I then assembled the aft fuselage and back-riveted the side
skins to the bulkheads and J-channel stiffeners. I took a
couple of shots to show the difference of how the rivets appear
when riveted versus back-riveting. The first shot is a
line of rivets after riveting and the second shot is a line that
was back-riveted. This is a really tedious job, especially with the June heat
warming the shop to a toasty 85 degrees. The tough thing
here is that all the J-channel rivets are oriented such that you
cannot "see" the rivet because it is blocked by the channel.
This is referred to as "blind riveting". All in all it
went well with only two "slips" where I didn't have the
back-riveting holder on the rivet resulting in a slight skin
dent. Actually, it is an "outie". I will need help riveting the bottom skin and will wait until
Jim Olson can come over on Monday
evening. |
7.0 |
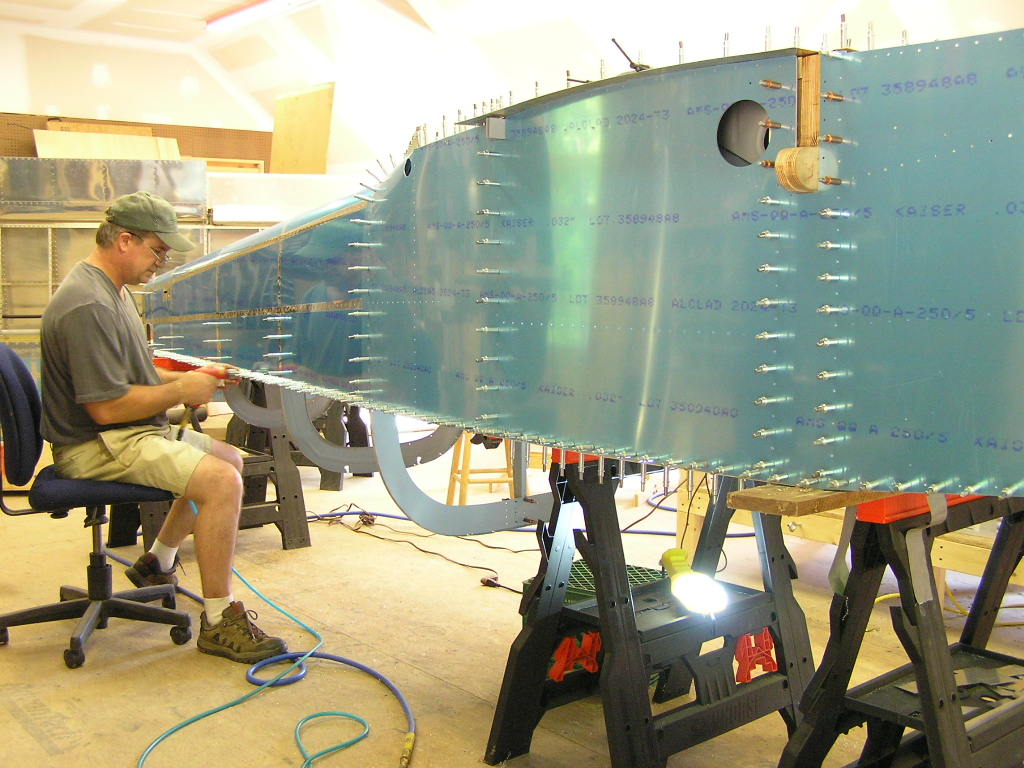
| 6/10/07 | Today we got a visit from my flying buddy,
Ben
Bierbaum as he and his son and a couple of friends were on their
way to Boy Scout Camp. They thought the plane was "cool". After lunch, Jim Olson arrived and we went to town back-riveting the aft fuselage and center section bottom skin. On to the Center Section... |
2.5 |
| Center Section | ||
| 5/11/07 | I bought some 7/16" x 4" bolts for temporarily
attaching the F-904 bulkhead. I chucked the bolts in my
drill press and sanded them down a couple thousands of an inch
so they should slide in nicely. Began by cutting the F-916C spacers. I then cut the section out
of the F-916L & F-916R seat ribs as well as trimming the seat
access ribs. I used a unibit and enlarged the tooling hole
on each seat rib to 5/8" for electrical wiring runs. I
deburred the seat ribs and dimpled for the platenuts. I
then installed the platenuts. |
4.0 |
| 5/12/07 | I sorted out the seat ribs and clecoed them to
the aft section of the F-904 Spar bulkhead. I then clecoed
the seat ribs to the F-705 bulkhead. I then clecoed the
baggage section ribs to the F-705 bulkhead. I inserted the
F-916C spacers and drilled the 1 1/2" holes in the baggage ribs
for the steps using the fly-cutter.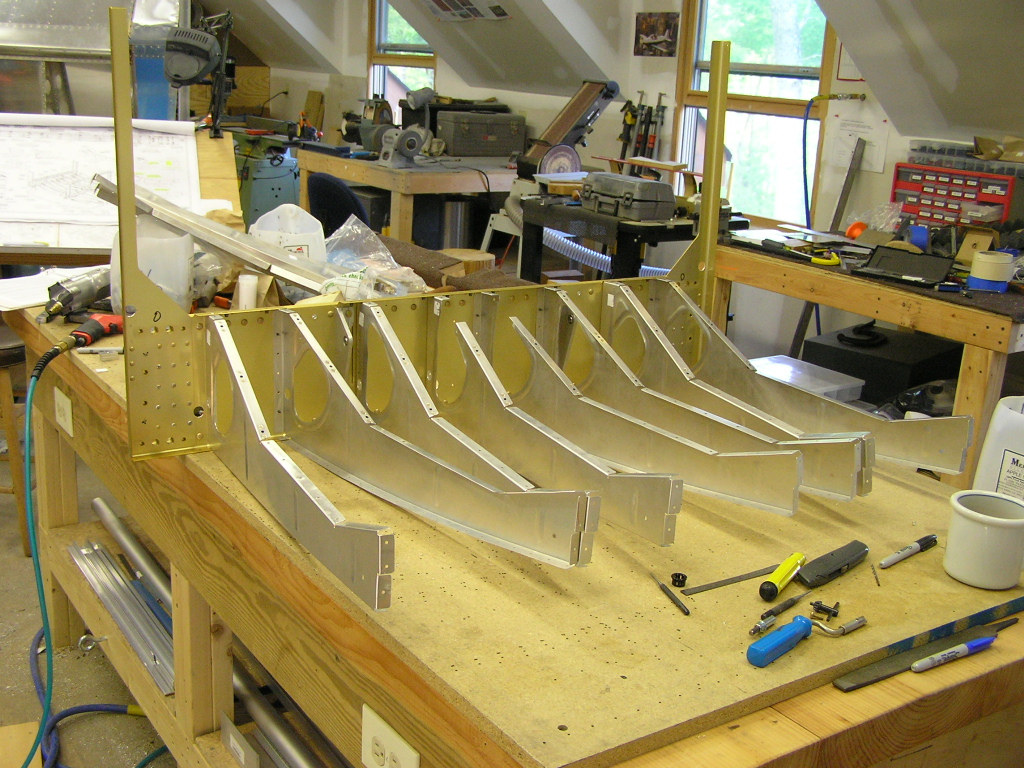
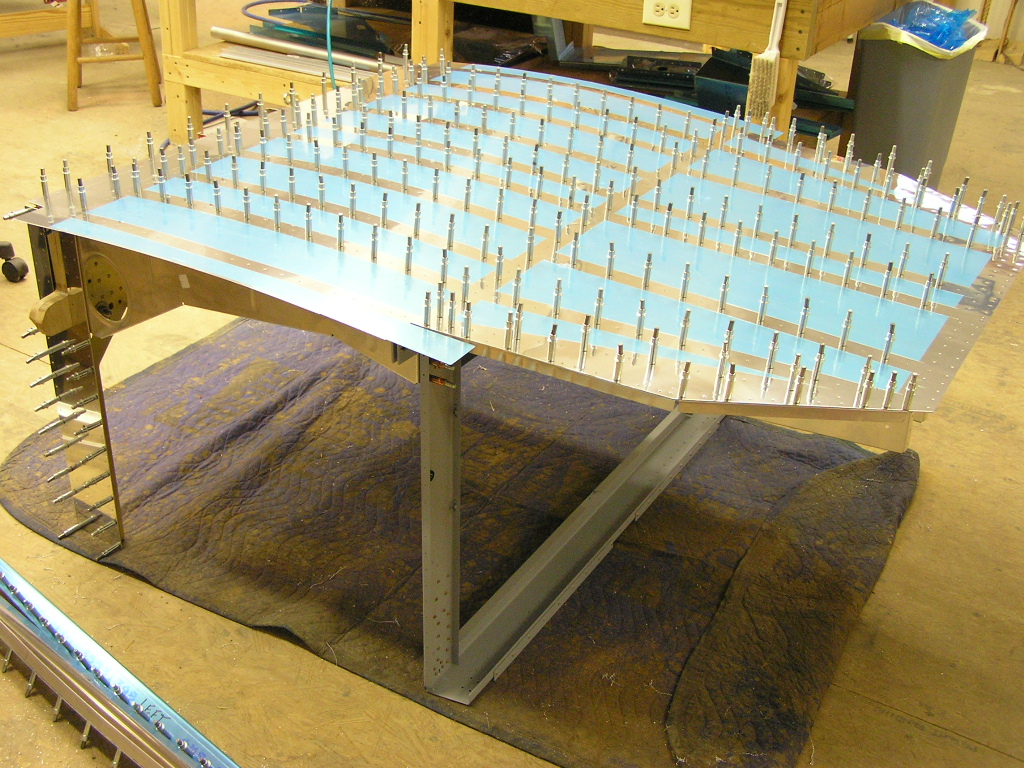
Next, I flipped the assembly over and clecoed the F-776 bottom
skin to the center section. The trick to getting the holes
to match up is to start clecoing along the flange of the F-705
and then move fore and aft clecoing as you go. I then
flipped the assembly over again and drilled the F-623 L&R.
I used my soldering iron to remove the plastic along the rivet
lines. I also had to fabricate the F-623A-FWD and F-623A-AFT
attachment straps in order to install the F-623 side pieces.
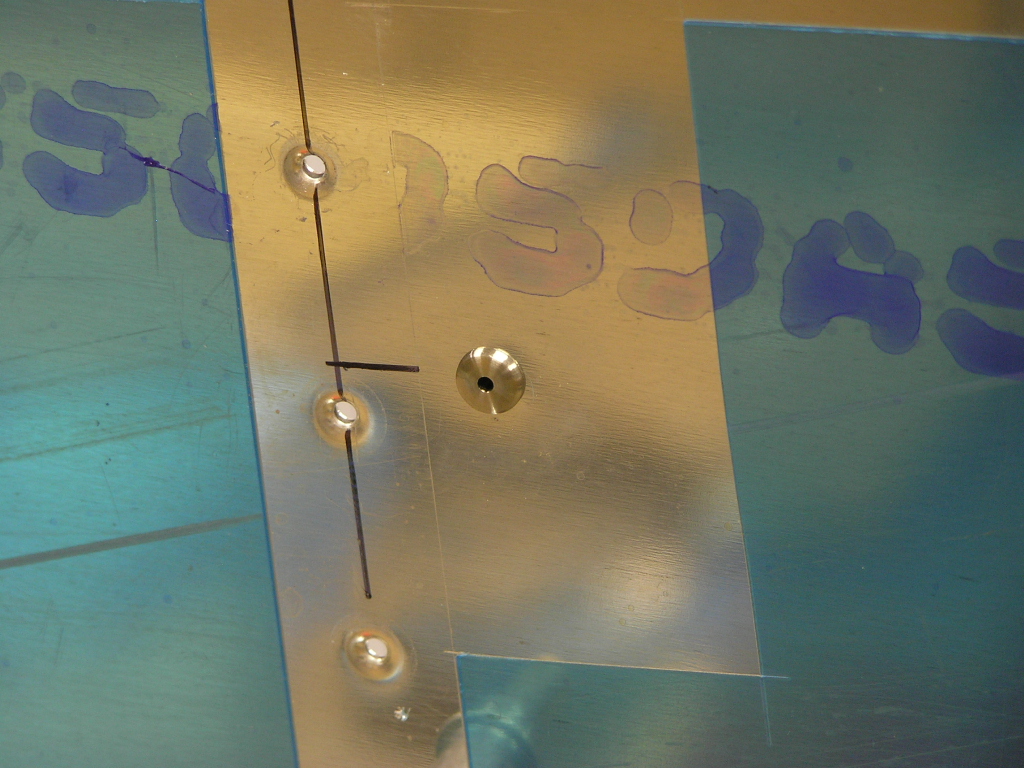
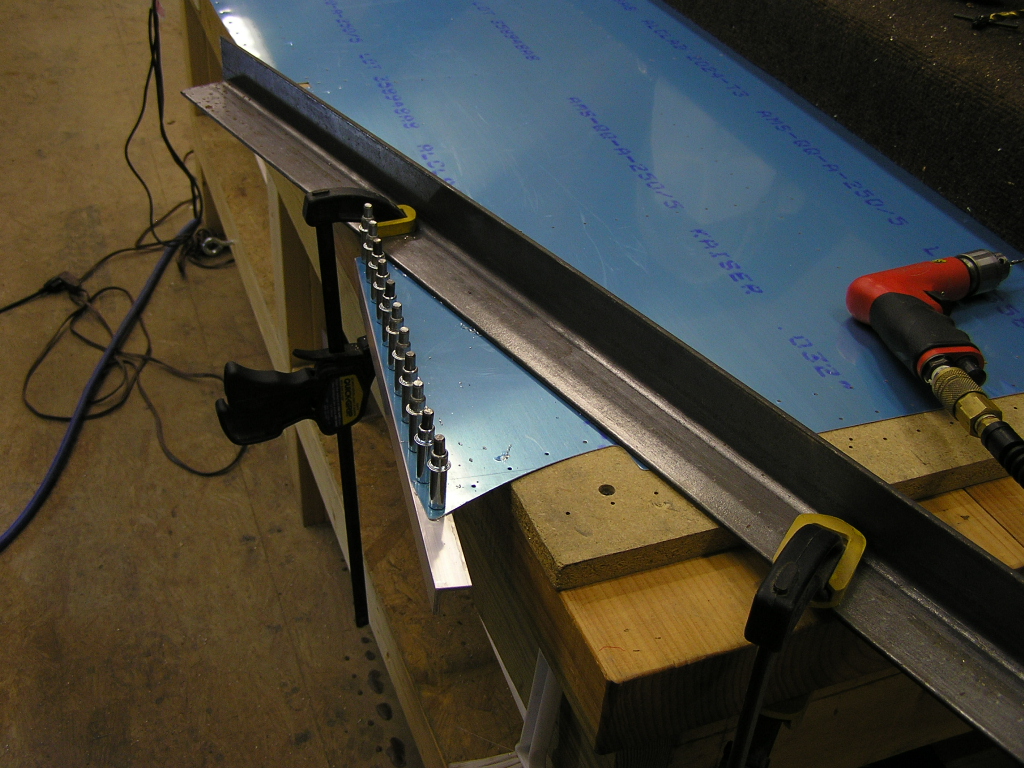
When I match-drilled the F-623, I was not happy with the edge
distance I got on the F-623A-FWD straps so I fabricated new
straps. The original straps are on the bottom in the photo
and the new-and-improved straps are on top. These
are much better. I then bolted on the forward half of the F-904 Spar bulkhead
and clecoed to the bottom skin. Finally, I match-drilled
the bottom skin to the entire Center Section as well as to the
F-904 flanges. I also drilled the F-904H Center Section
Side Plates to the F-904 and clecoed. |
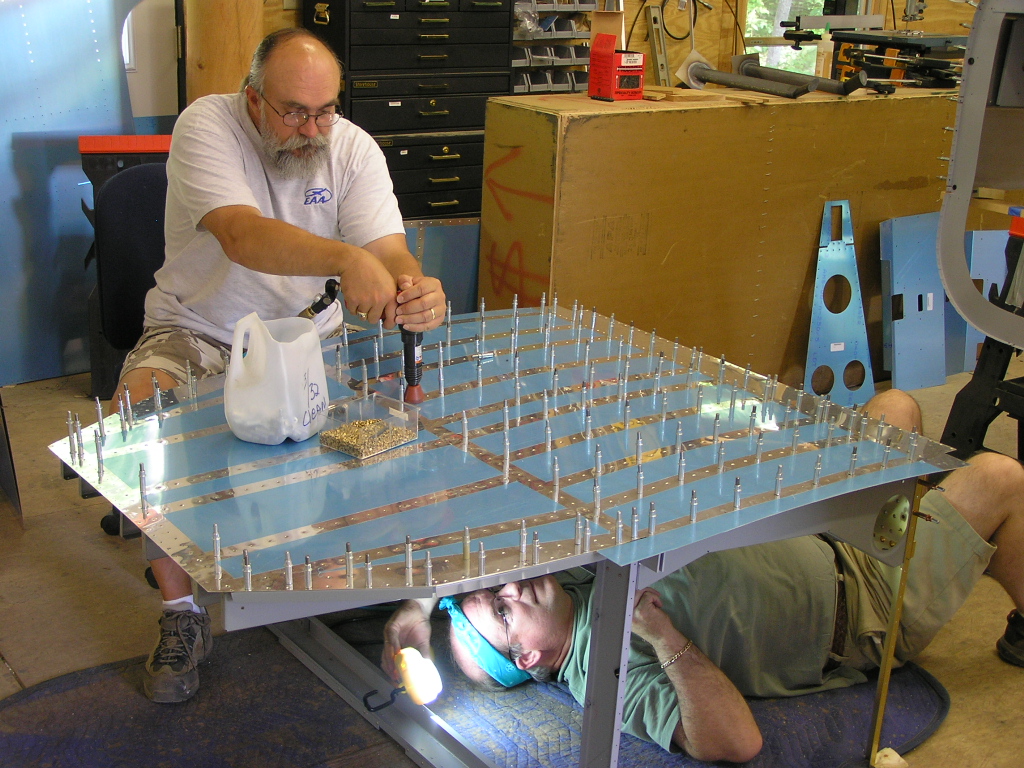
8.0 |
| 5/13/07 | I was reminded by
Mike Behnke of an article on Van's
website that discusses the span wise rows of rivets across
the forward F-904 bulkhead. This area of the skin will be
overlapped by the forward F-972 bottom skin and the rivet holes
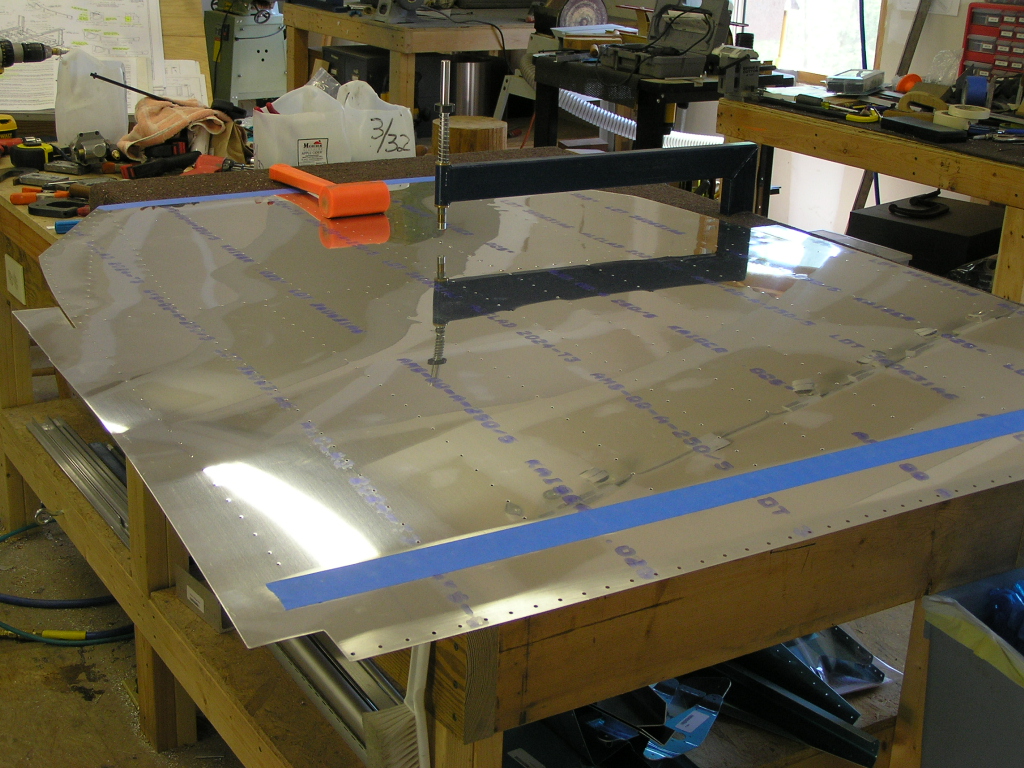
will need to be countersunk as opposed to dimpling. I removed F-976 bottom skin and deburred the holes and edges. I
then started dimpling the bottom skin. Lastly, I started match-drilling the ribs to the Center
Section bulkheads. |
4.0 |
| 5/14/07 | Finished dimpling the F-976 bottom skin.
There are about 12 holes you cannot reach with the C-Frame
dimpler so I used the pop-rivet dimpler and it went fine. |
1.0 |
| 5/15/07 | Match-drilled the baggage section ribs to the
F-705 bulkhead. Deburred the baggage ribs and the F-904H
Center Section Side Plates. |
1.0 |
| 5/18/07 | Dimpled the baggage ribs and the F-623A-FWD and
F-623A-AFT attachment straps. Disassembled and deburred the
center section side plates and the seat ribs. |
2.0 |
| 5/19/07 | Dimpled the seat ribs. Began prepping the center section ribs for
priming by scuffing and washing with soapy water. Also
scuffed and washed the bottom wing skins. Unfortunately,
the priming session was cut short when my water stopped
flowing...Apparently my submersible pump 245 feet down in my
well went Tango Uniform. When my Pump and Well repairman
finally got here we pulled the pump and replaced. By
7:30pm we had water again but I was too pooped to work anymore
on the plane. |
3.0 |
| 5/20/07 | Continued priming of center section ribs and
bottom skin. My refined process now is to (1) scuff with
soapy water, rinse and let air dry. (2) Brush the part
with AlumiPrep, rinse with water and air dry. (3) Brush
the part with SanChem Part "C", rinse with water and let air
dry. And then (4) brush the part with SanChem Part "A" & "B",
rinse with water and let air dry. It seems like a tedious
process, (and it is) but you get a nice even chemical conversion
to the alclad and it adds no weight.
For the smaller parts such as the small spacers and attach straps I scuff with soapy water, immerse in AlumiPrep for a couple of minutes, rinse with water, then immerse in Alodine for two (2) minutes, rinse with water and let air dry. Finally, I shoot the small parts with a thin coat or self-etch primer. This is such a boring detail that takes so much time, I am
not taking any photos. |
2.0 |
| 5/21/07 | I decided to prime the ribs with the Nason
epoxy primer instead of the Sanchem since I wanted to get this
done and I could spray all the parts in about an hour. I
must admit that although quicker, it was much messier to clean
the spray gun and I gained a few ounces of weight. The
Nason is a good product and will give me excellent corrosion
protection.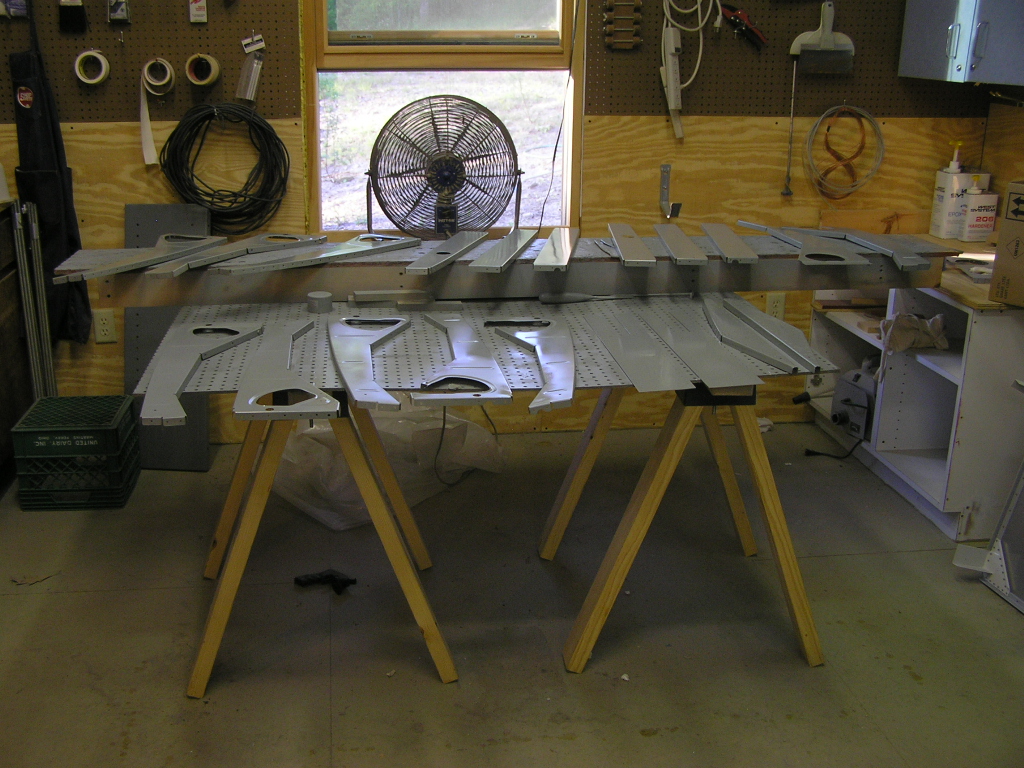 |
2.0 |
| Assembling the Center Section | ||
| 6/8/07 | Began the final assembly by clecoing the seat
ribs to the aft F-904 Spar bulkhead. I installed the upper
and lower AN3 bolts through the ribs and bulkhead and torqued to
25 in/lbs. |
1.0 |
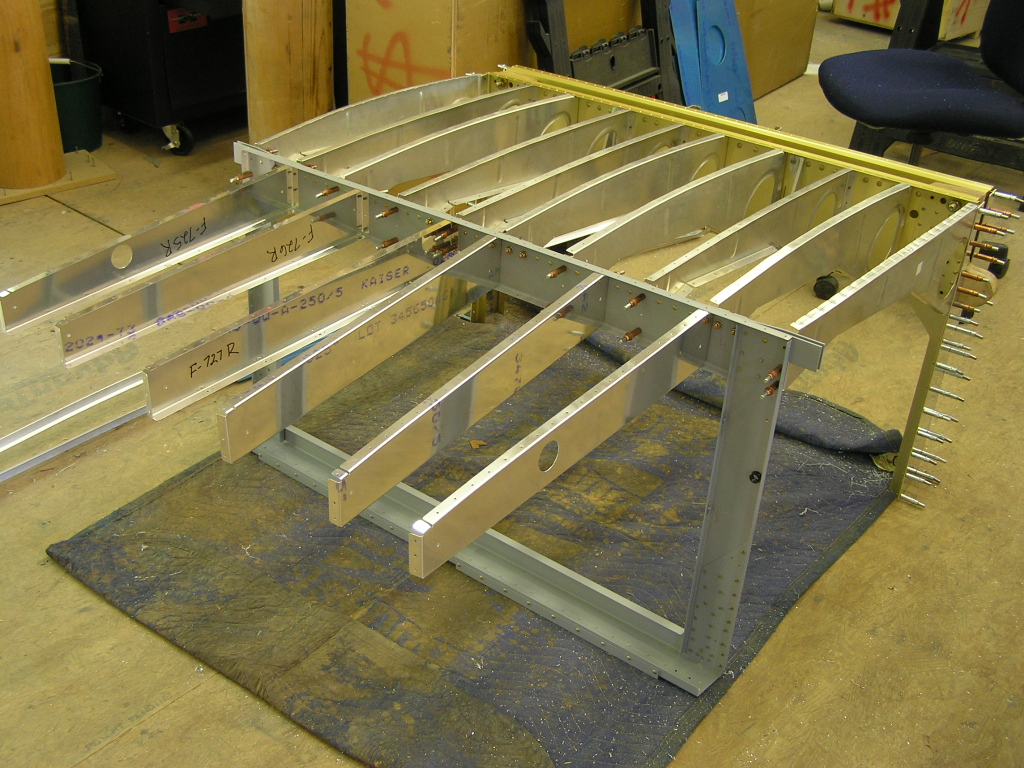
| 6/9/07 | Riveted the seat ribs to the aft F-904
bulkhead. Riveted the seat ribs and the baggage floor ribs
to the F-705 bulkhead. Like others have mentioned, this is
difficult to rivet and do a good job because the access is so
poor.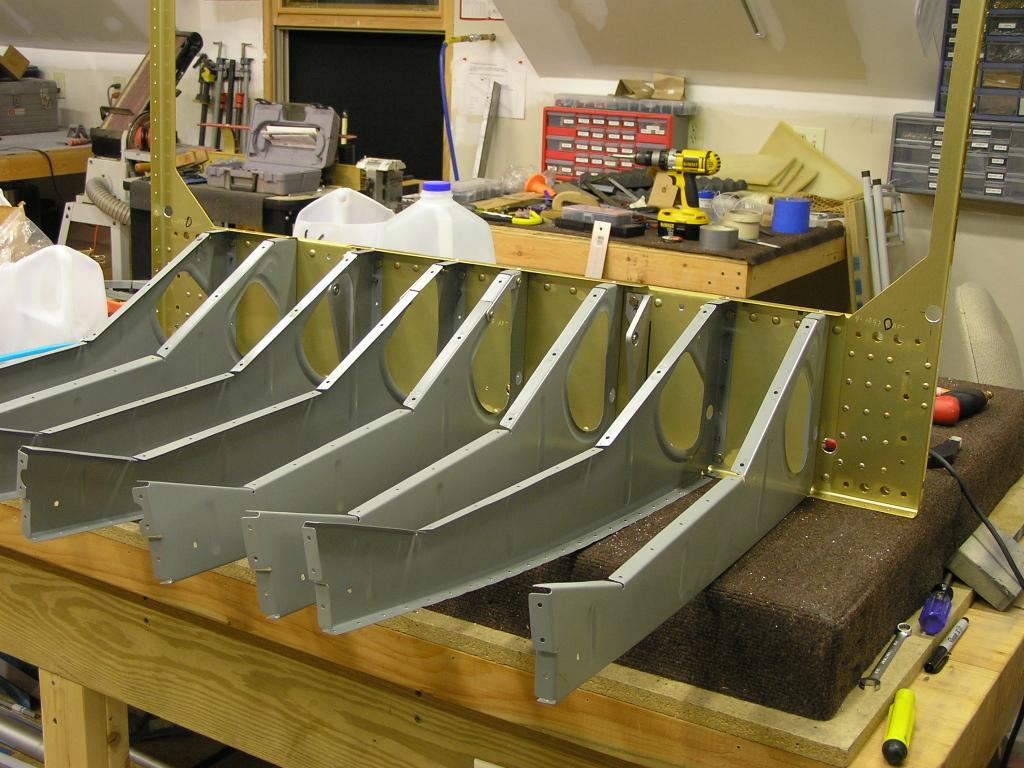 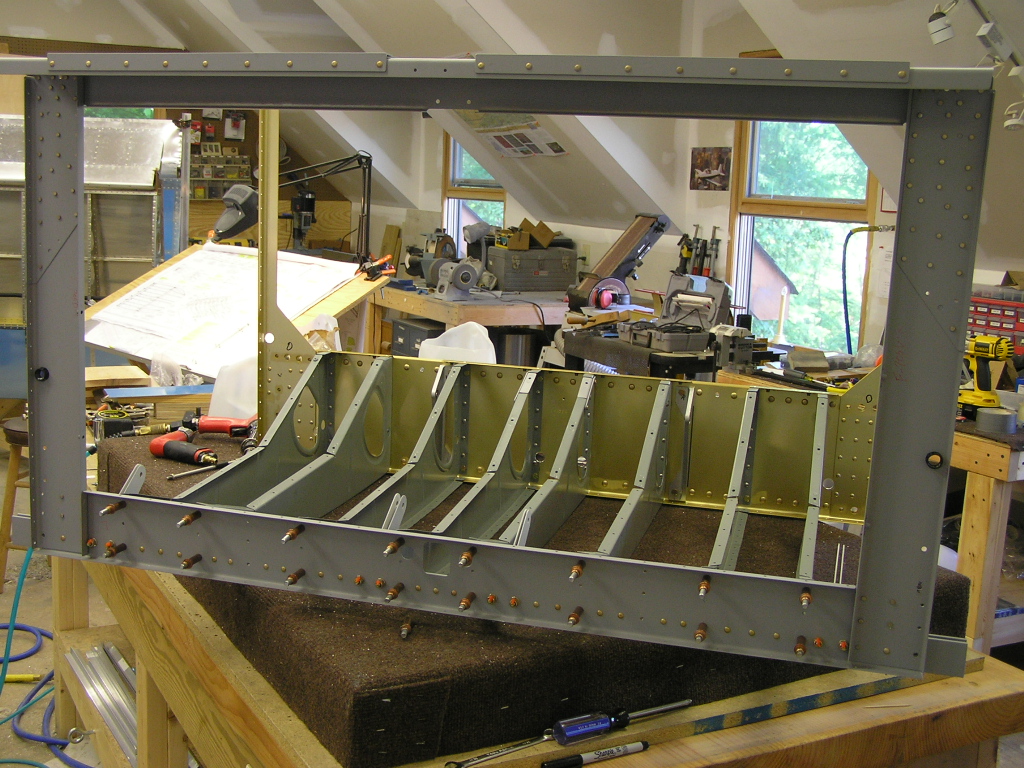
I flipped the center section over and clecoed on the bottom
skin. I also match-drilled the F-915 outside seat ribs
using the centerline I drew on the rib flanges previously. I got a call from Jim Olson this
evening and he is coming over tomorrow so we should be able to
finish all the skin riveting. I went ahead and pop-riveted
the ELT/Strobe brackets as well as drilling and installing the
really cool static ports I got from fellow RV builder
Mark Phillips at the Possum Works
in Tennessee. |
6.0 |
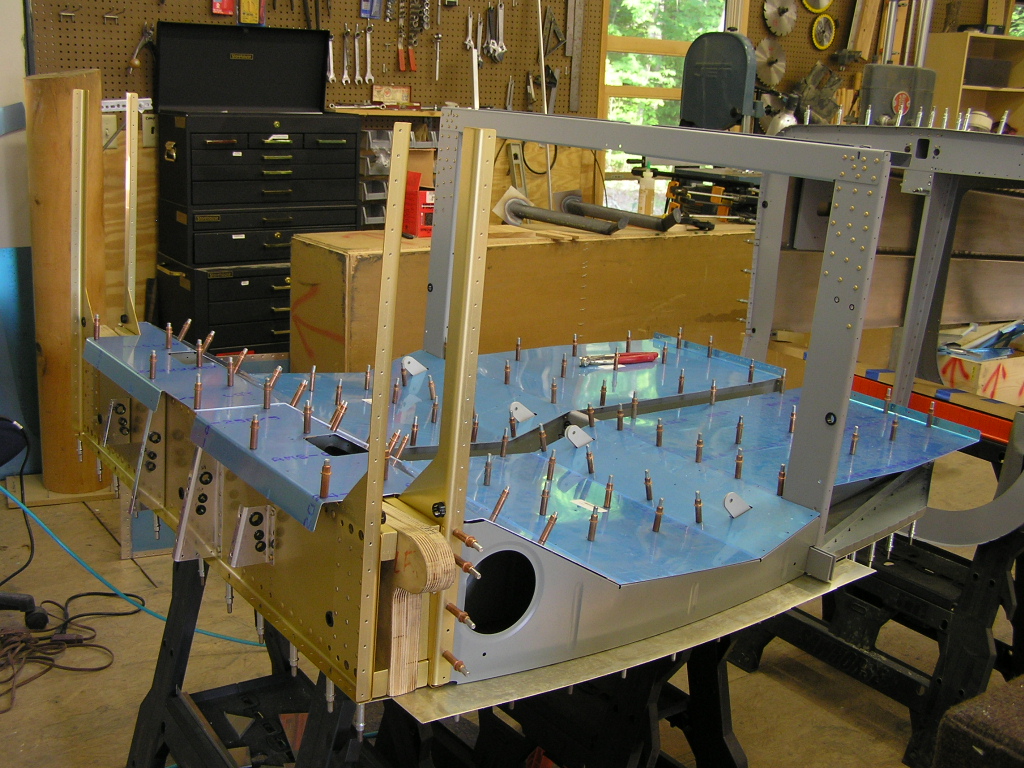
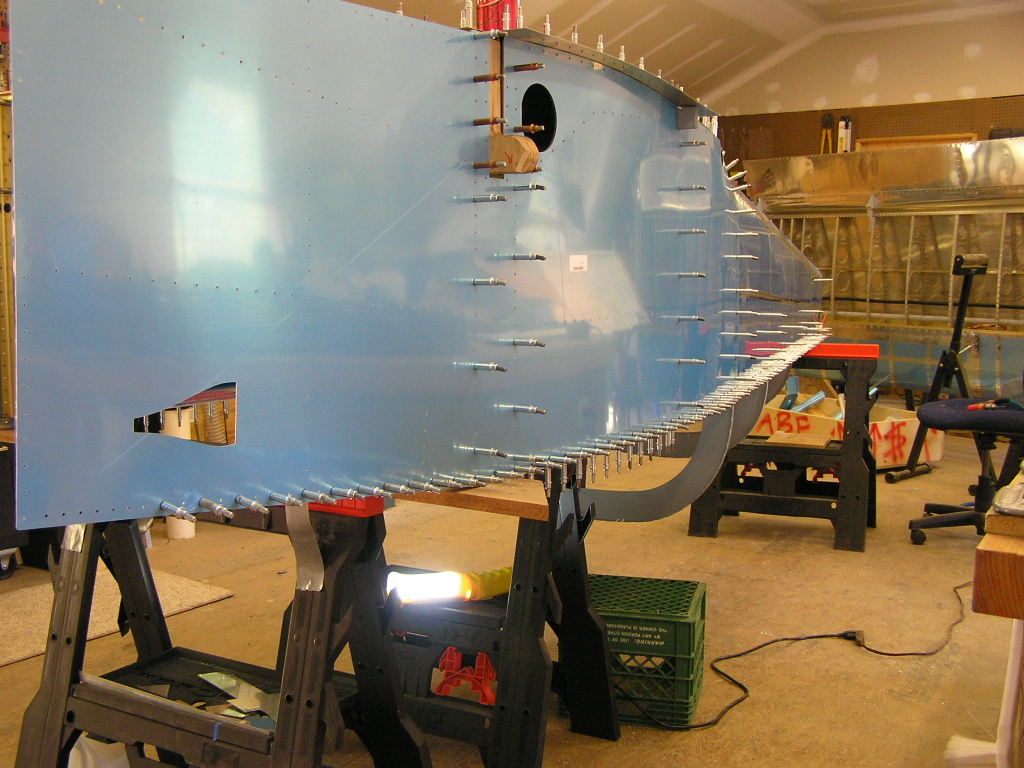
| 6/10/07 | Today Jim Olson came over to help me rivet the
aft fuselage as well as the center section bottom skin.
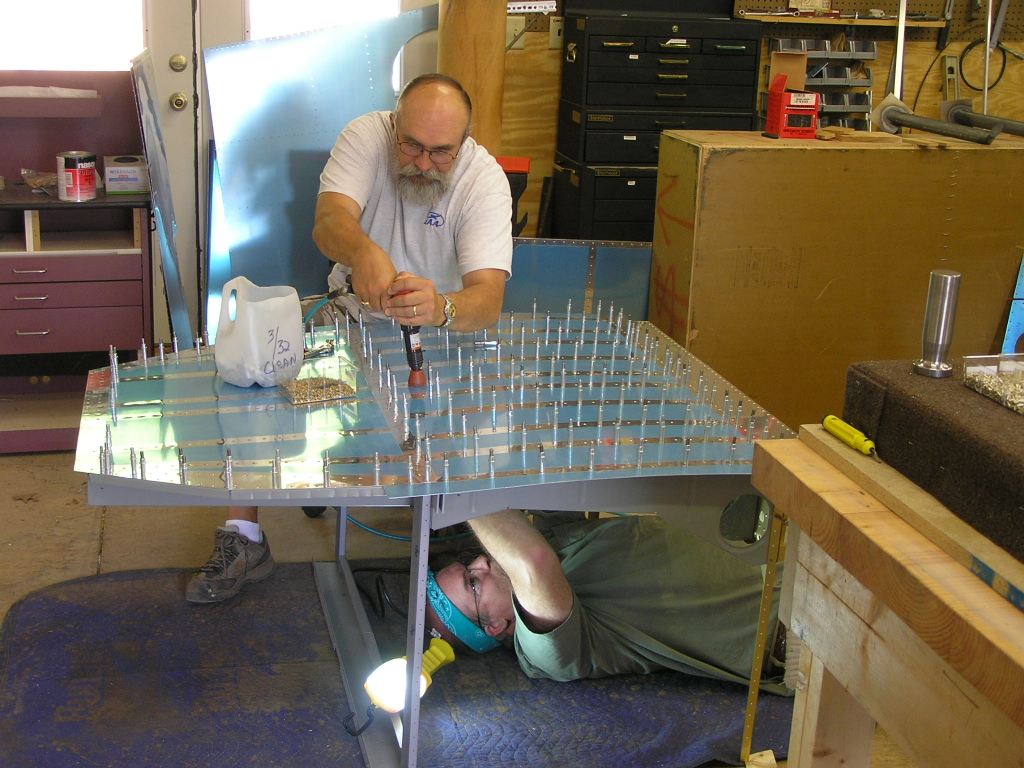 
All went well and we finished by flipping the center section and
clecoing the seat pans and baggage floors. One question I have for other builders is how they trimmed
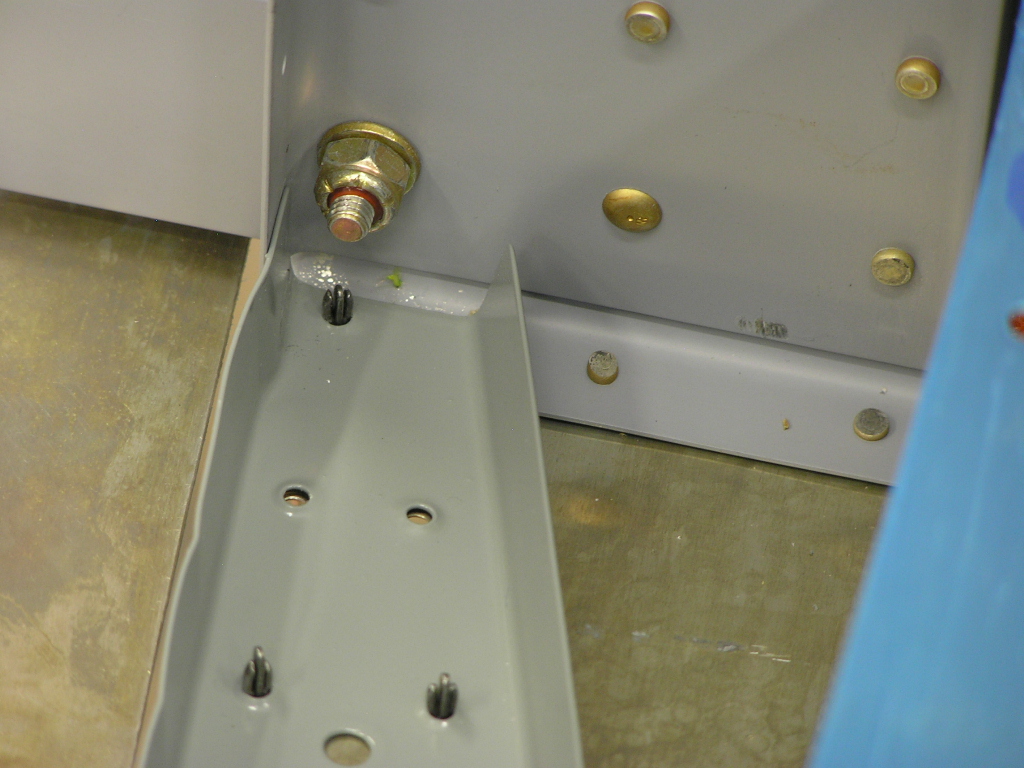
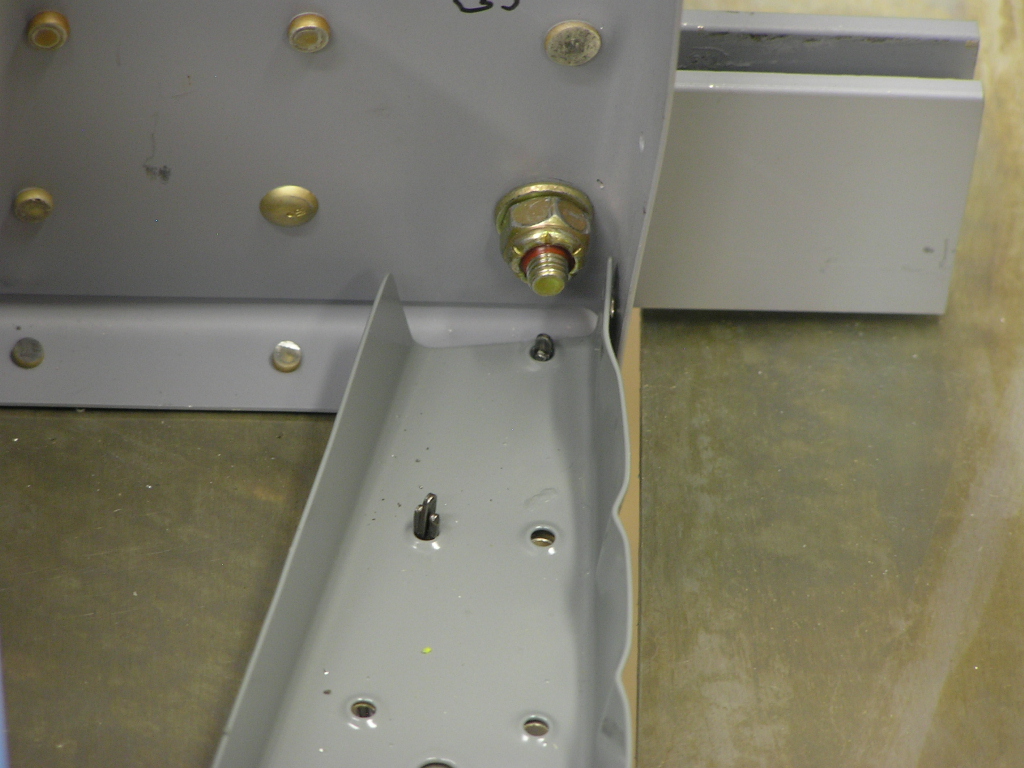
the F-623 L&R corner ribs. I also wonder about the 1/4" bolts that connect the fore and
aft spar bulkhead. Here you can see that even with the
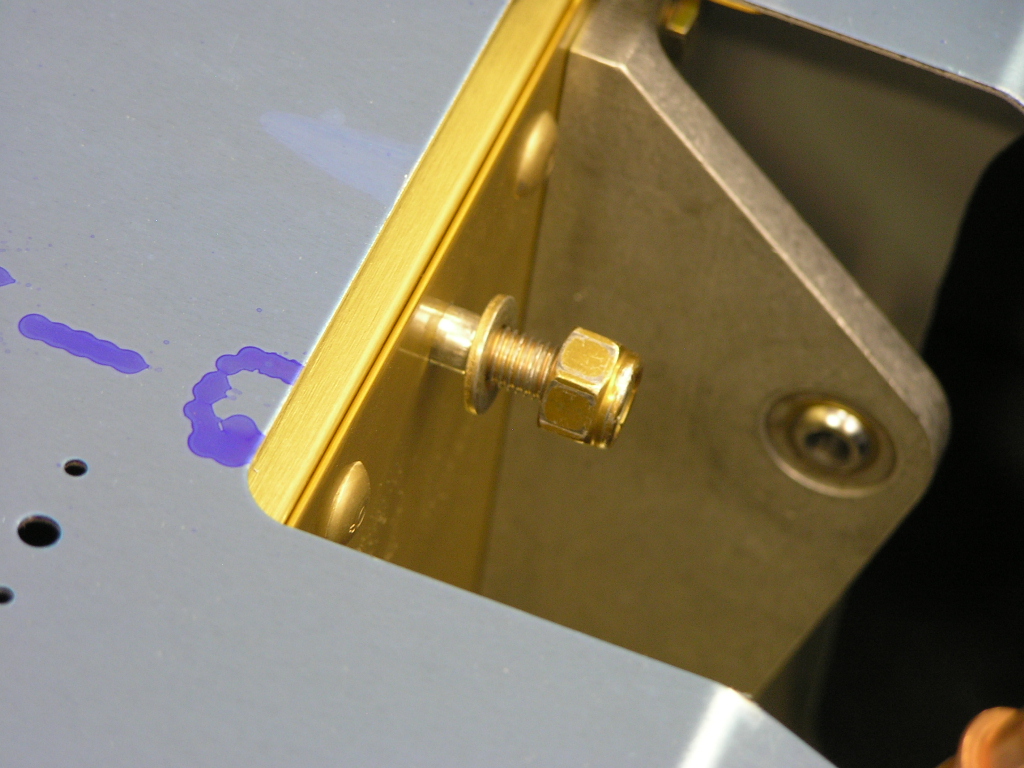
correct length spacer, the bolt appears too long. |
2.5 |
| 6/11/07 | I match-drilled the seat pans and baggage
floors. I also drilled the F-915 outer seat ribs to the
seat pans being sure to allow 3/32" gap for clearance with the
side skins. |
1.0 |
| Joining the Rear and Center Fuselage Assemblies | ||
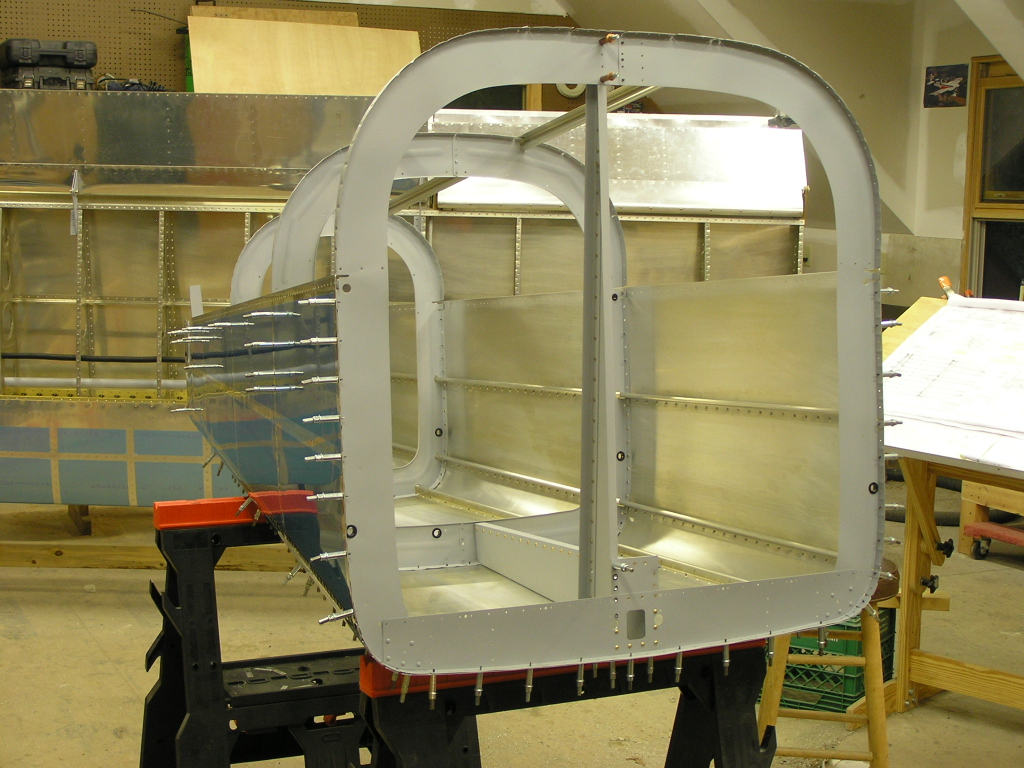
| 6/12/07 | This evening Lynne and I flipped the center
section and set it carefully on two sawhorses. After
aligning the center section with the aft fuselage and lifting
the tailcone a few inches we were able to get it together enough
to get one cleco set. It was a really tight fit but by
working it across one hole at a time we were able to get it
"zipped" together. |
.5 |
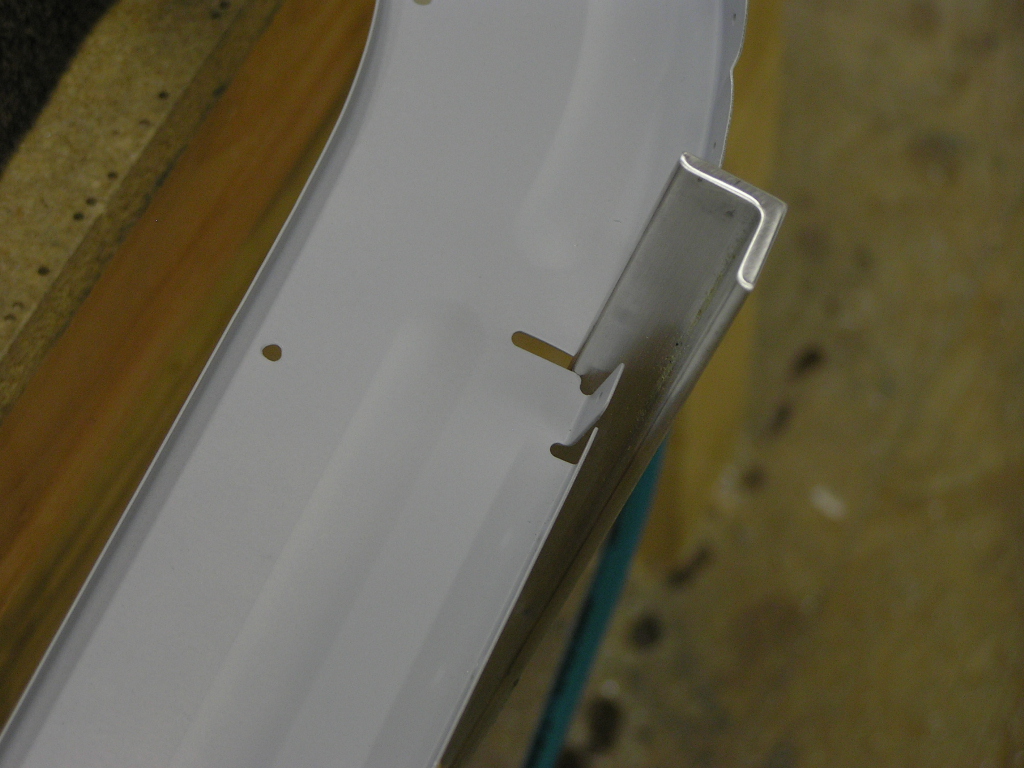
| 6/14/07 | Trimmed the baggage side ribs to the correct
size. Installed the longerons. I had to slightly
enlarge the groove I had cut in the rear for fitting over the
F-712 bulkhead.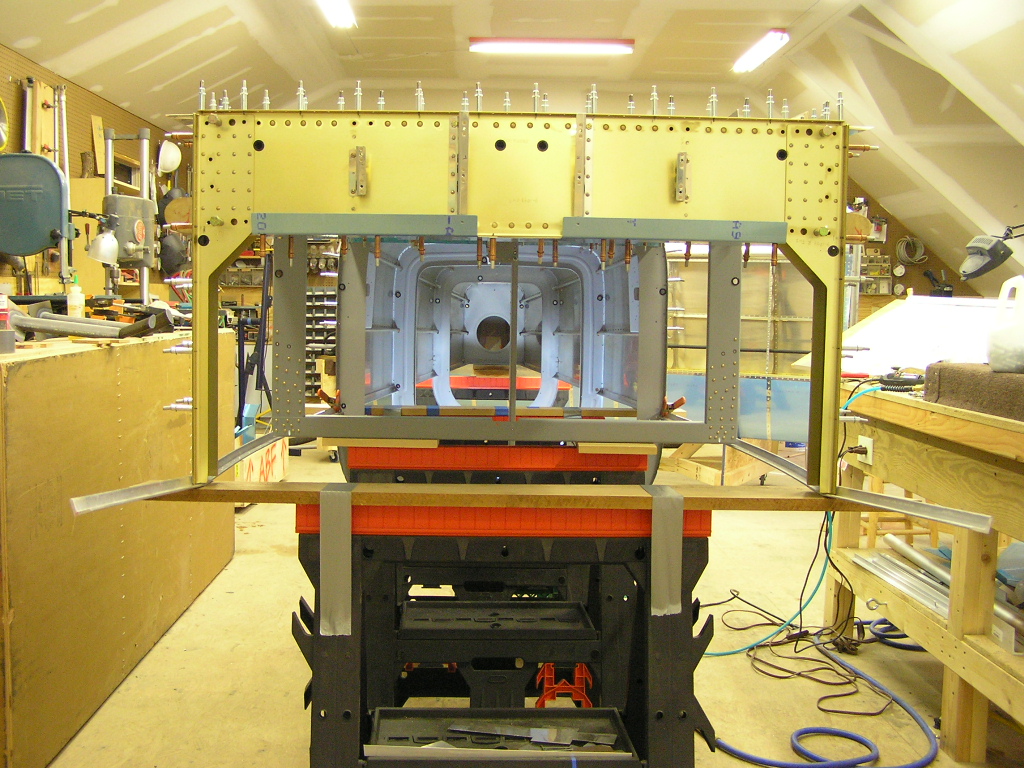 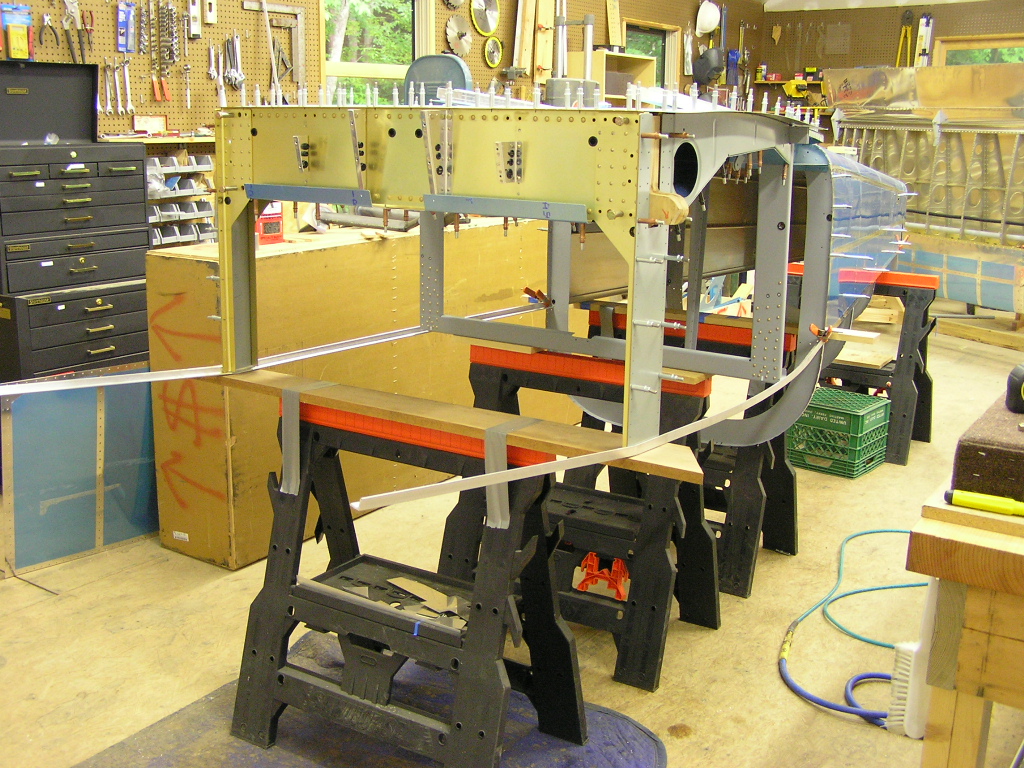 
I plan to install the side skins soon in order to see how well
my bends turned out. |
1.0 |
| 6/15/07 | I fitted the side skins just to see how well
the longerons would line up and was pleased to see they appear
in perfect alignment. I'm really glad I was so anal with
measuring when I was bending them now. After jogging the
aft fuselage I was able to get the side skins to align enough to
get clecos installed. I then removed the side skins and
drilled the 1 1/2" holes for the steps. 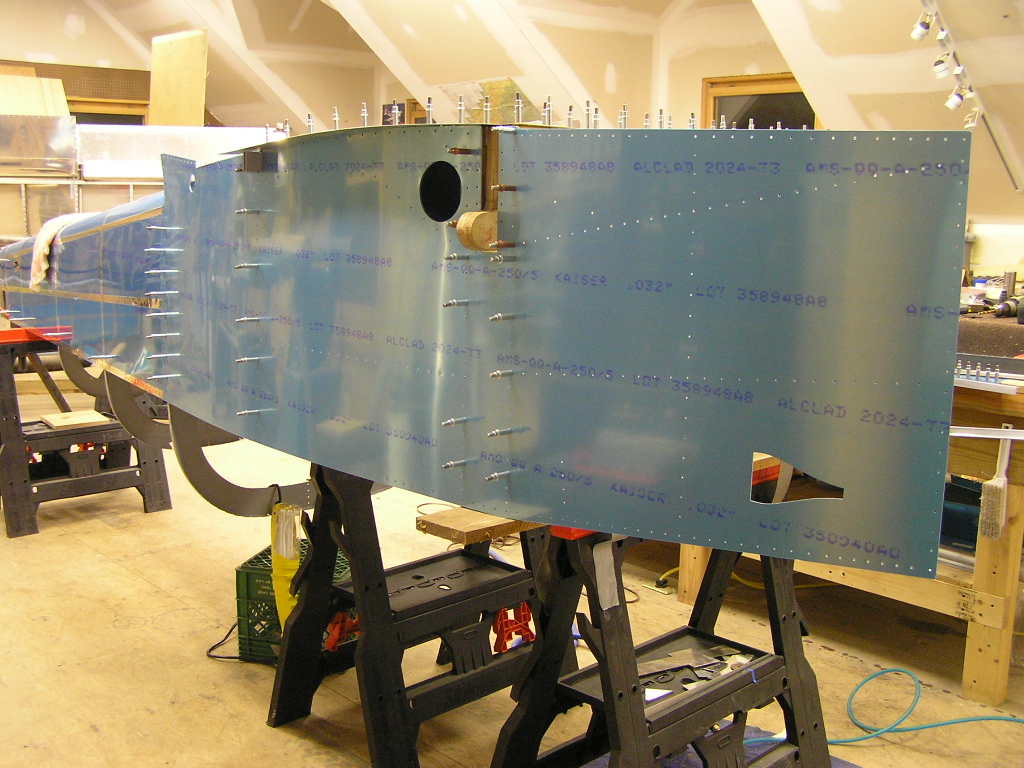 I re-attached the side skins and marked the flanges of the
baggage side ribs. After removing the ribs I rough cut the
flanges with the bandsaw and cleaned them up with the bench
grinder. Next, I fluted the arm rests and clecoed them to
the side skins. |
2.0 |
| 6/16/07 | I spent most of the day helping our
Electrician who we had come over to wire our basement.
When we built the house 3 1/2 years ago we had left it
unfinished so we are starting with the electrical. After
he left, I snuck out to the shop...
I started by match-drilling the armrests, then removed and
deburred. Removed the left side skin and clamped the skin
to the table. I cut a 12" piece of .125 angle and drilled
and clecoed to the skin. I clamped vise grips to the angle
and made the conical bend in the skin. After the bend was satisfactory, I clecoed the skin to the
fuselage. I clecoed the F-623 baggage side ribs to the
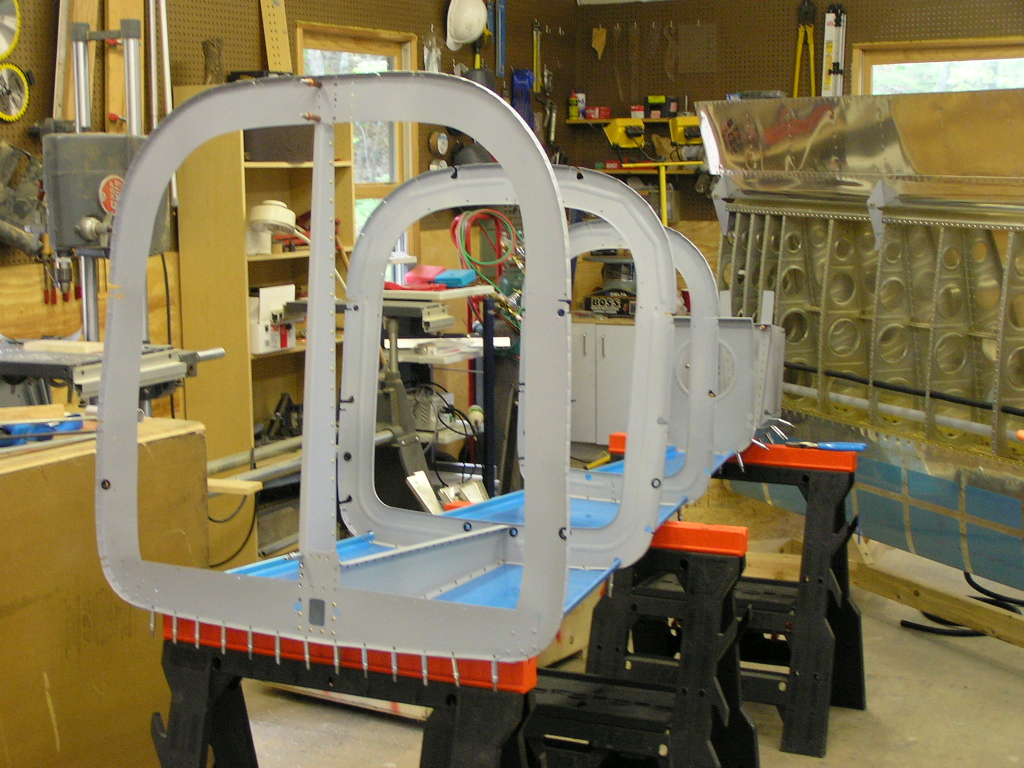
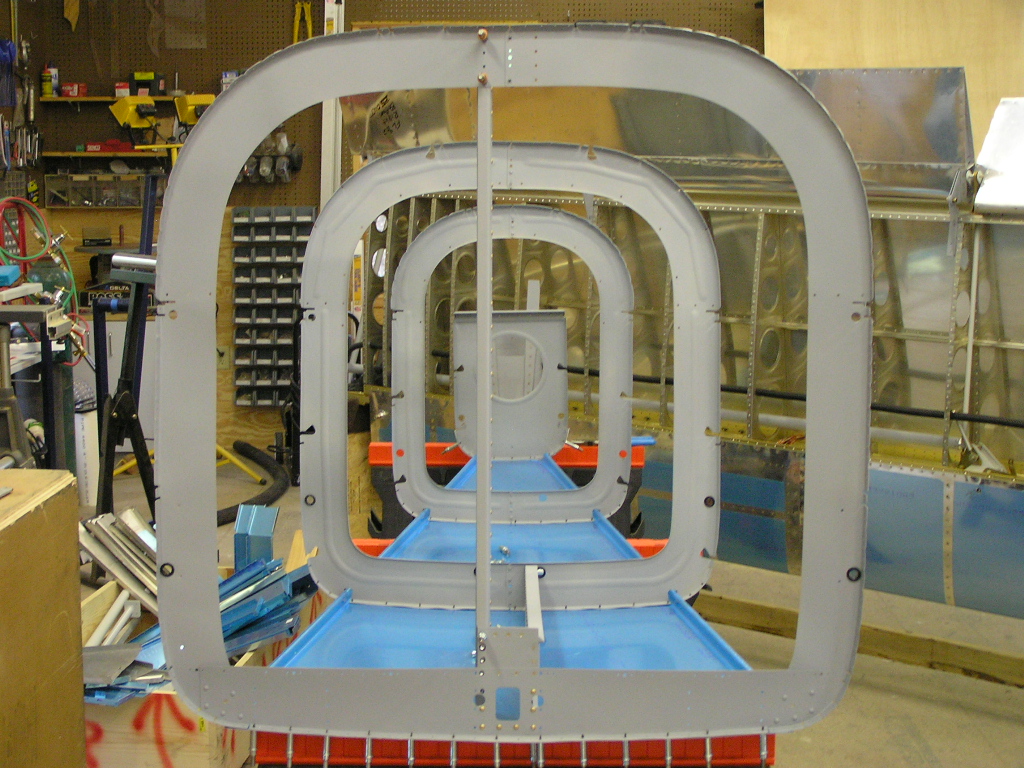
fuselage and clecoed the conical bend. Finally, I installed and clecoed the aft canopy decks to the
longerons. |
3.0 |
| 6/17/07 | Today, I celebrated Father's Day by removing
the right skin and making the conical bend. I then
re-attached it to the fuselage. 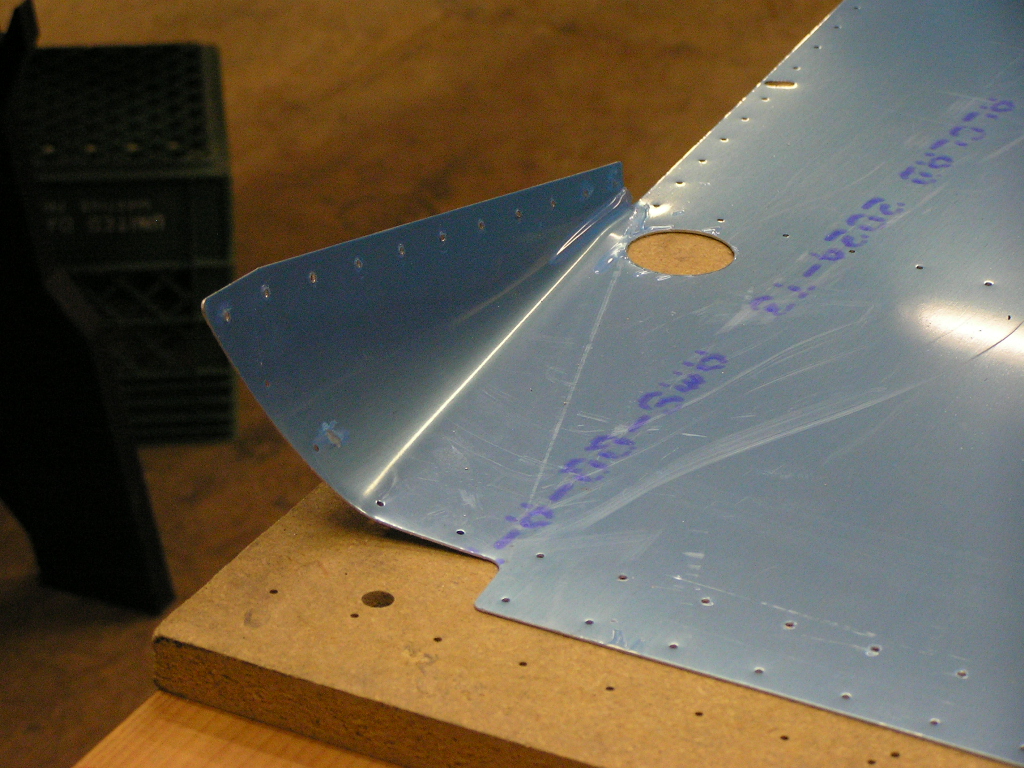
Next, I drilled the longerons. I also had to trim the
front ends of both longerons to allow for a .75" clearance back
from the ends of the side skins. |
6.0 |
|
Total Hours this Page |
88.0 | |
|
Total Hours Fuselage (as of 6/14/07) |
153.0 | |
| Next: Forward Fuselage |


Copyright ©2005-09
Hosted by NTI Networks