
Home
Shop
Tools
Empennage
Wings
Fuselage
Panel
Firewall Forward
Canopy
Installing the Roll Bar
Fitting the Slider Frame
Riveting Aft Top Skins
More Canopy Fitting
Trimming the Canopy
Fitting the Canopy
The "BIG CUT"
Gluing the Slider Canopy
Fitting the Side Skirts
Gluing the Side Skirts
Fitting the Windscreen
Fitting the Latch
Gluing the Windscreen
Rear Anchor Blocks
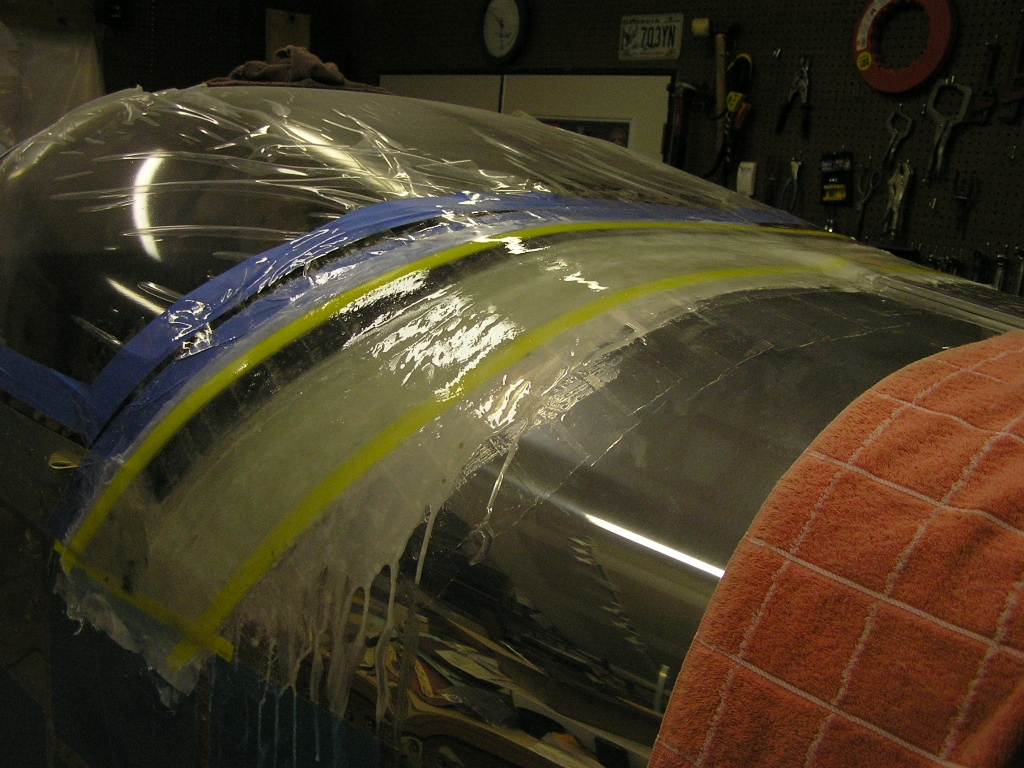
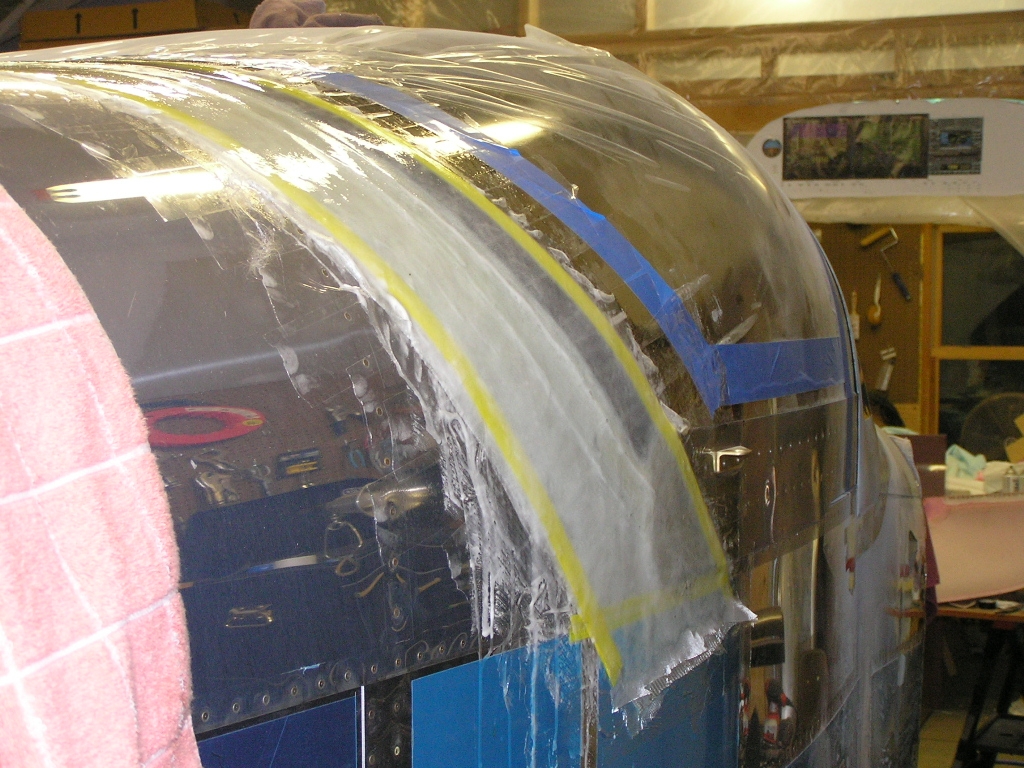
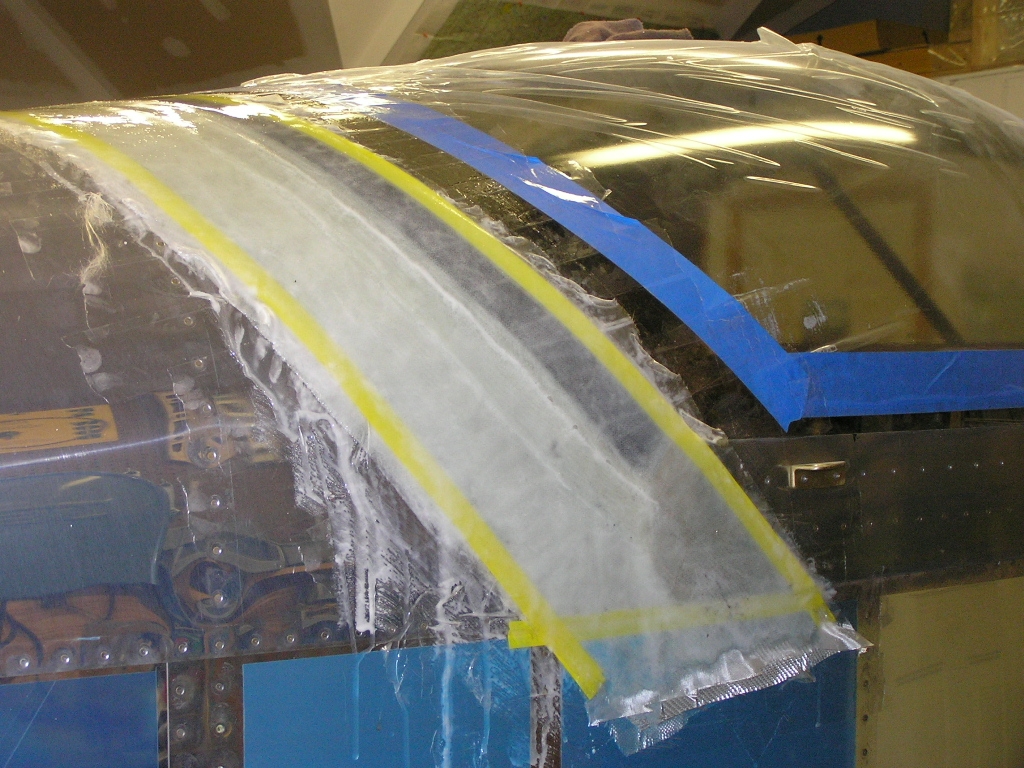
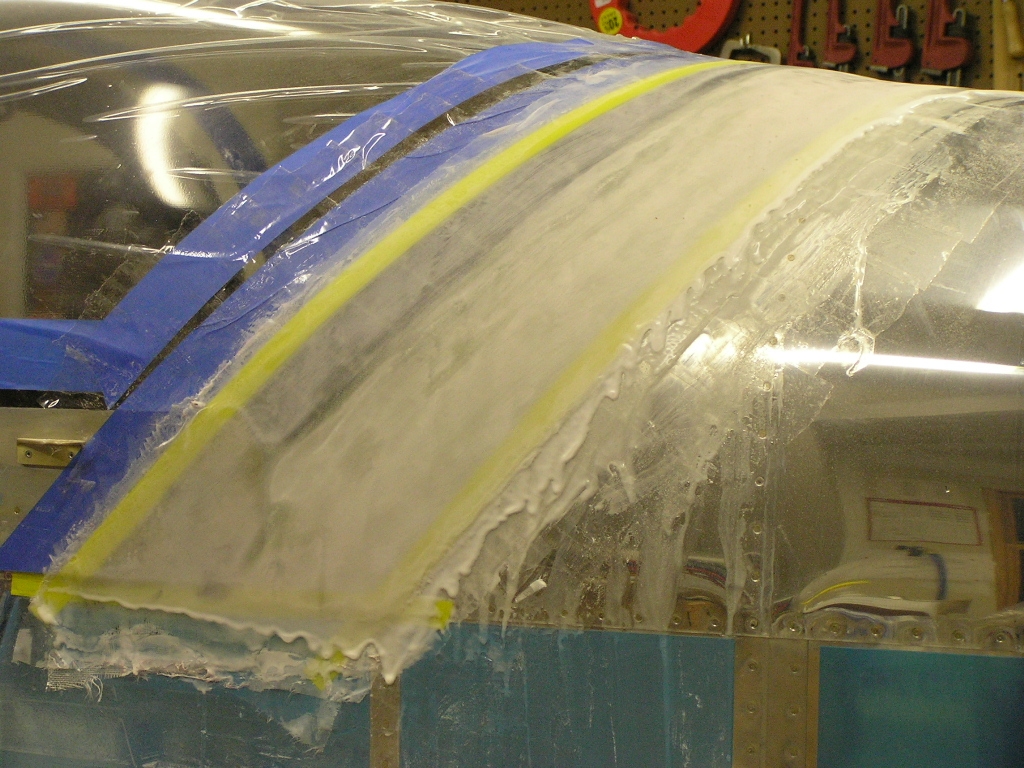
Glassing the Windscreen
Glassing the Rear Skirt
Gluing the Rear Skirt
Wiring
Engine
Miscellaneous
Canopy
|
Date |
Description of Task | Hours |
| 1/11/08 | I got confirmation that my
Finishing Kit was shipped and should arrive late next week. |
|
| 1/18/08 | Finishing Kit arrived!
Lynne and I spent a couple of hours inventorying it.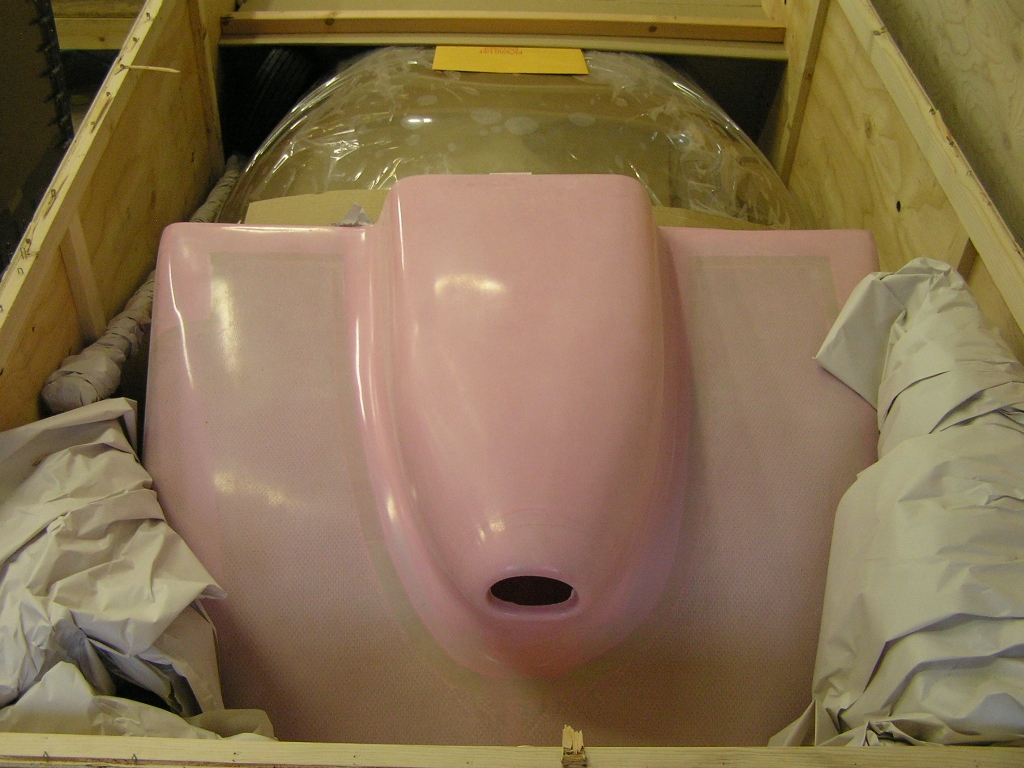 |
2.0 |
|
Installing the Roll Bar |
||
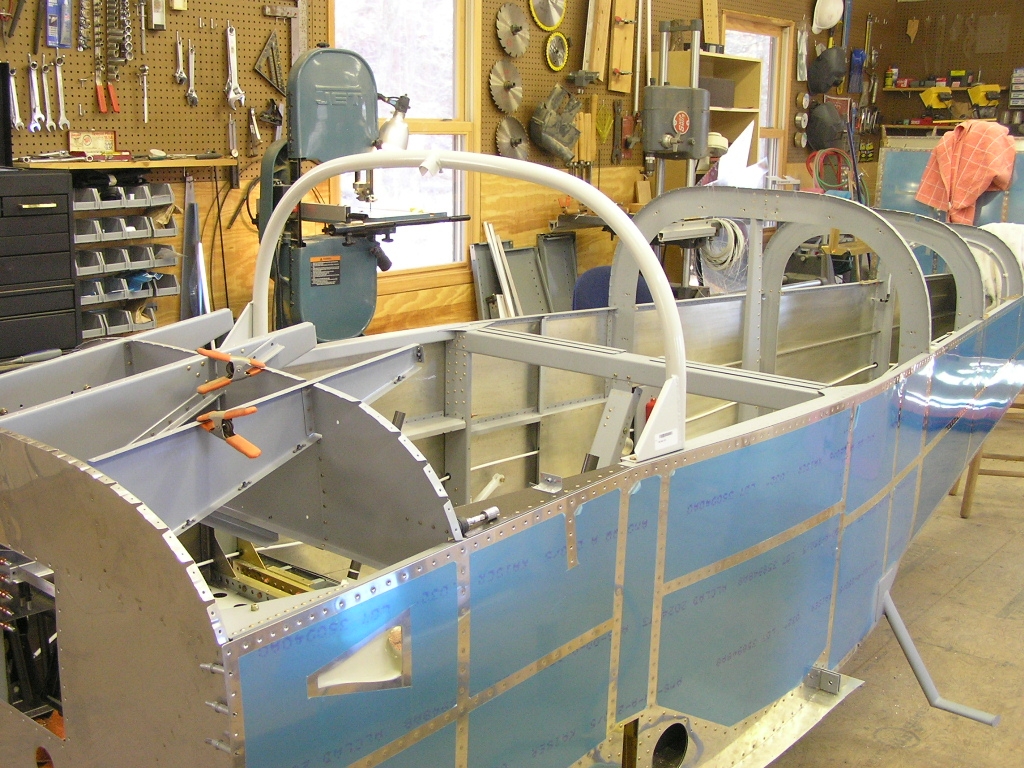
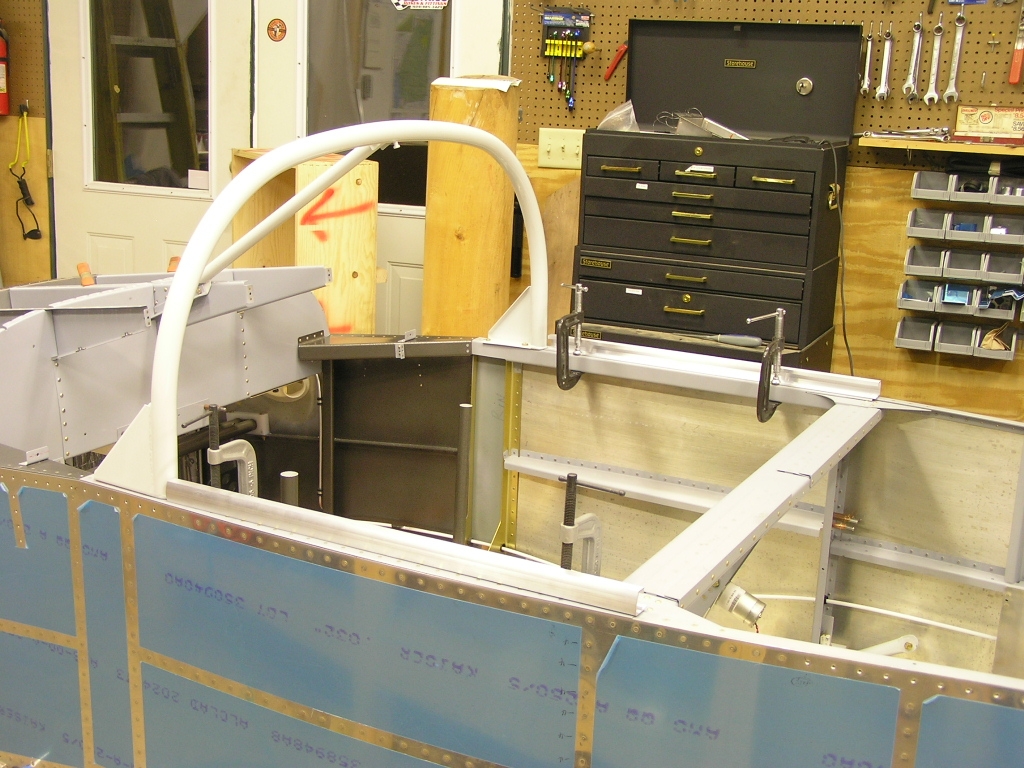
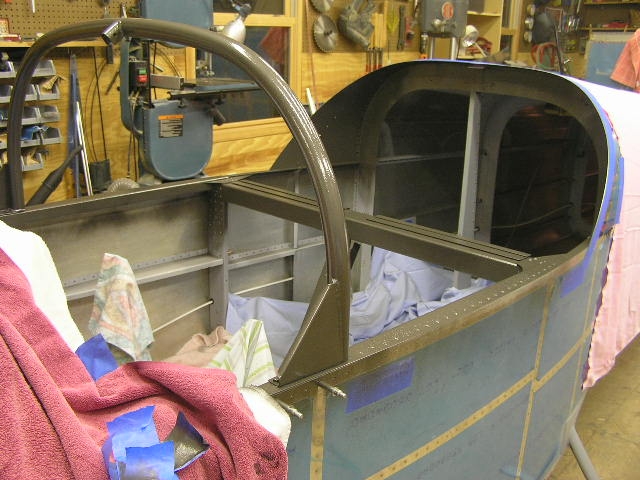
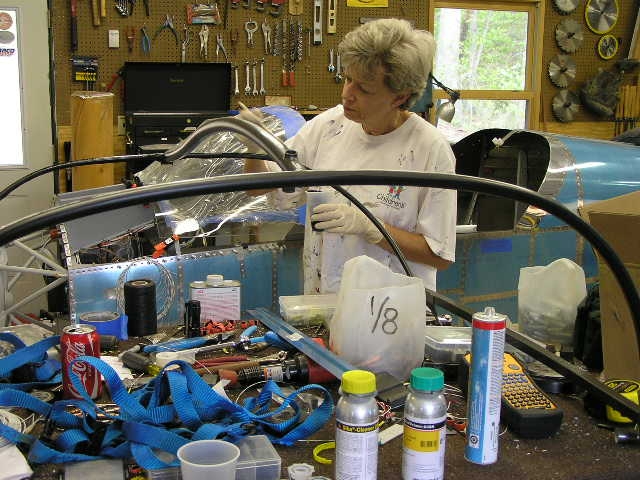
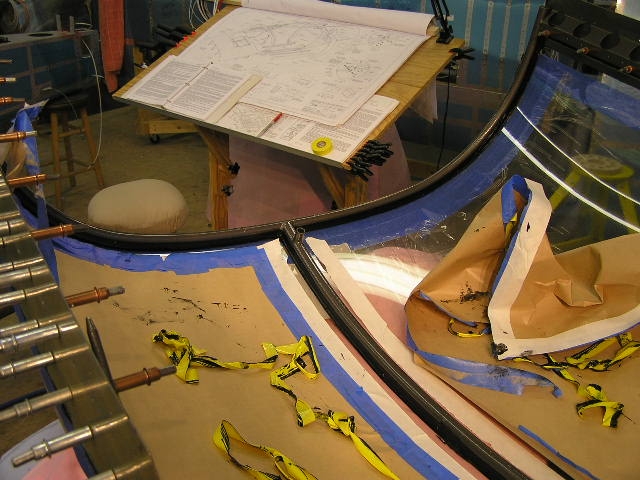
| 1/20/08 | When I was reviewing the
drawings to begin working on the canopy I soon realized that
Vans had a problem when printing. If you look, you can see
the entire right side of the sheet is blank.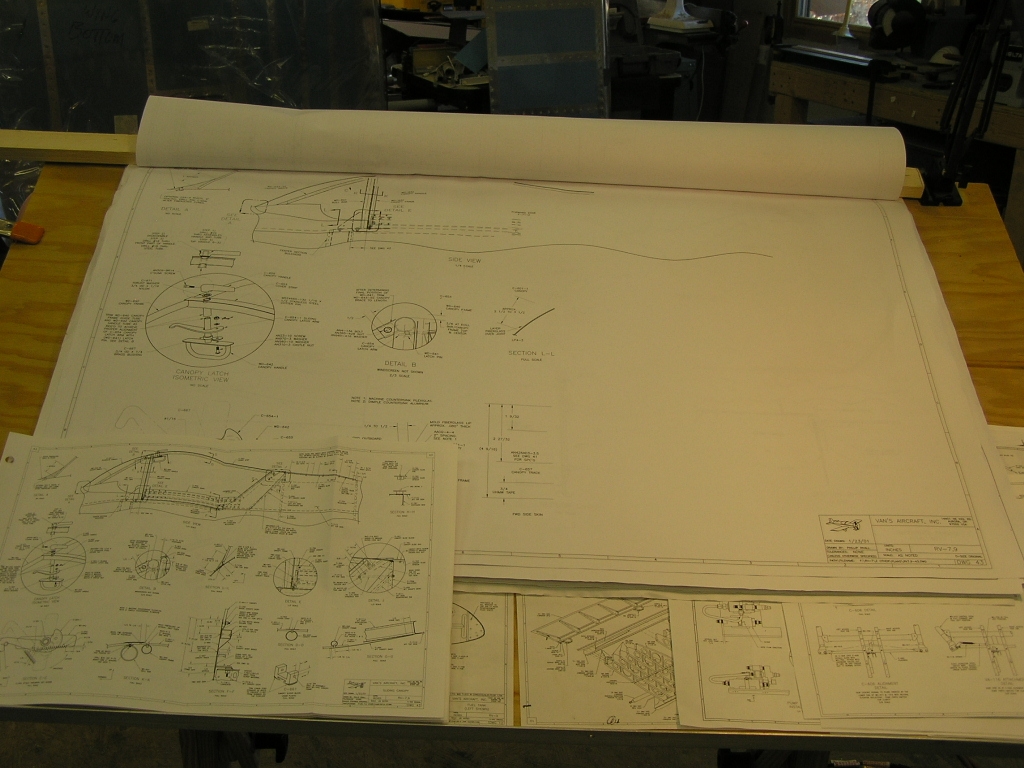 I was able to continue using the Preview Plans drawings until I get the large ones replaced.
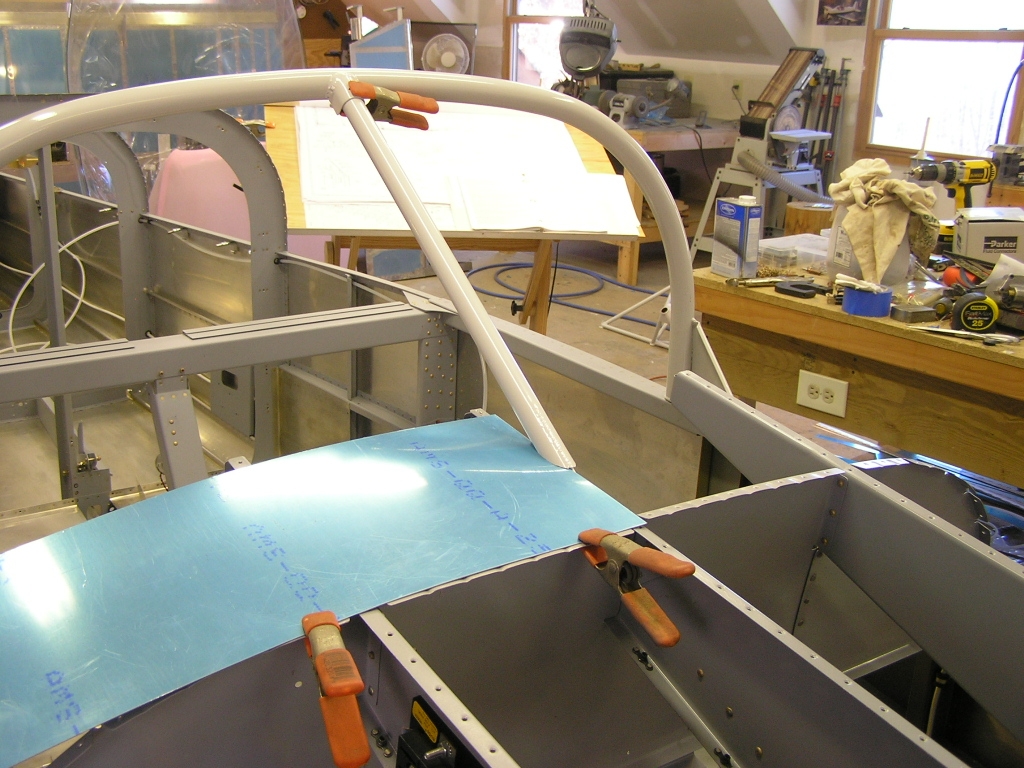
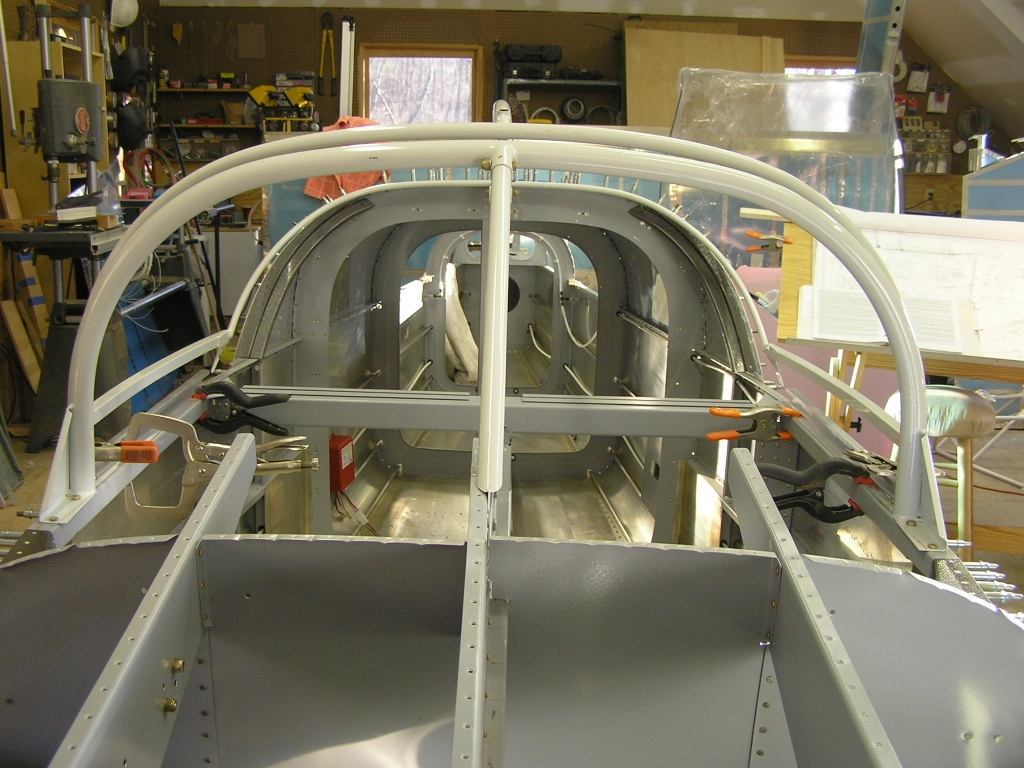
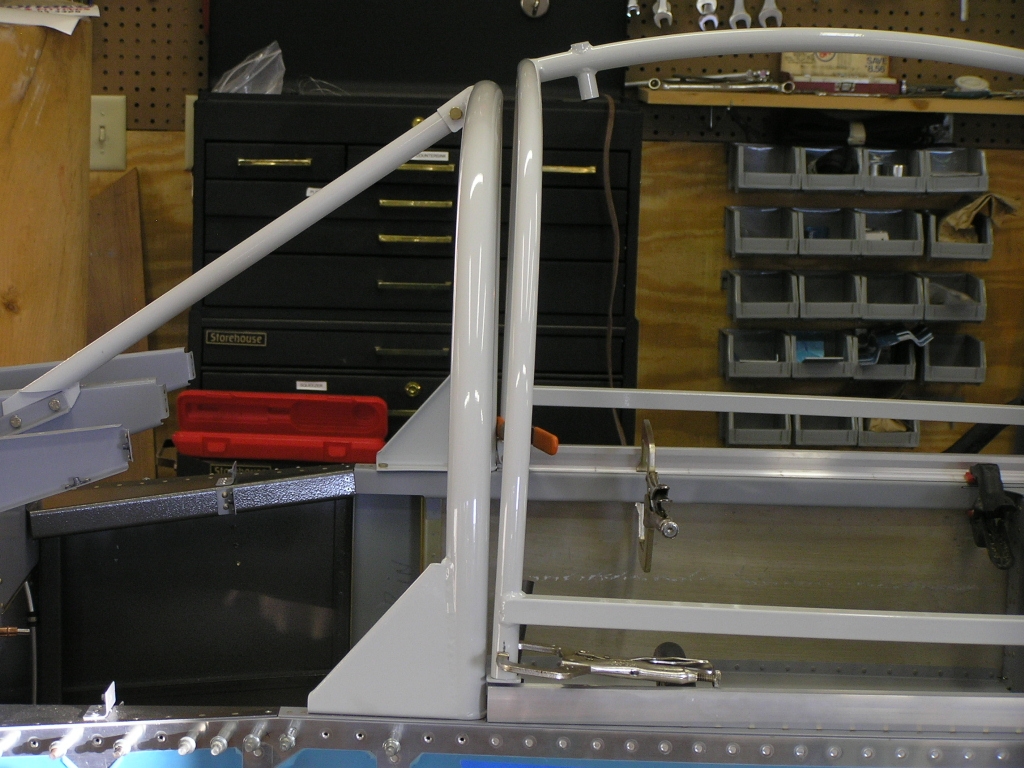
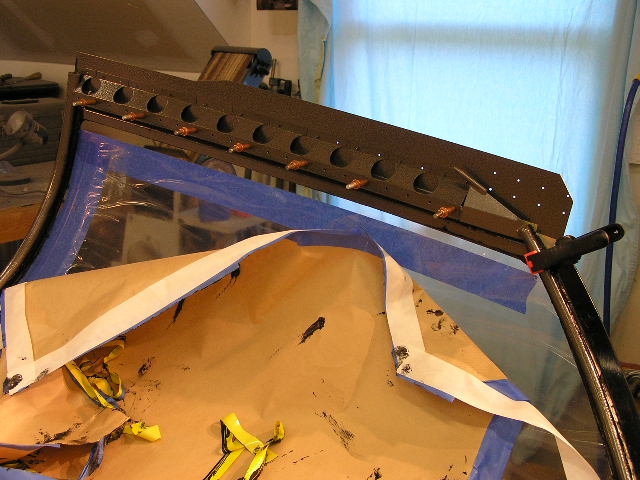
I found out that my roll bar did not require any
bending for it to fit...I hope this is an Omen.
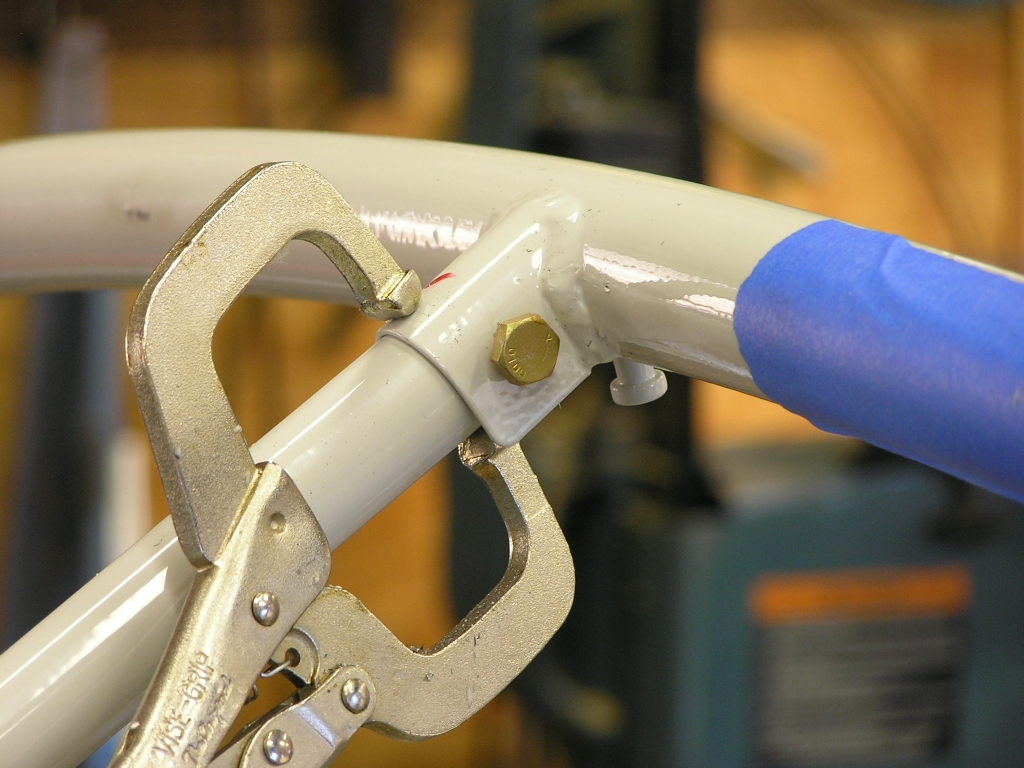
I drilled the roll bar to the aft canopy deck and
fabricated the spacers per the plans. I drilled the
spacers using the drill press. I installed the fore
spacers and bolted with no problem but I found it impossible to
reach the aft bolts, much less add the spacer, washer and
finally the nut. I used the Dremel to grind out the lower
flange of the aft canopy decks just enough to allow room for a
7/16" socket. I also glued the washers to the spacers to
ease installation.
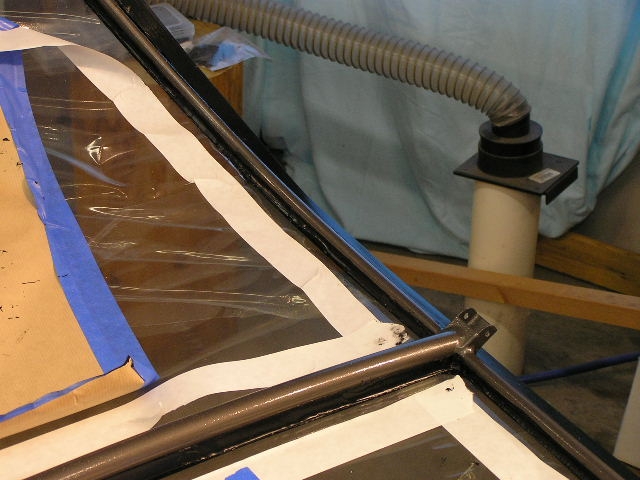
Next, I fit the roll bar brace and had to cut 1.25" for a nice
fit.
After fitting, I drilled the upper flange and bolted.
Finally, I match-drilled the brace to the center deck rib.
I then disassembled, deburred and trimmed the excess steel per
the plans. |
8.0 |
|
Fitting the Slider Frame |
||
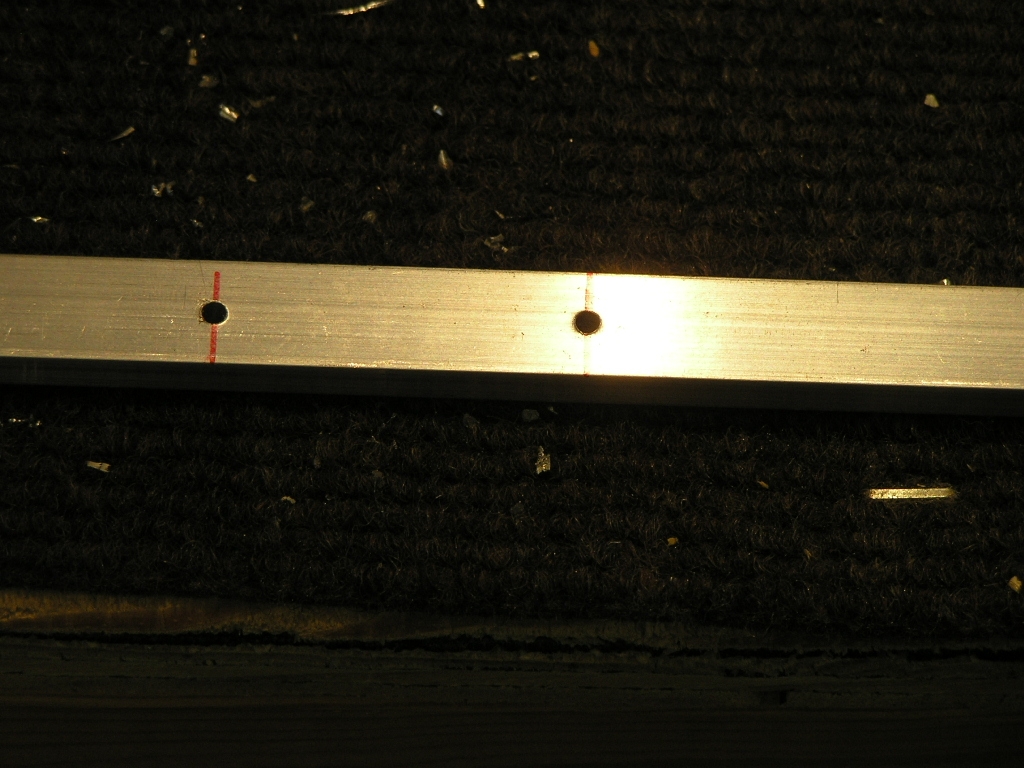
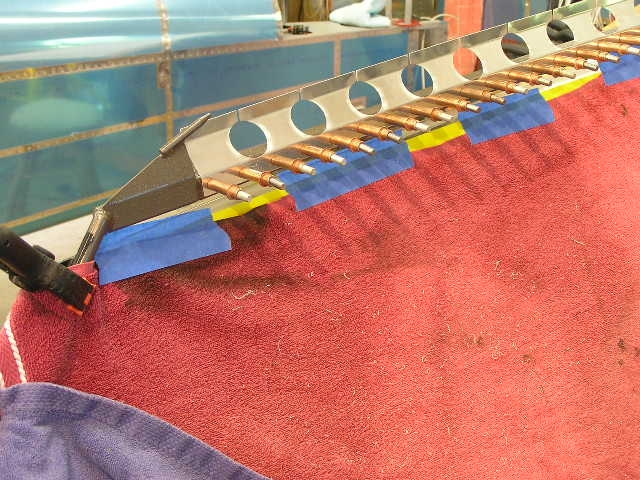
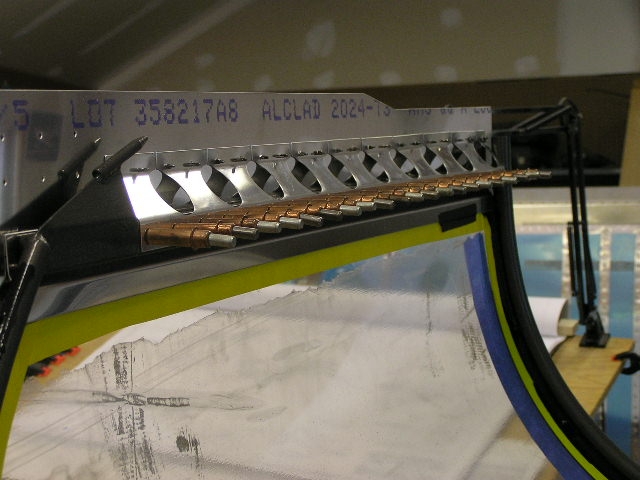
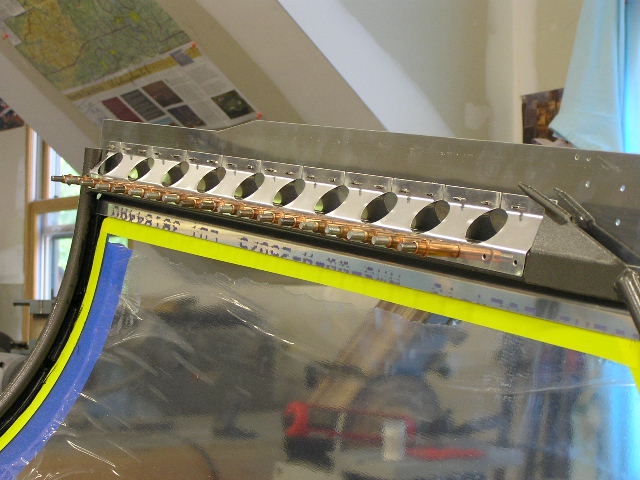
I started by assembling the
rollers and clamping them to the canopy frame.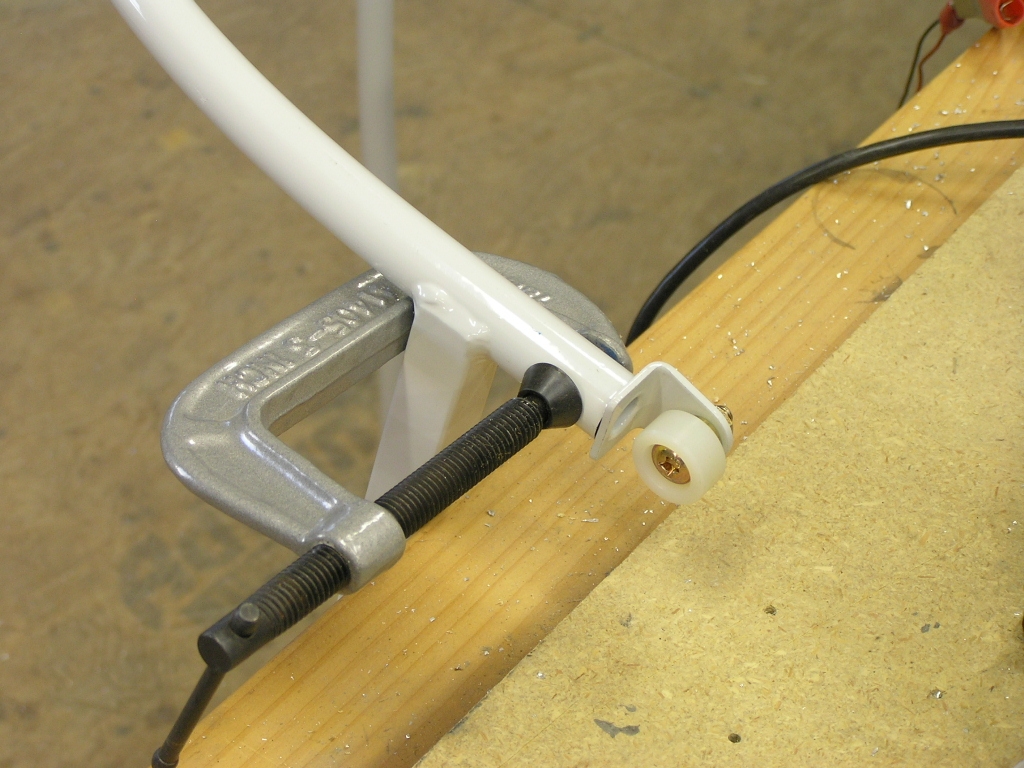 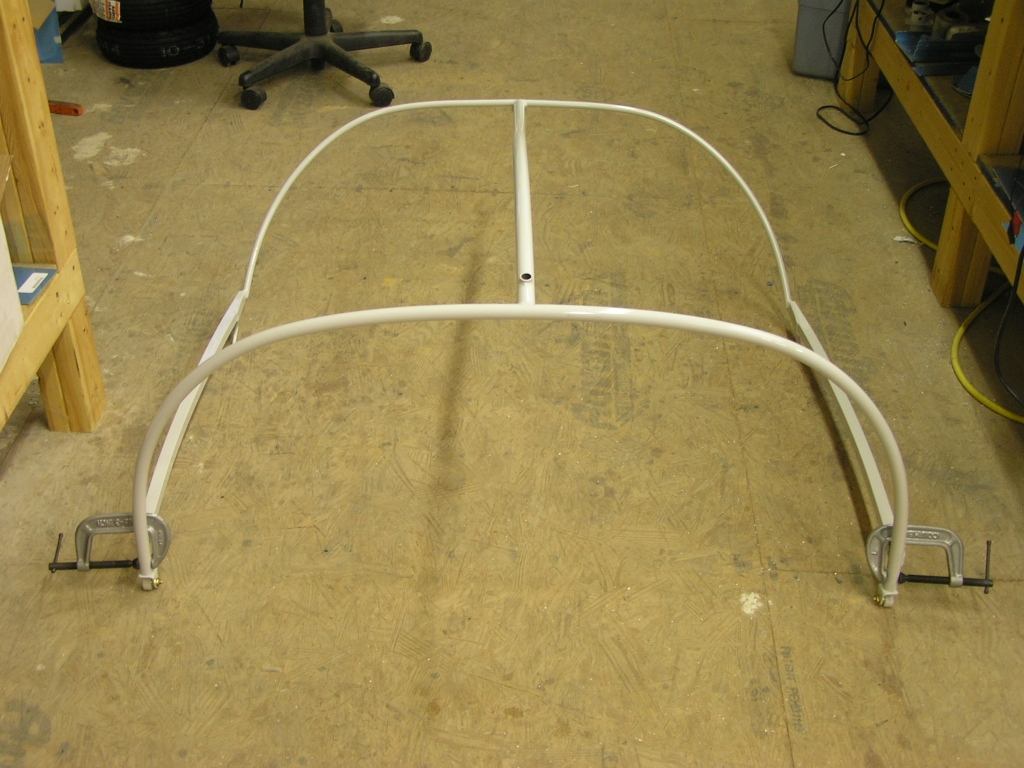
Next, I cut the roller track and deburred.
After measuring out the attachment holes, I drilled the tracks
and clamped them to the aft canopy decks. |
||
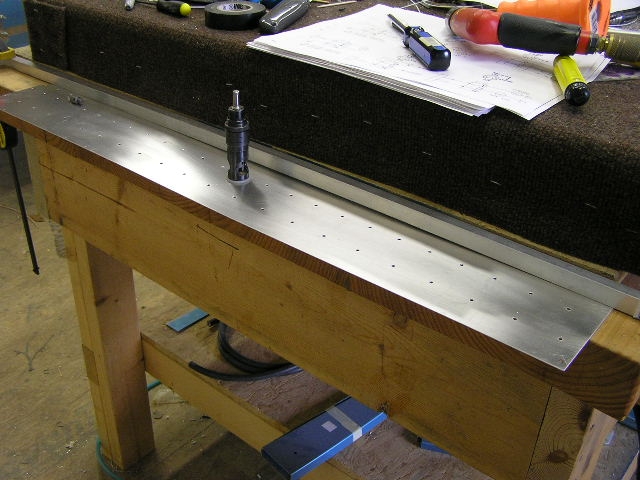
| 1/26/08 | I drilled the aft slider block
to the slider frame and trimmed per the plans.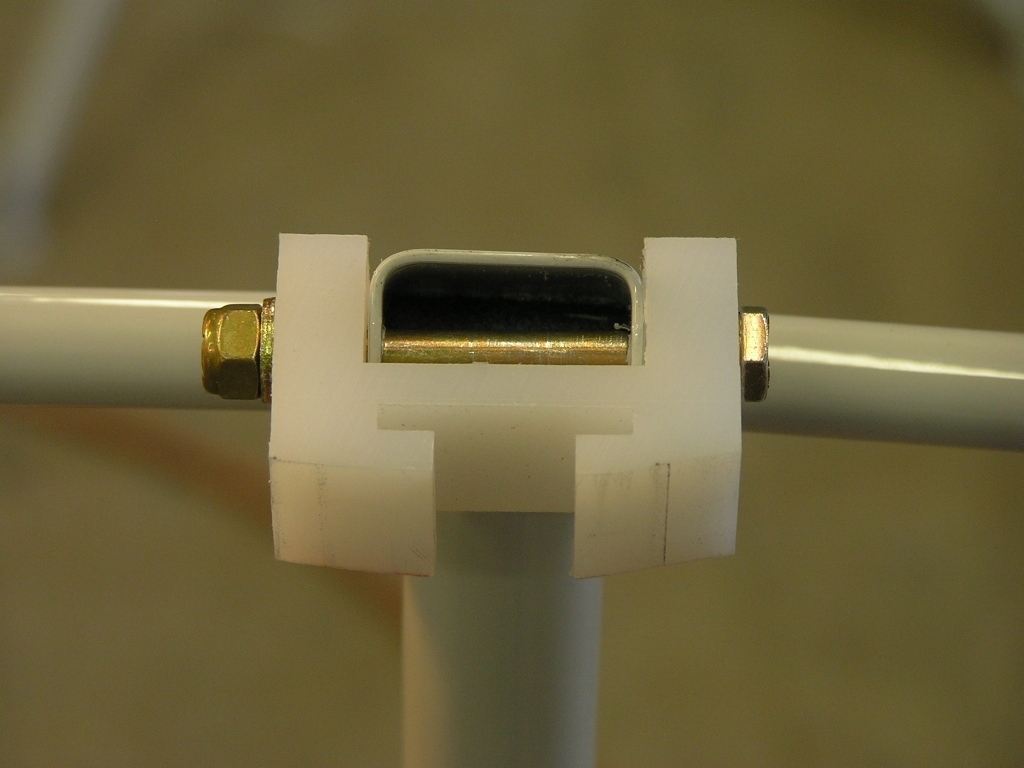
I spent the next few hours assembling and fitting
the rear slider track assembly by positioning, drilling and
riveting the C-763 slide spacer and the C762 slider track. With the slider track taped in place on the
aft top skin I was able to install the slider frame and check
for initial fit. |
5.0 |
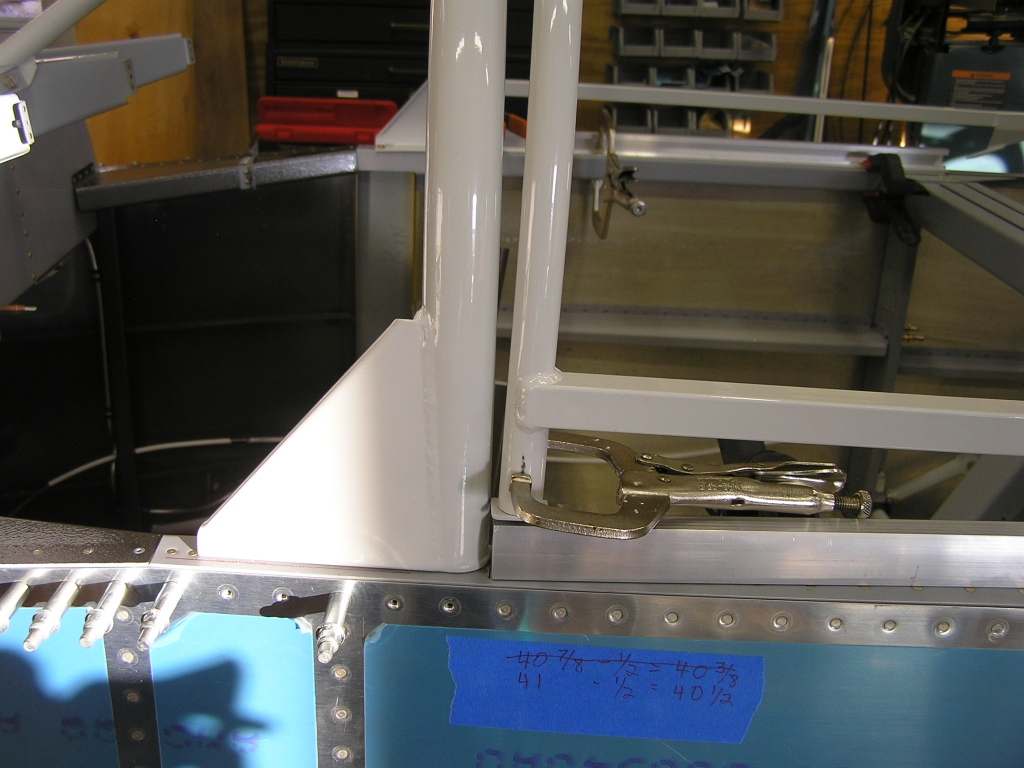
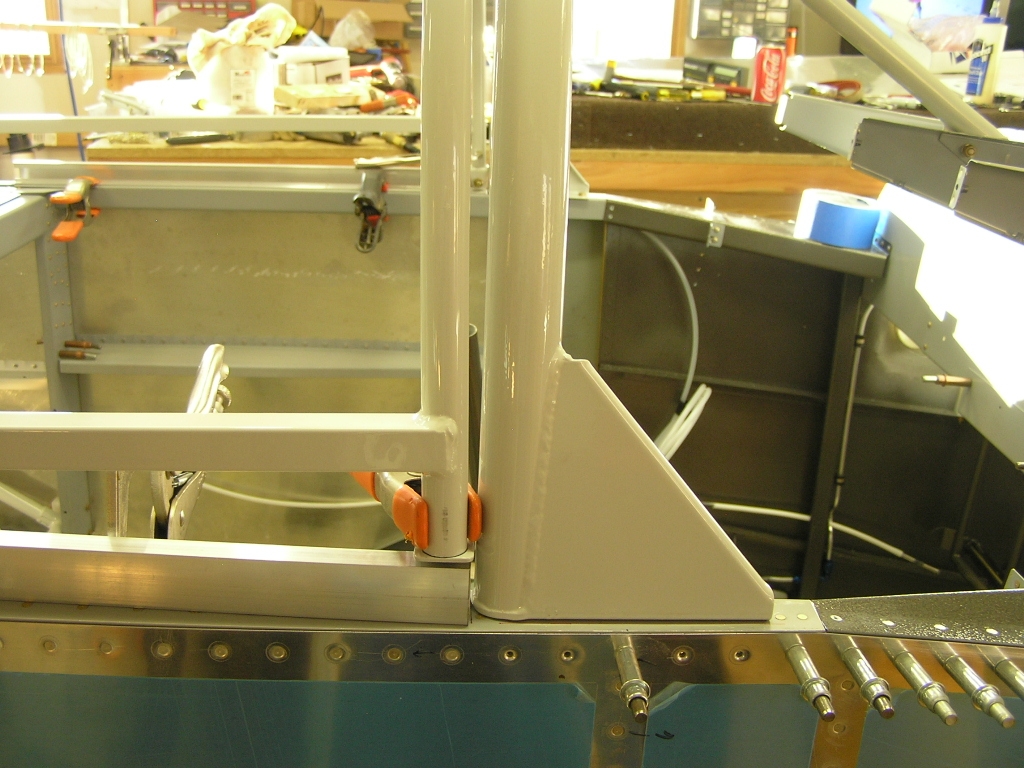
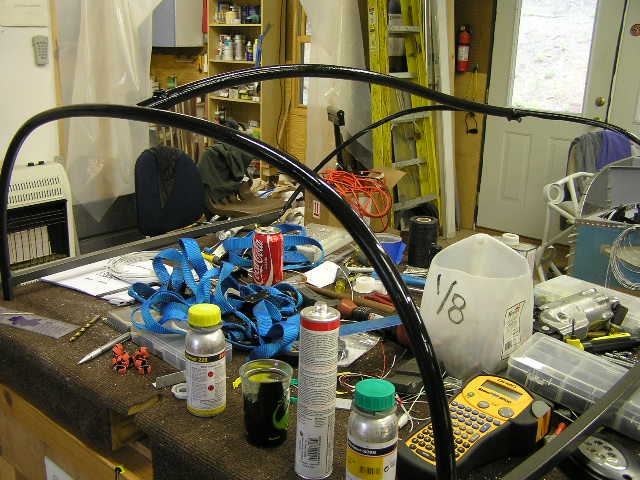
| 1/27/08 | After initially adjusting to
where the side tubes matched the fuselage sides I started
measuring the rear bow in relation to the aft top skin. It
looks great and is about 1/8" below the aft skin.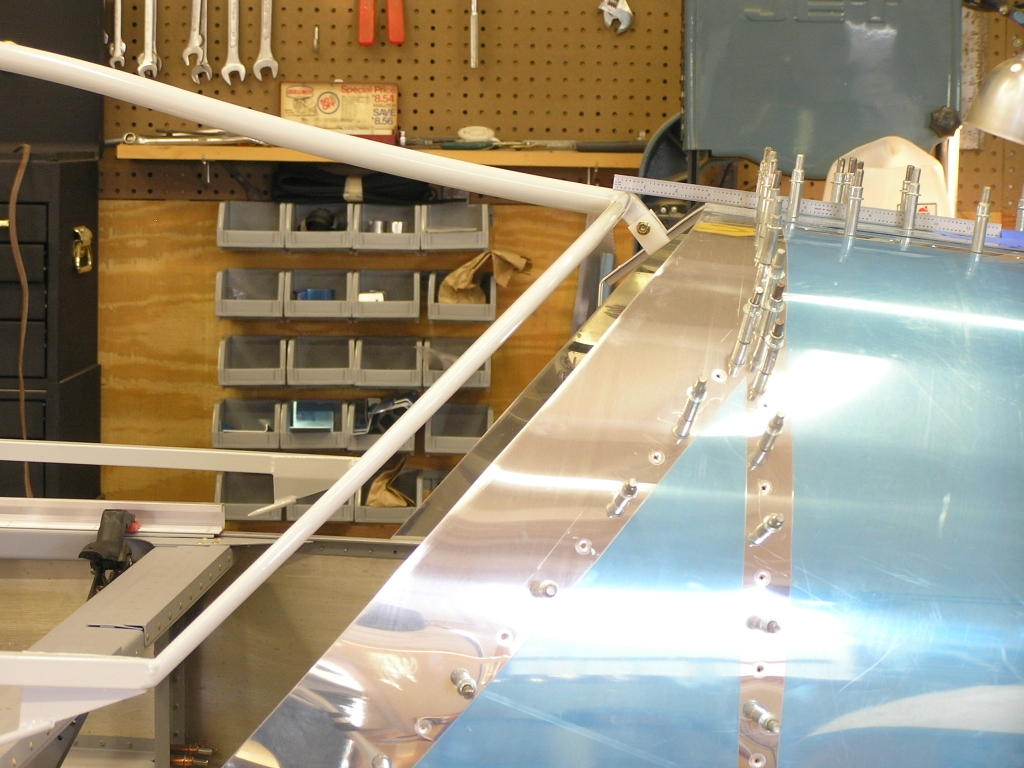
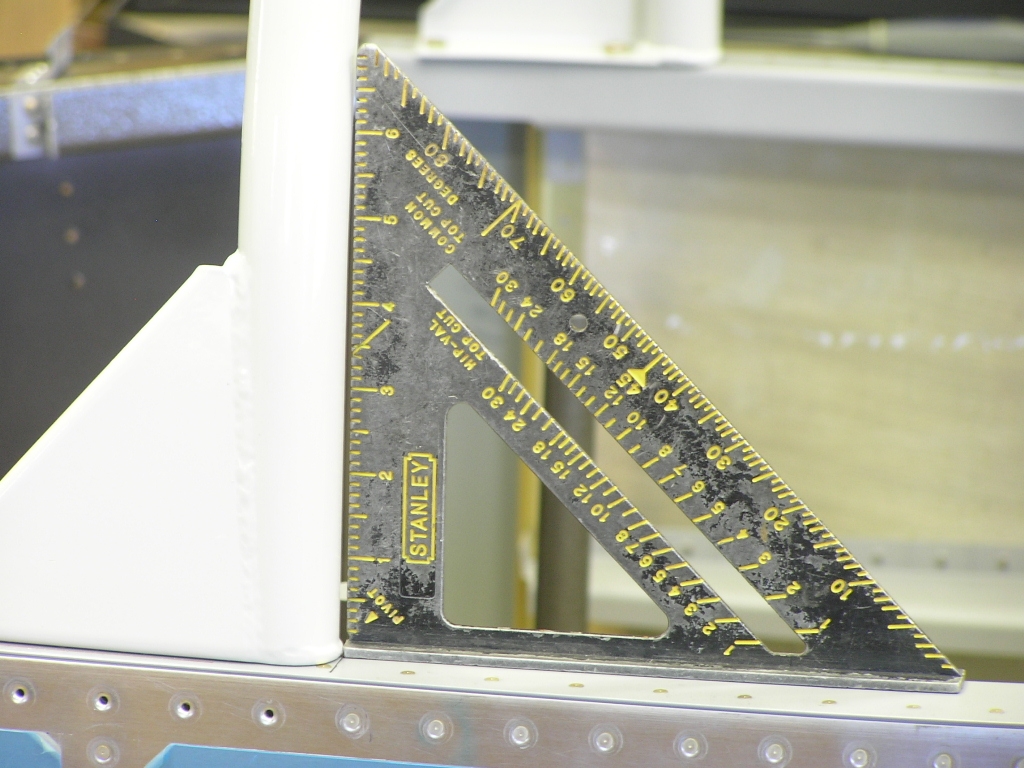
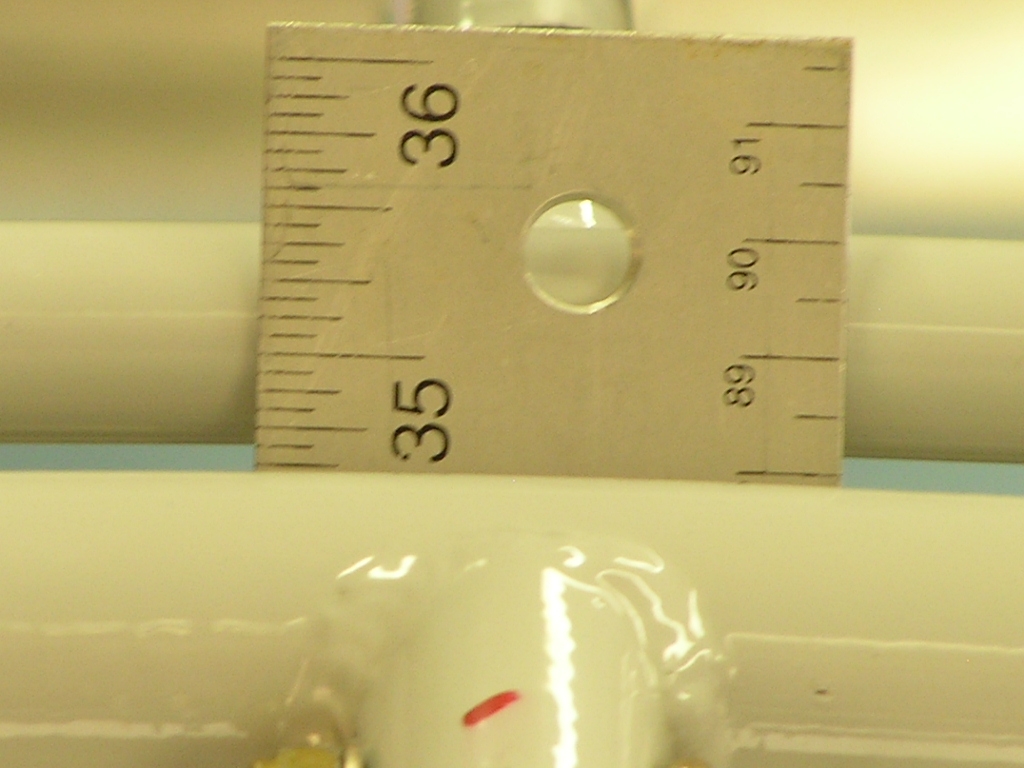
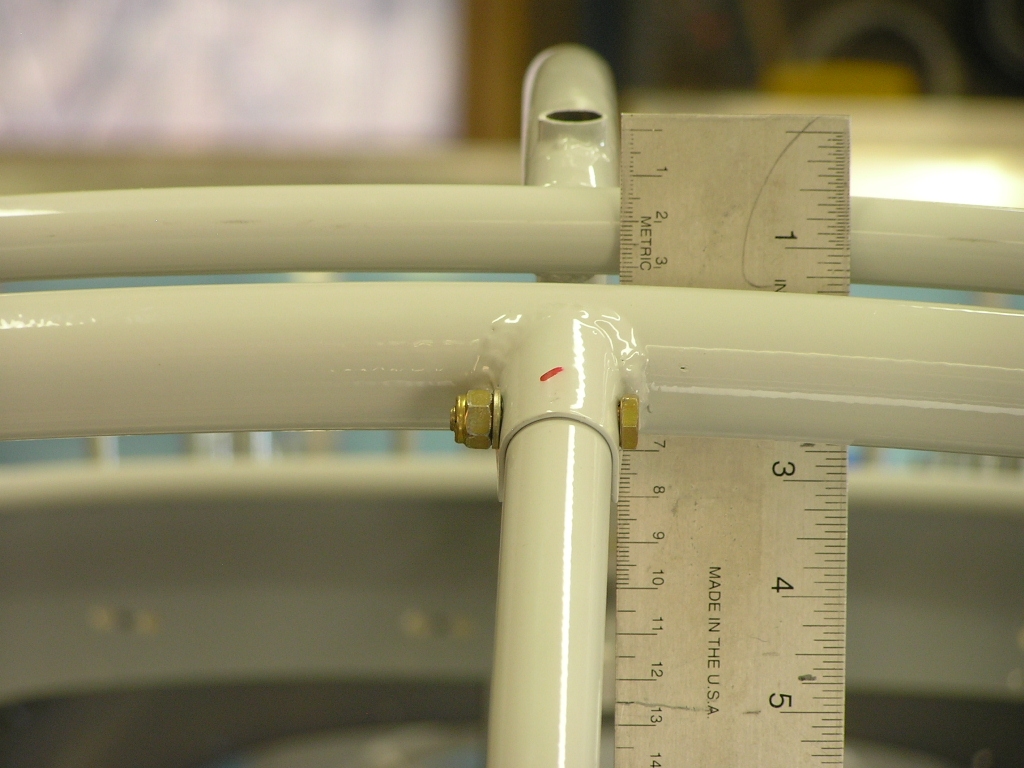
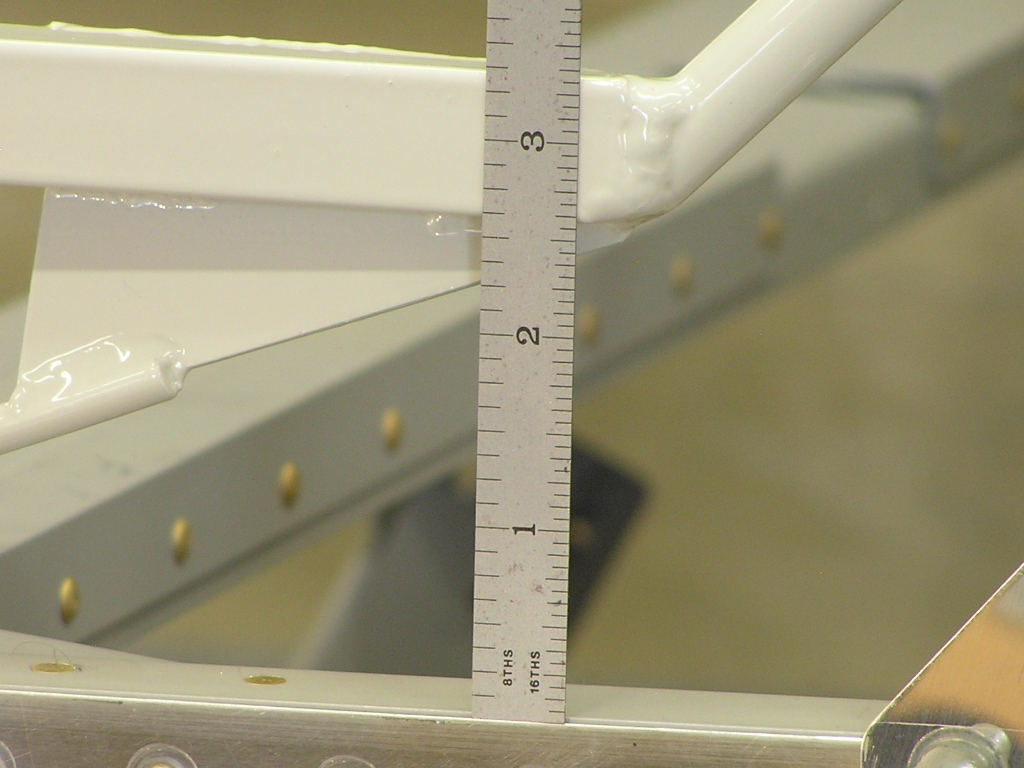
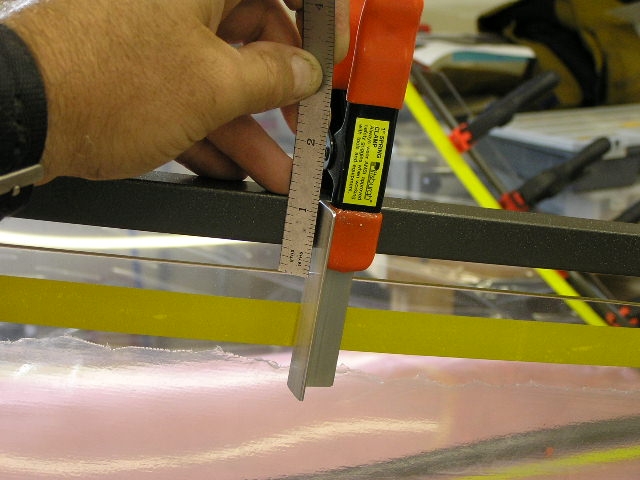
I determined that all the measurements were
within specs except for the height of the front bow. The
front bow is supposed to be 3/8" higher than the roll bar.
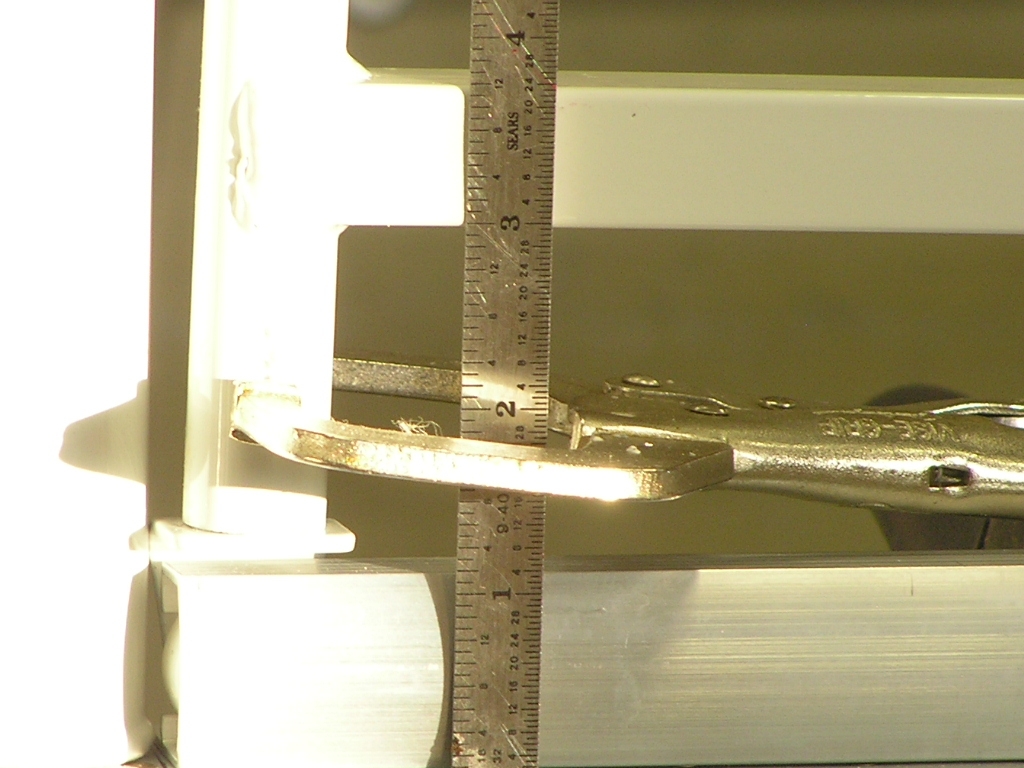
Now, it is about 3/4". Also, while the roll bar is perpendicular to
the fuselage, the slider frame has a "gap" at the top. This "extra height" at the front slider bow is
also reflected in the side tubes. They are supposed to be
parallel with the aft canopy deck but here you can see that the
front measures 3 3/4" and the aft measures 3 3/8". Amazingly, it seems I will not have to do any
manual bending of the 4130 steel tubing. I need to check
with some other builders and see if I could just trim the front
slider bow where the rollers attach and let the bow drop 3/8".
I also believe this will resolve the problem with the vertical
fit and the side tubes. |
5.0
|
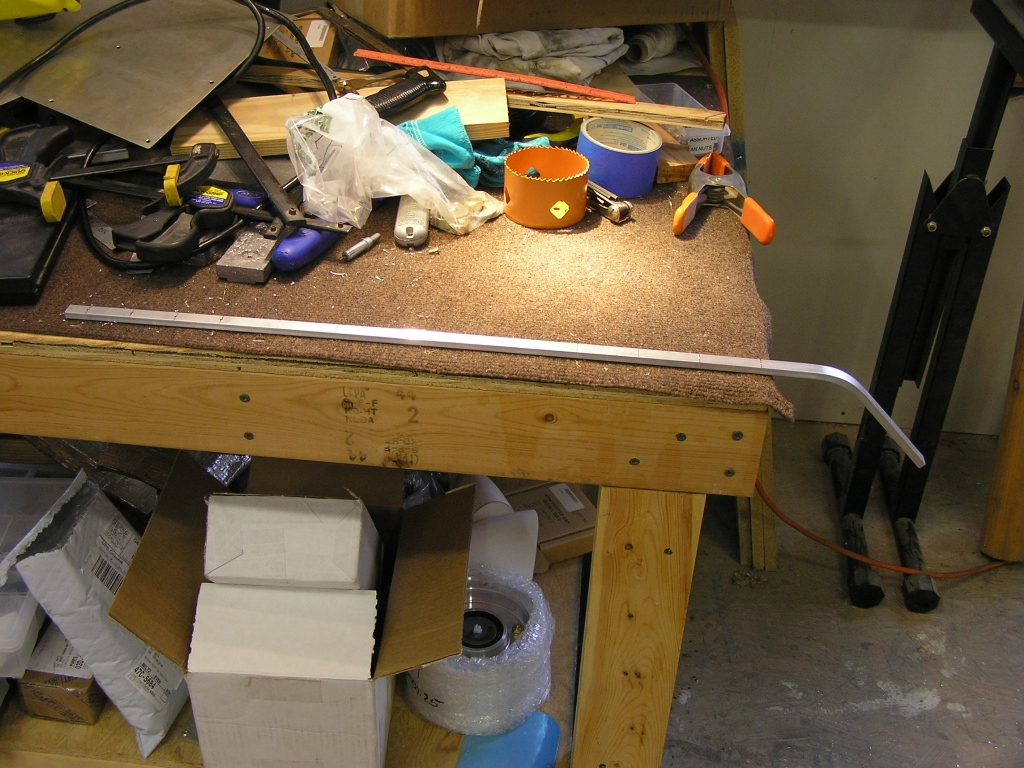
| 2/1/08 | After discussing with several
other builders I went ahead and cut 3/8" off both forward tubes
where the rollers attach. After re-installing the frame it
is apparent they still need to be trimmed another 3/16". I
think I will wait and verify my measurements again before
getting too "cut happy". |
1.0 |
| 2/15/08 | Last weekend I attended an
Aeroelectric Connection seminar
with Bob Nuckolls in Lawrenceville,
GA. Now it is time to get back to building.
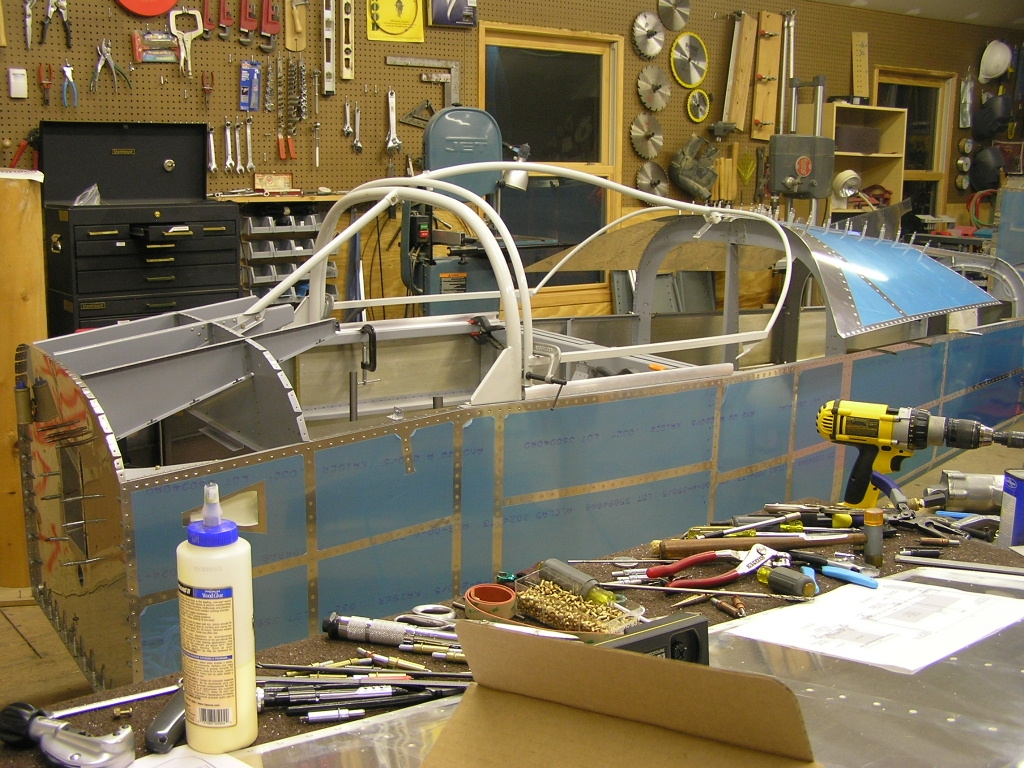
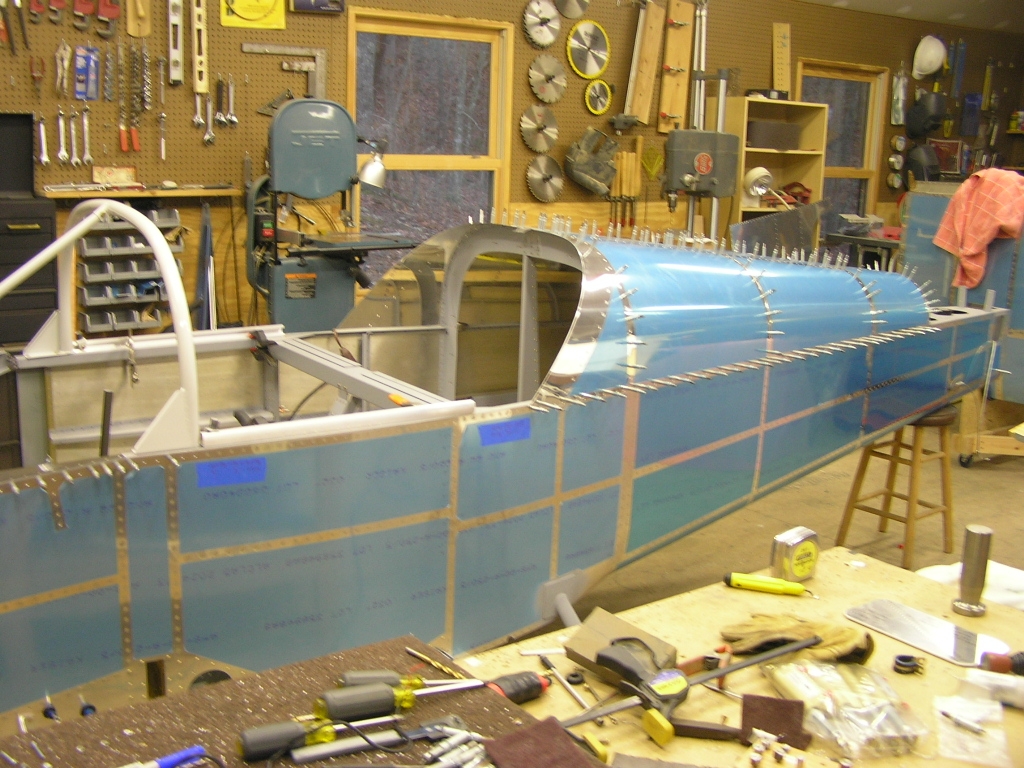
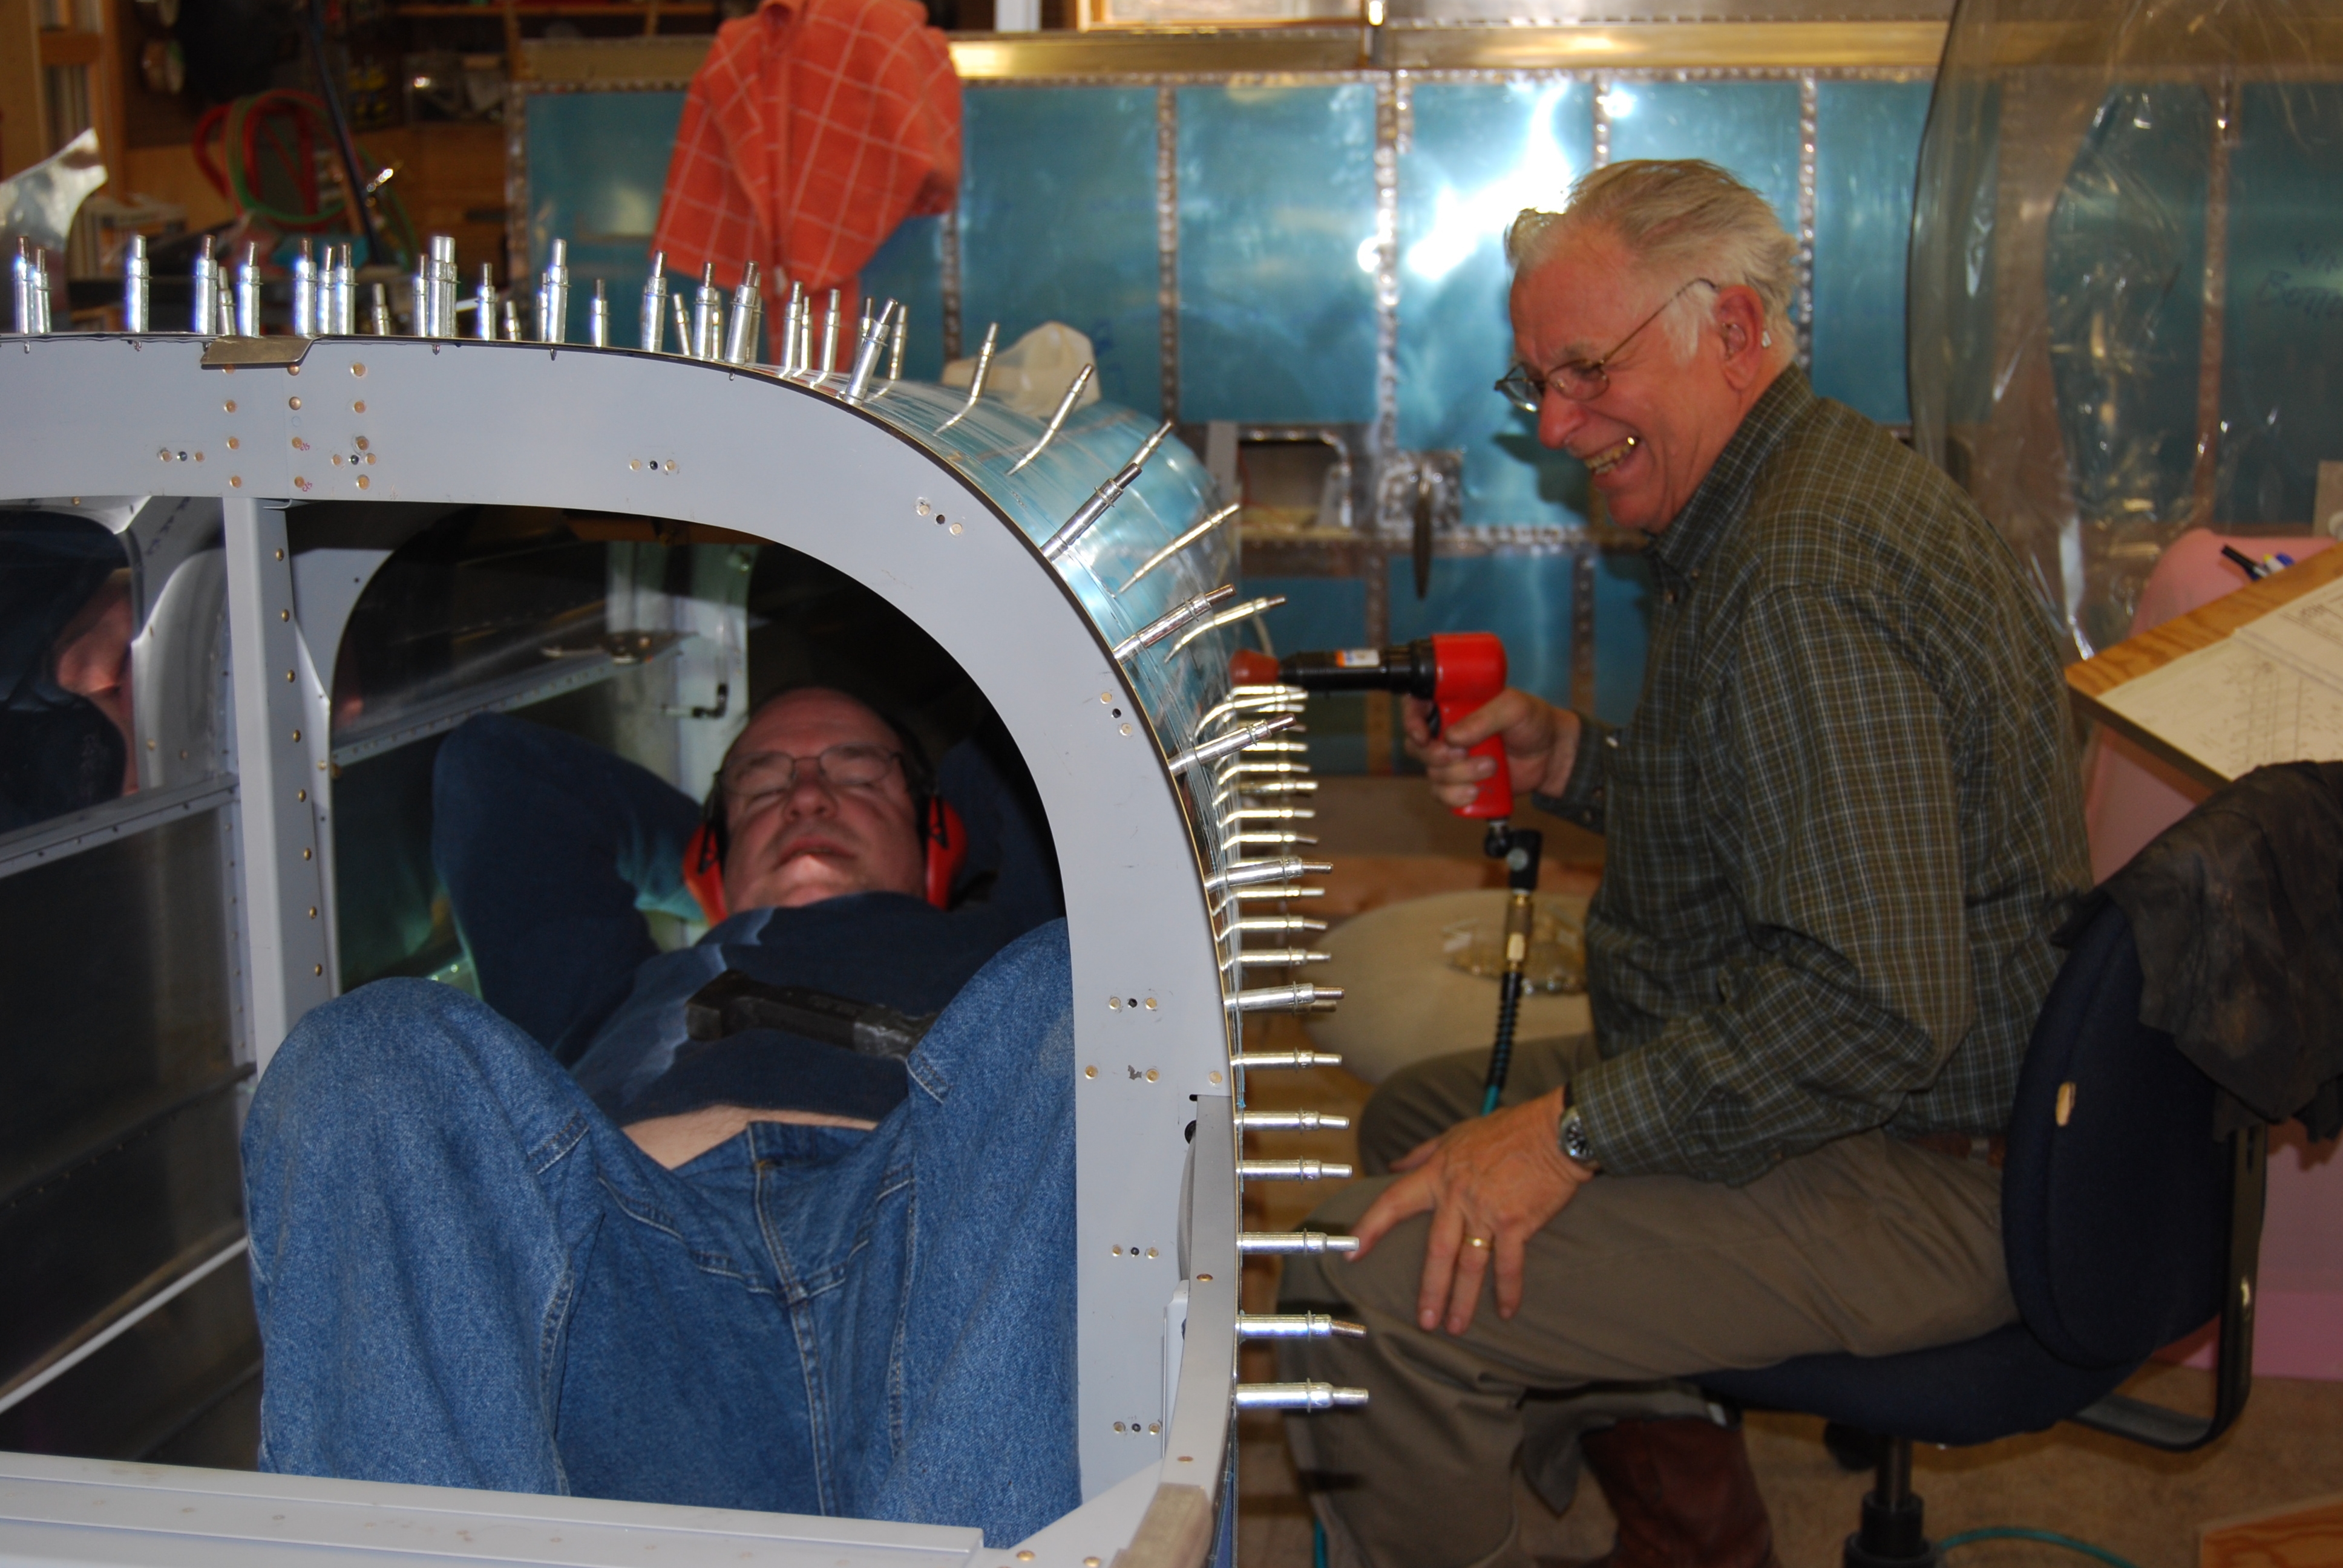
I hope to rivet the aft fuselage top skins next
weekend so I clecoed them to the fuse. |
1.5 |
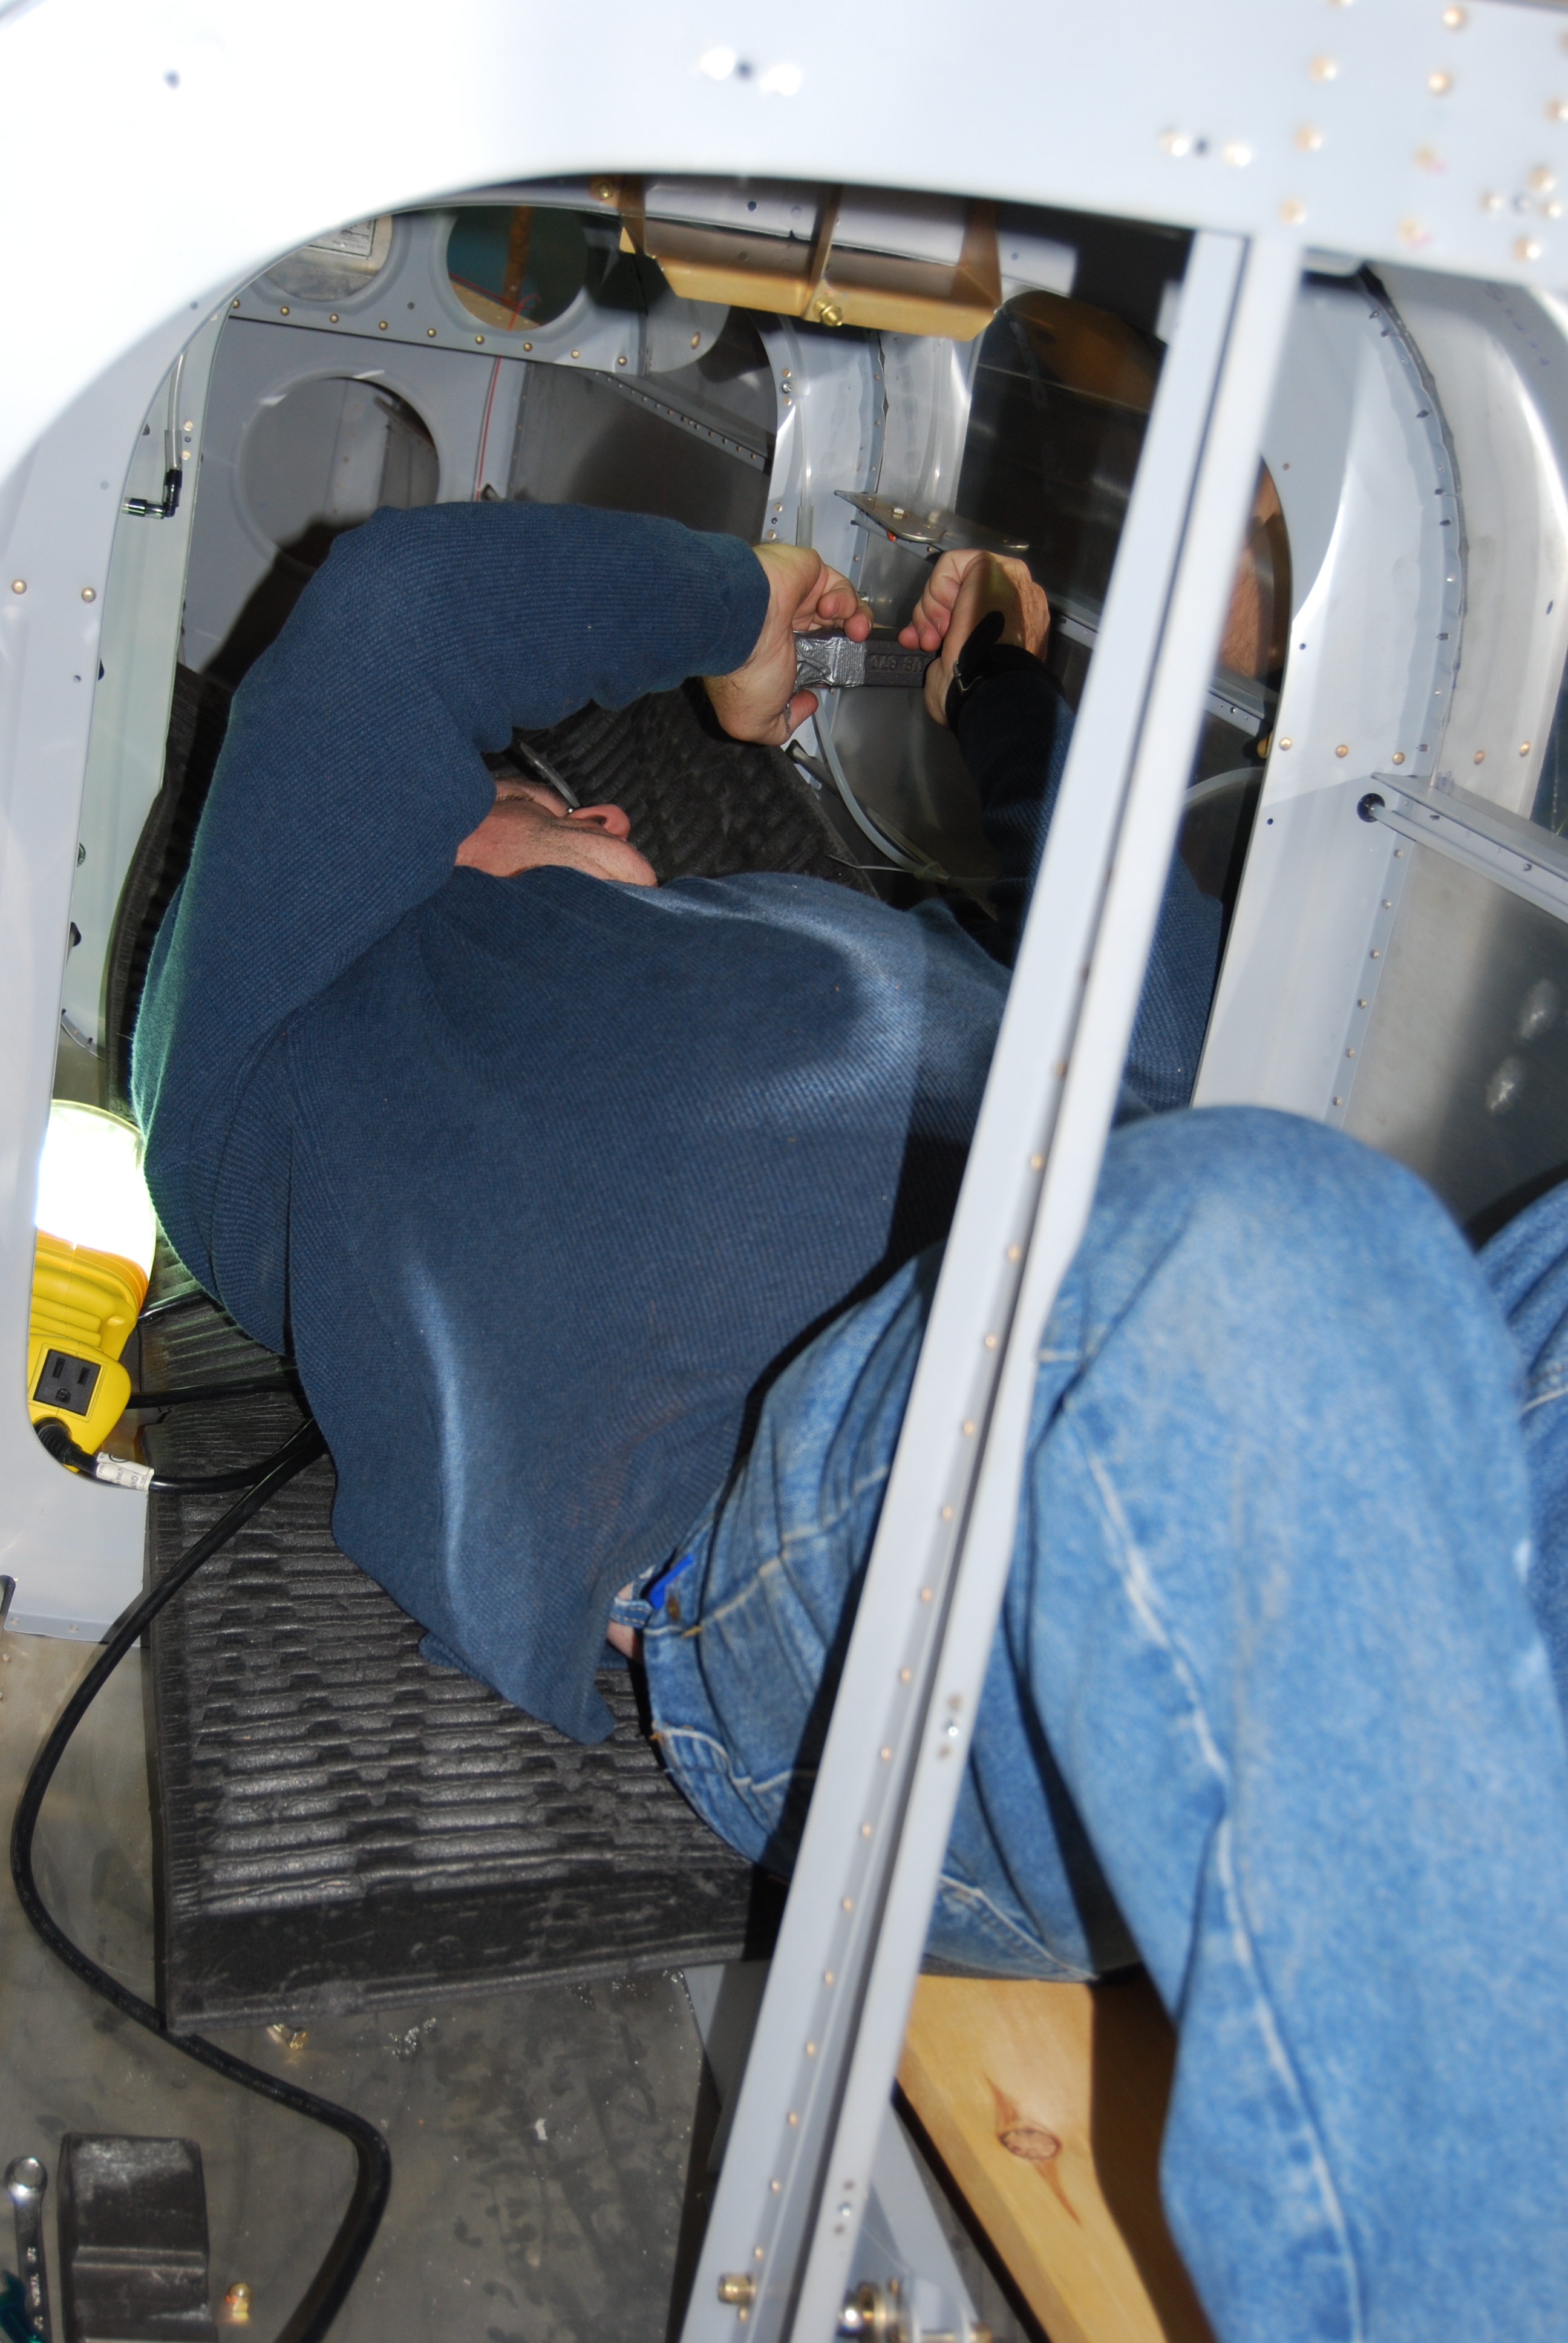
| 2/17/08 | I cut a 1x12" board to fit
across the bulkheads inside the rear fuselage. This should
support my weight in order to rivet the aft top skins.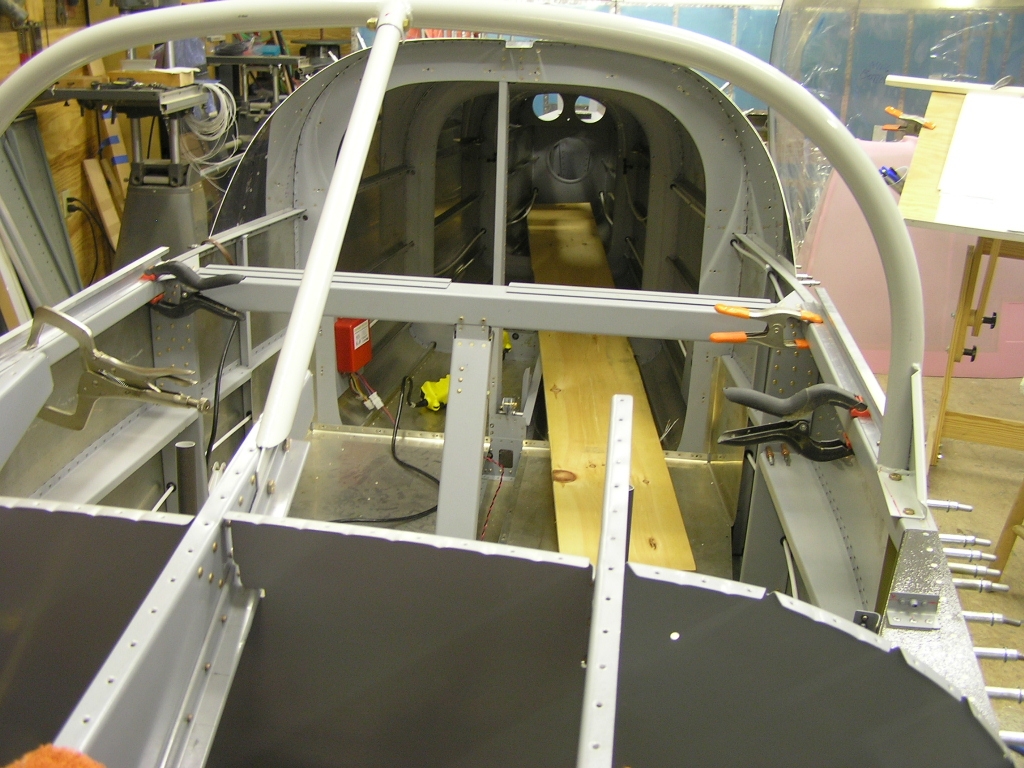
I spent a little time cleaning up and
re-organizing the shop. |
1.0 |
| Riveting the Aft Top Skins | ||
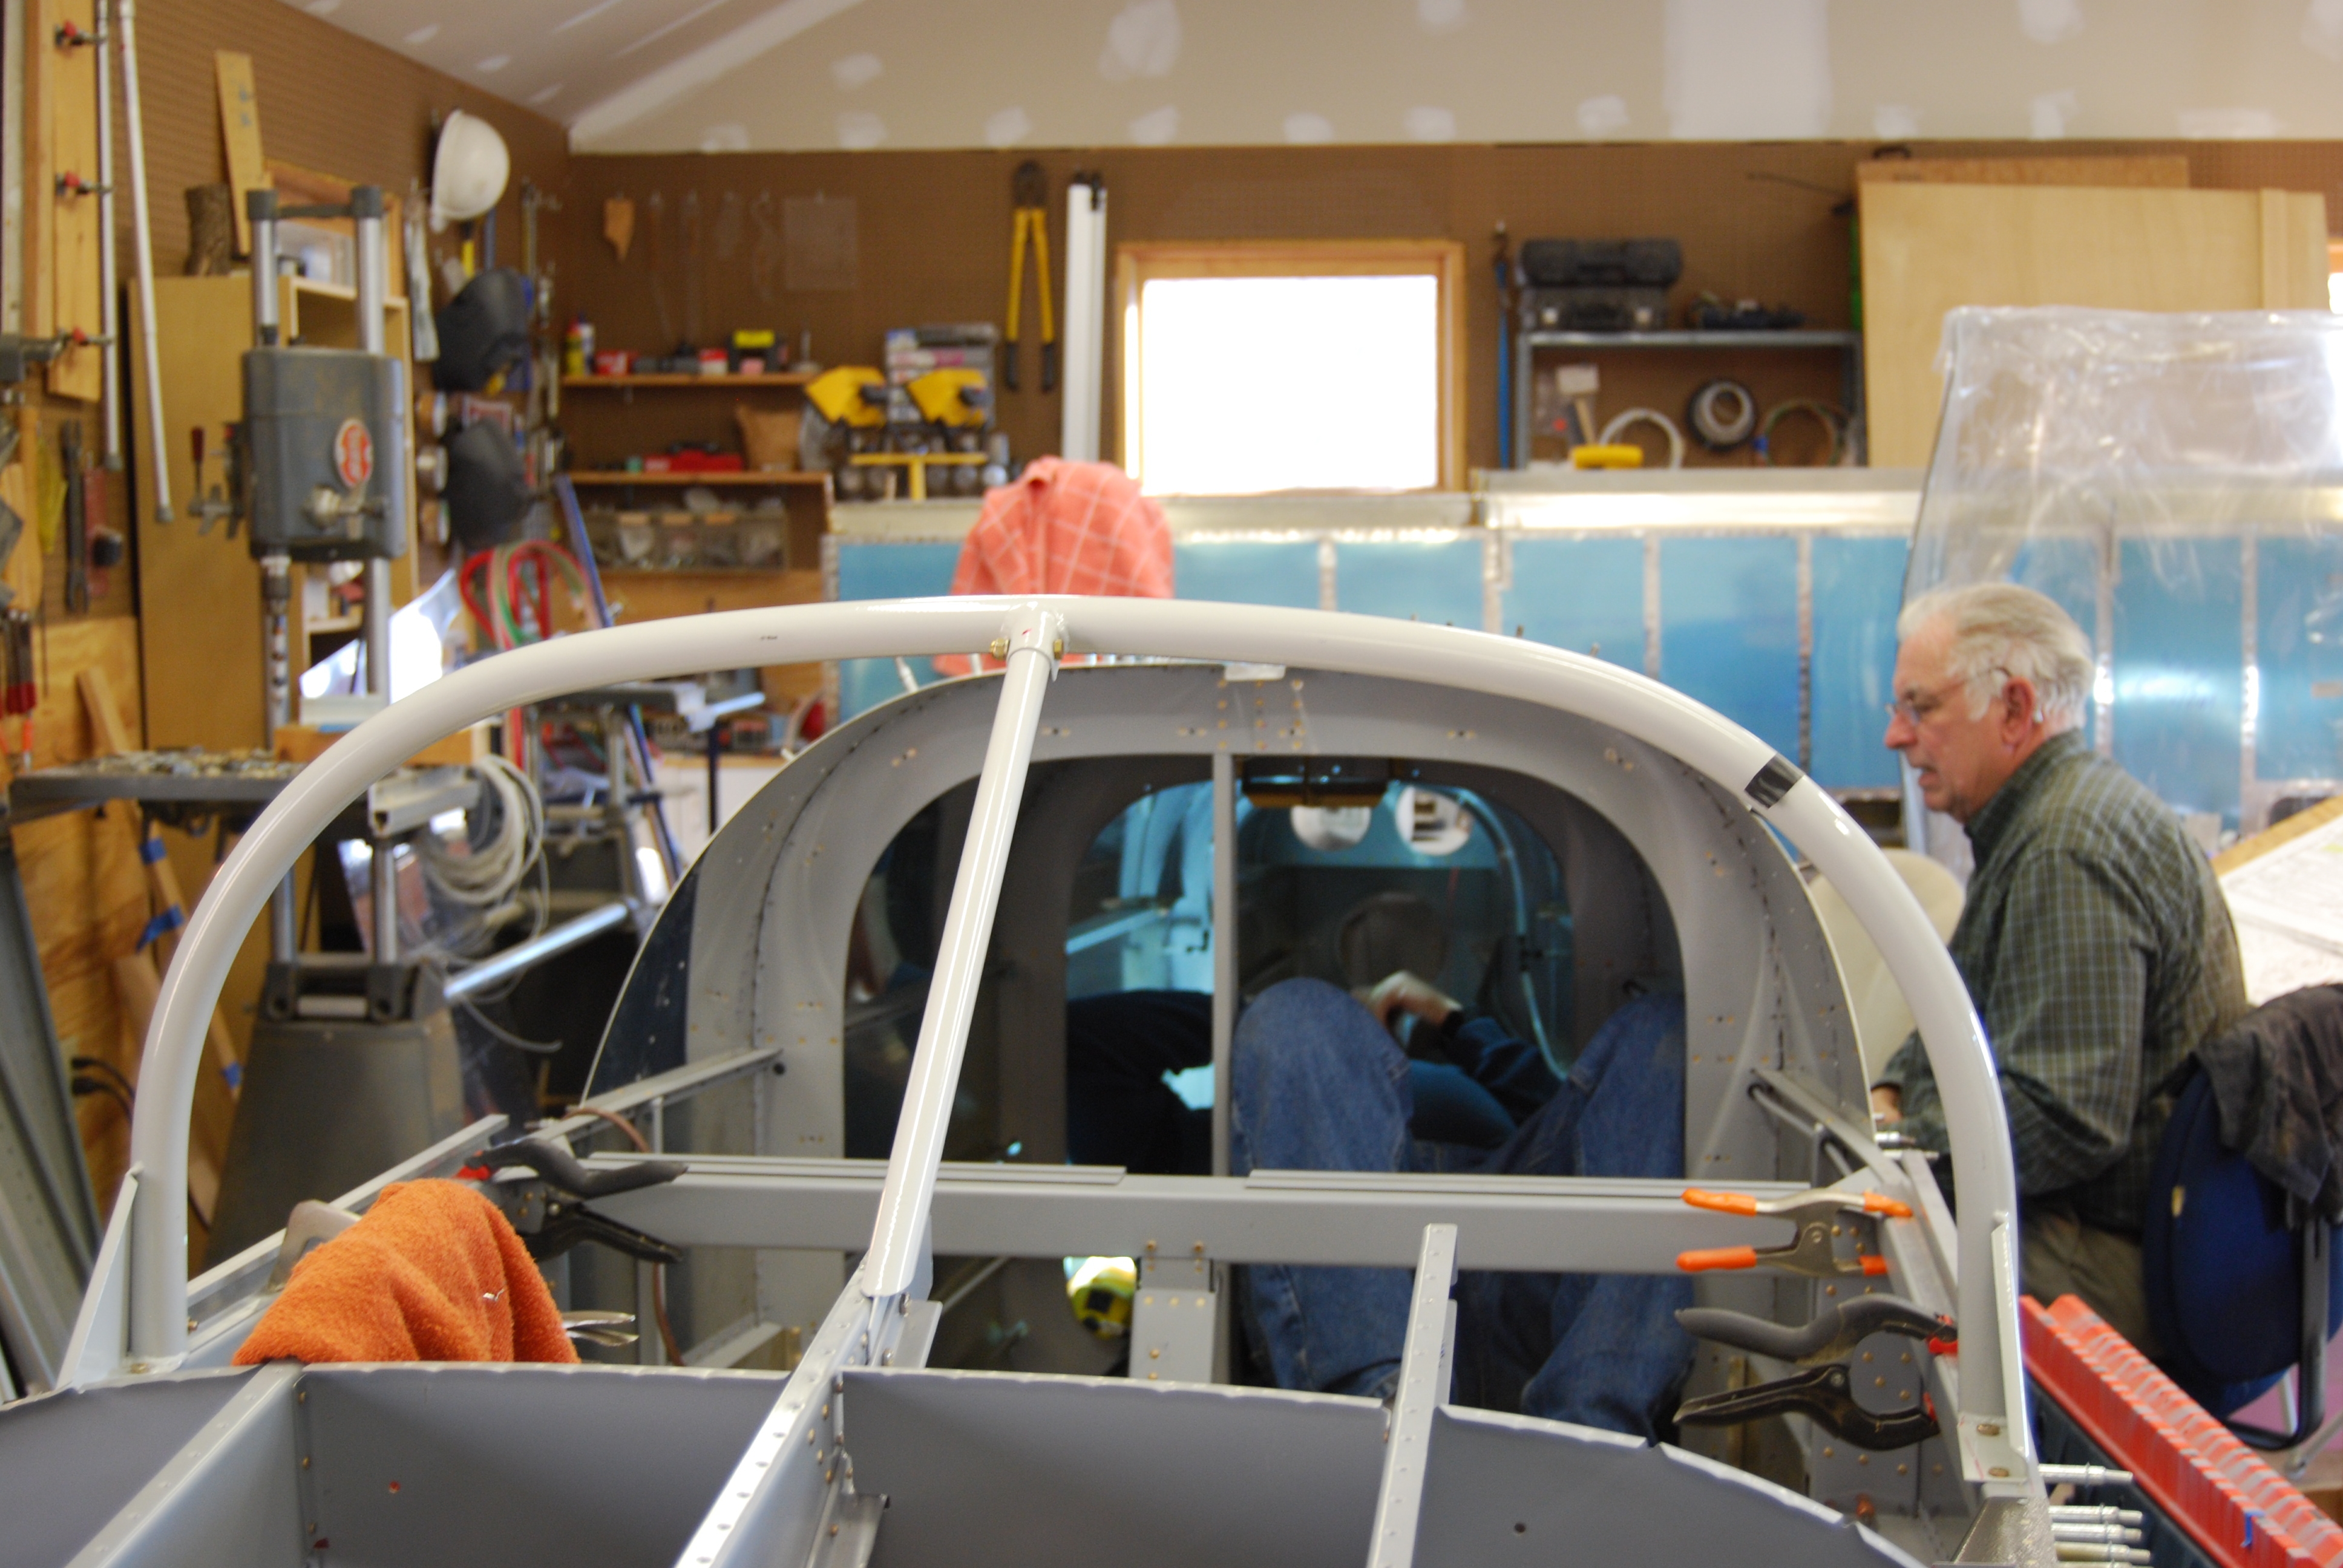
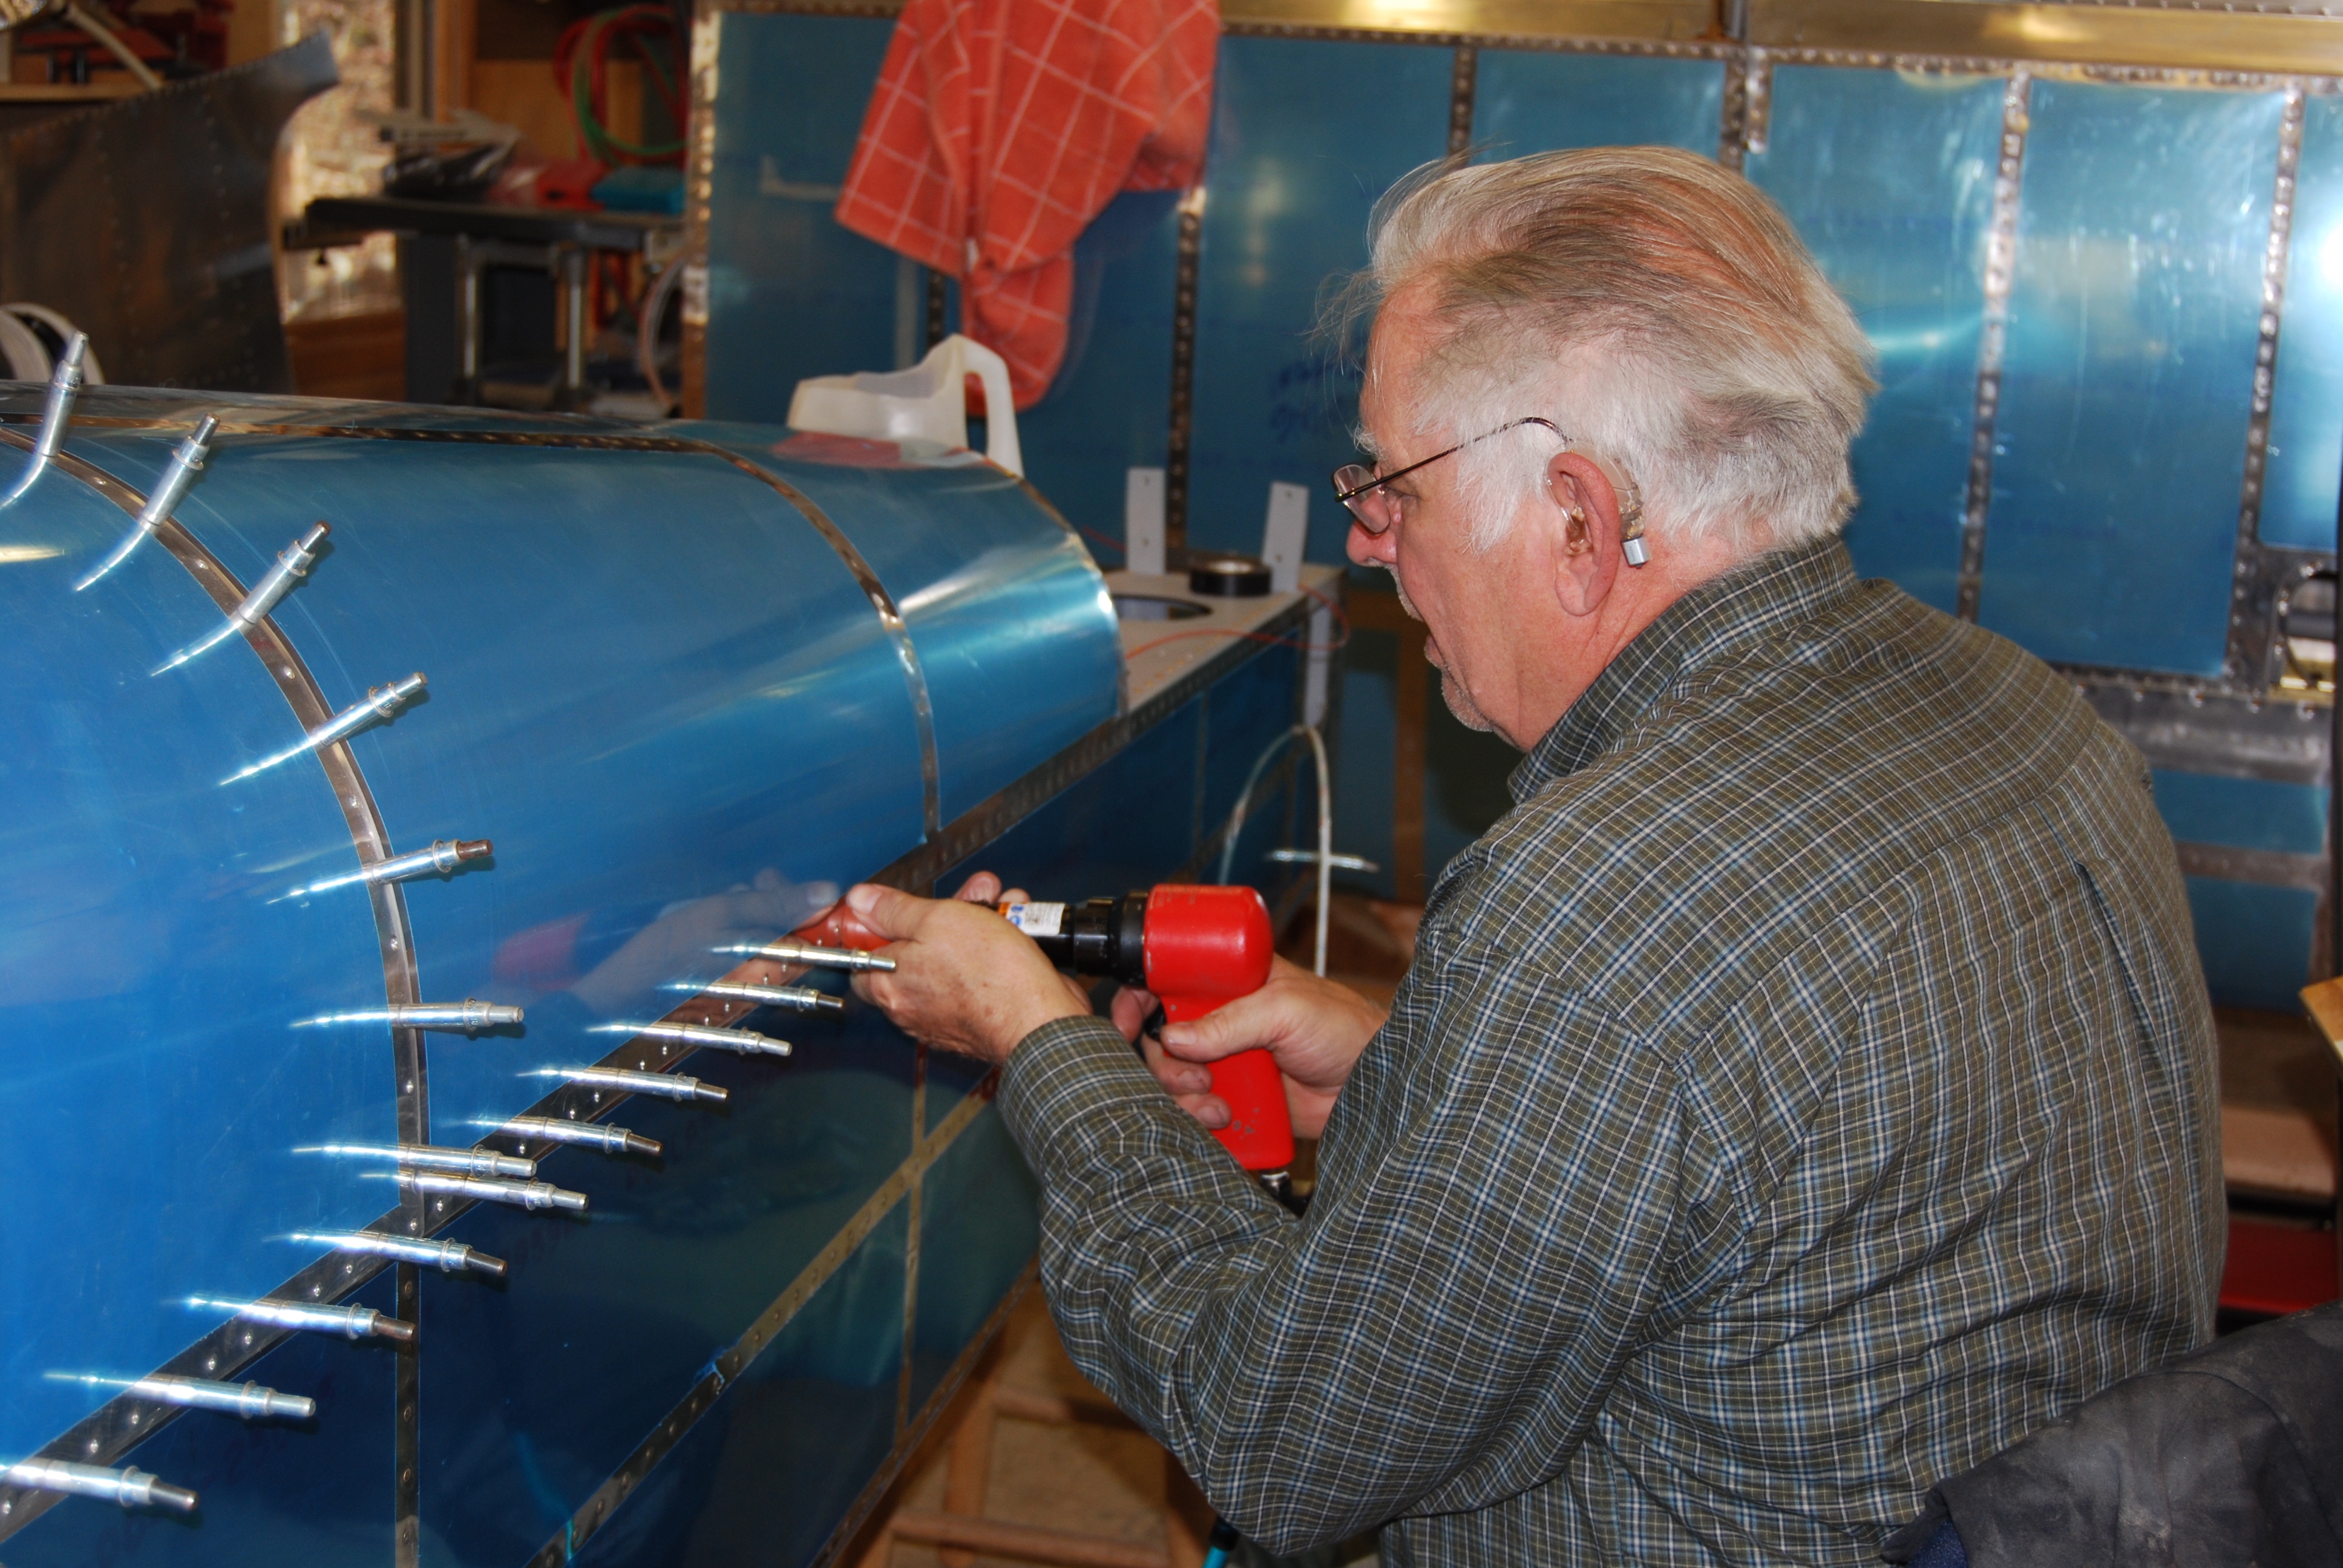
| 2/24/08 | My old riveting buddy Bill
Martin and his wife, Peggy, spent the weekend with us so we
spent most of the time in the shop. Before riveting the
top skins I mounted the magnetometer bracket for the Advanced
Flight Systems EFIS. We had to mount the bracket with a 7
degree slant to match the angle of the EFIS screen in the panel. We spent the next 5 hours riveting the top skins.
|
8.0 |
| 3/7/08 | I took the day off work so I
could get some work done on the plane. I need to finish
painting the interior so I went ahead and cut off the "ears" on
the roll bar using my Dremel tool with a cutting disc.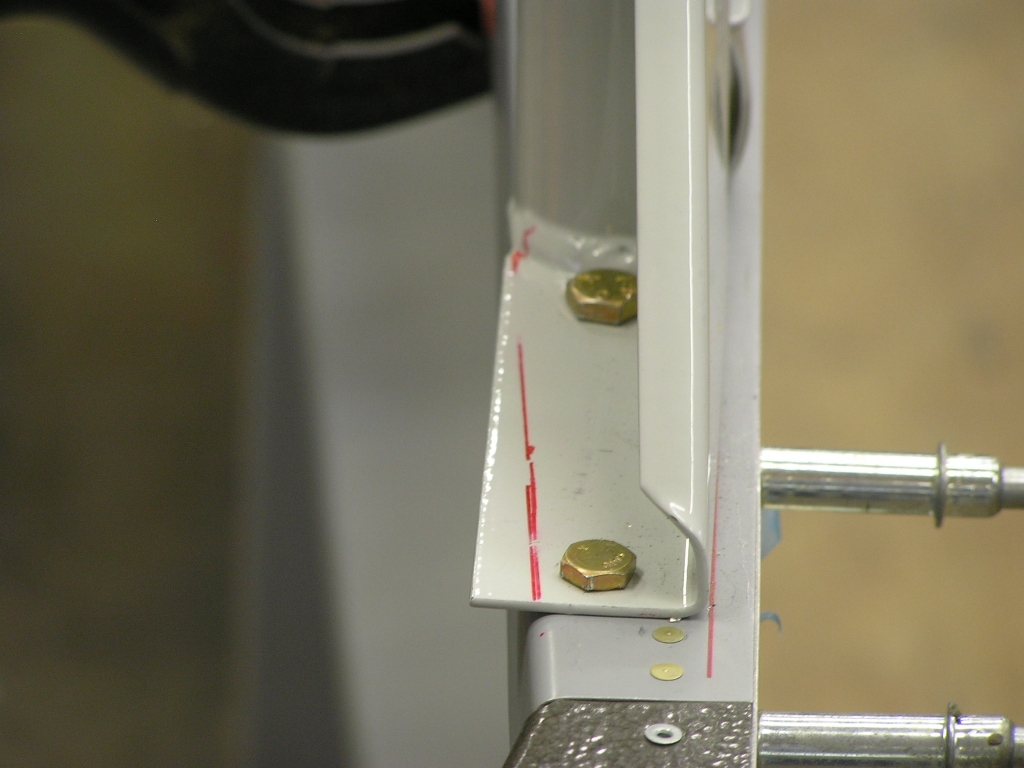 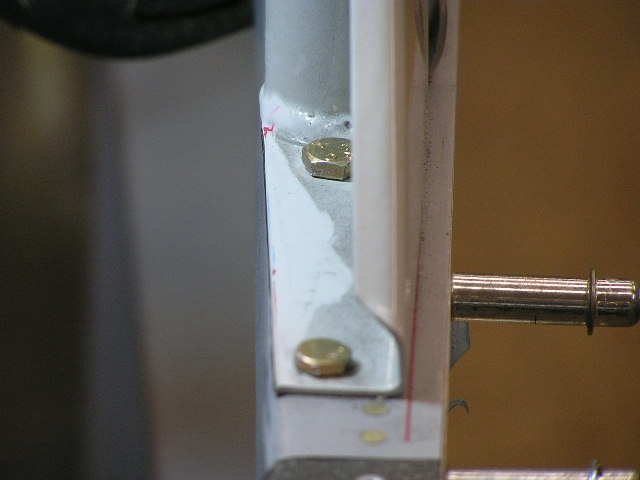
After masking off the rest of the interior I went
ahead and shot it with the Rustoleum hammered gray. I am
only hitting the areas that will not be covered by the interior
carpeting or upholstery. I went ahead and painted the roll
bar. |
2.0 |
| 3/8/08 | I painted the slider frame as
well.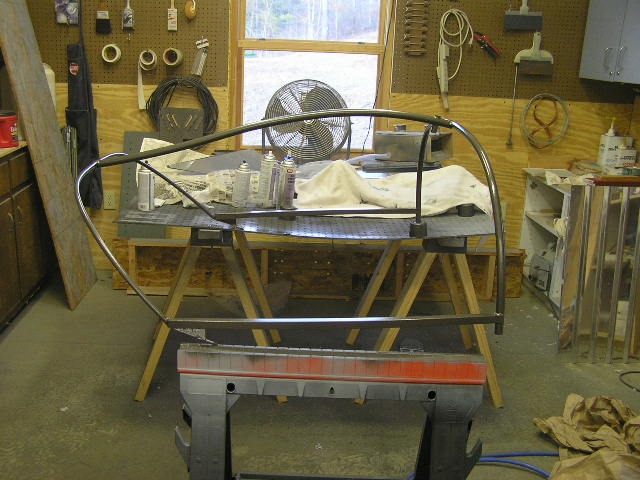 |
.5 |
| More Canopy Fitting | ||
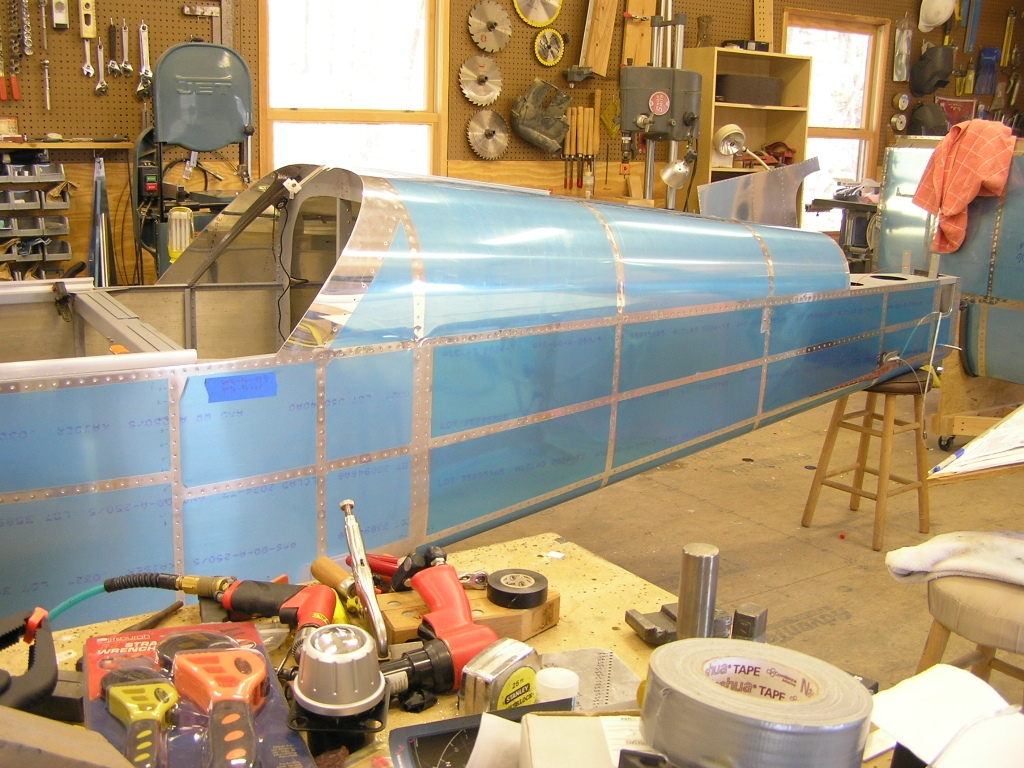
| 4/19/08 | Today I re-installed the slider
and re-checked all the measurements. So far, so good. No
major canopy frame tweaking required. I drilled the slider
rails as well as the rear slider rail. I finished by
setting the canopy on the fuselage to get a new perspective.
I really appreciate having Ben helping out with the fitting.
He helped confirm I wasn't missing something.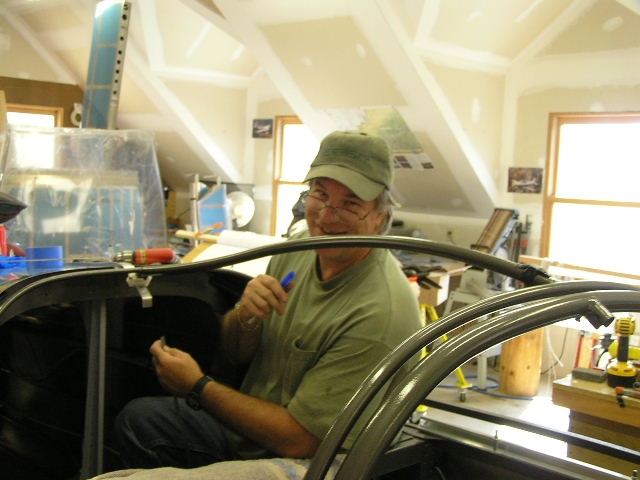 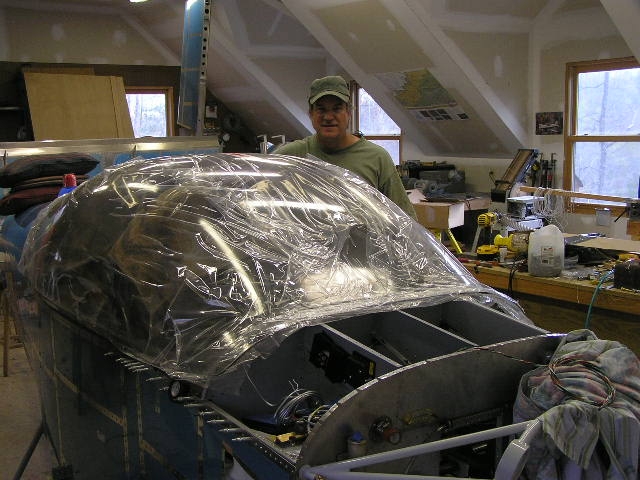 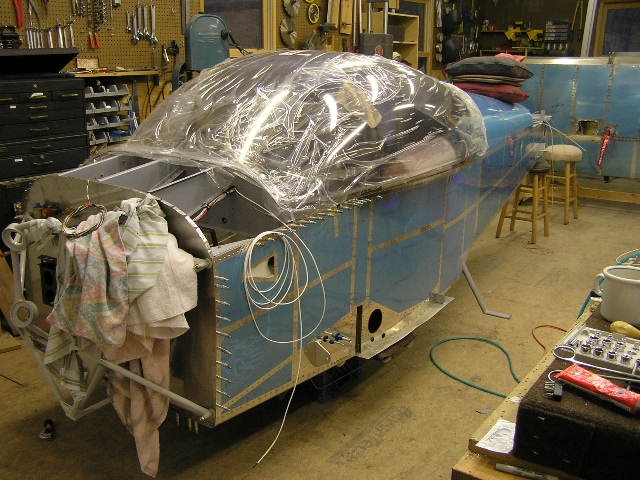 |
2.0 |
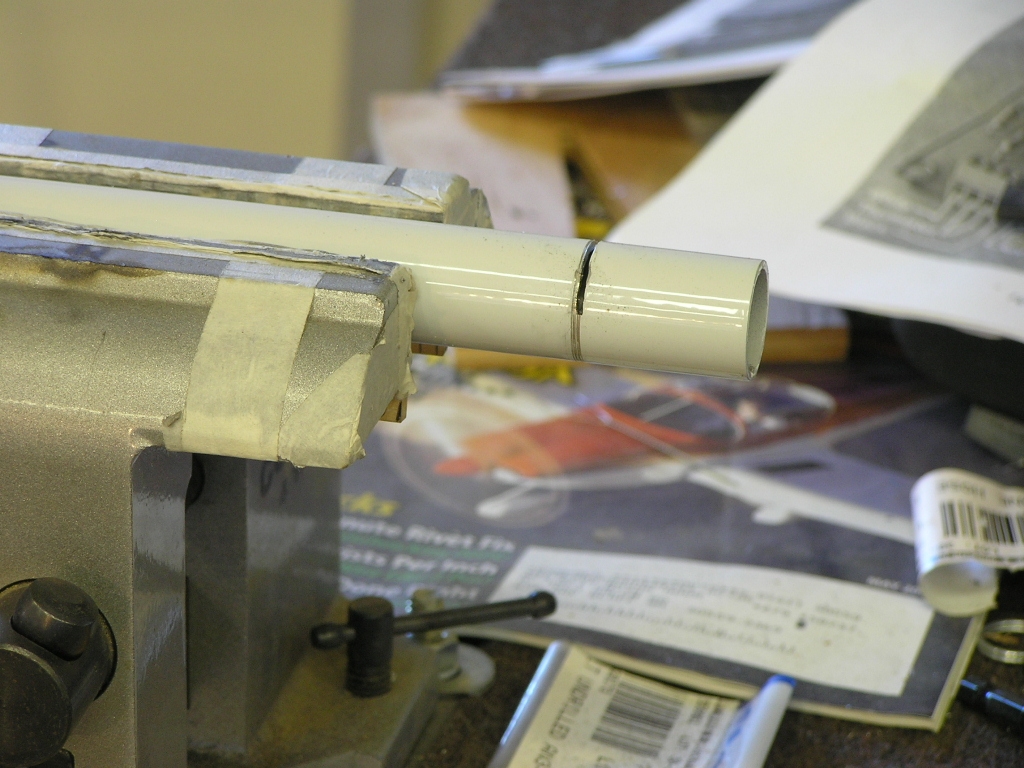
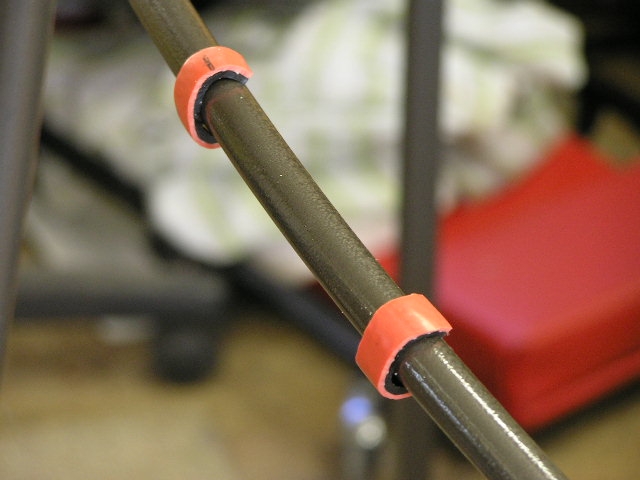
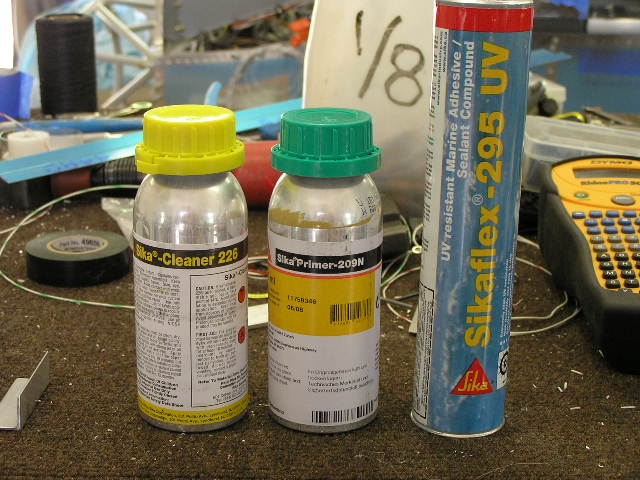
| 4/27/08 | I have received my Sikaflex as
well as the primer and cleaner from
Jamestown Distributors. I also bought two feet of
5/8" diameter hose for the canopy standoff. This hose has
a wall thickness of between 1/8" and 3/32".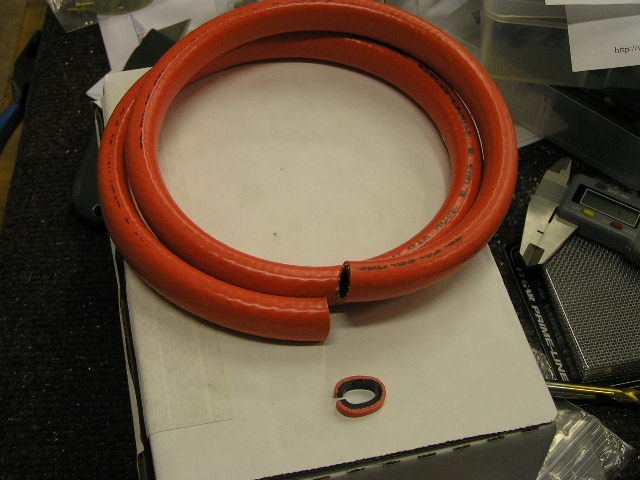 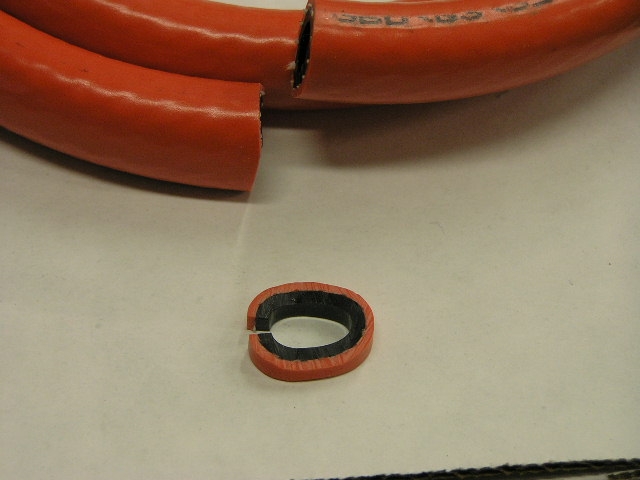 |
|
|
Trimming the Canopy |
||
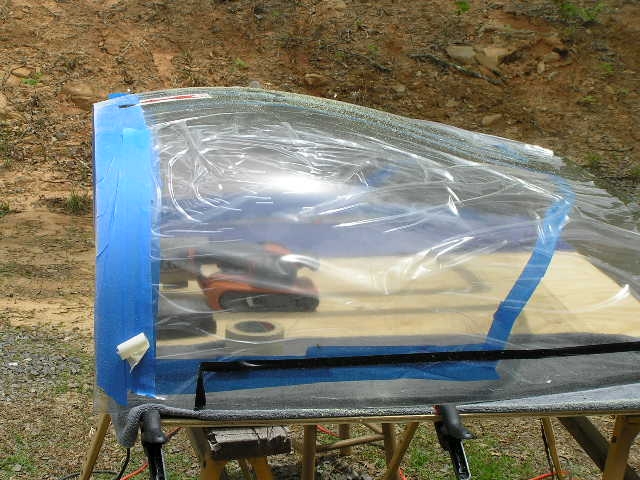
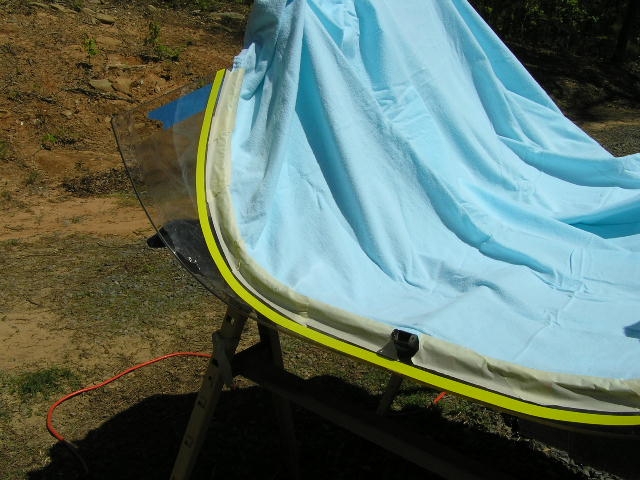
| 5/2/08 | Today I took the plunge and
trimmed the canopy. I found these cut-off wheels for the
Dremel that are made for cutting plastic. They cost $10.00
for five discs but after cutting off all four flanges the disc I
was using still looks brand new.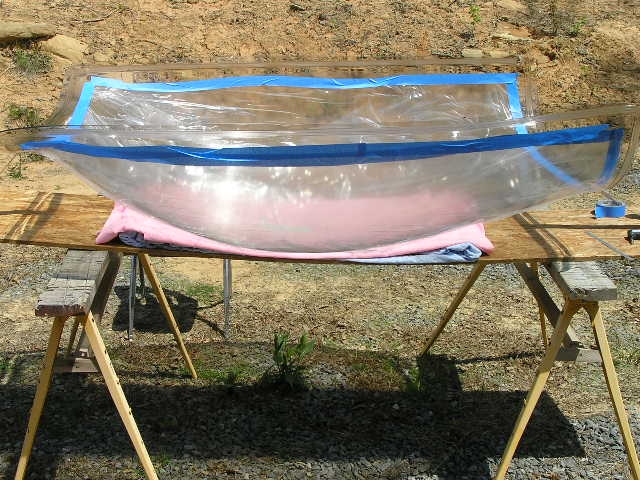 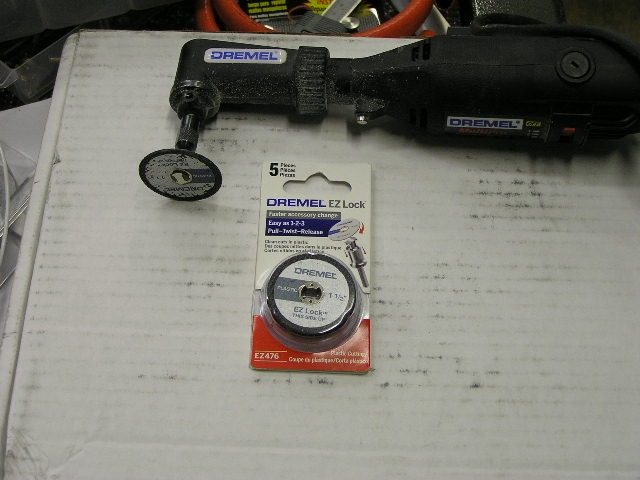
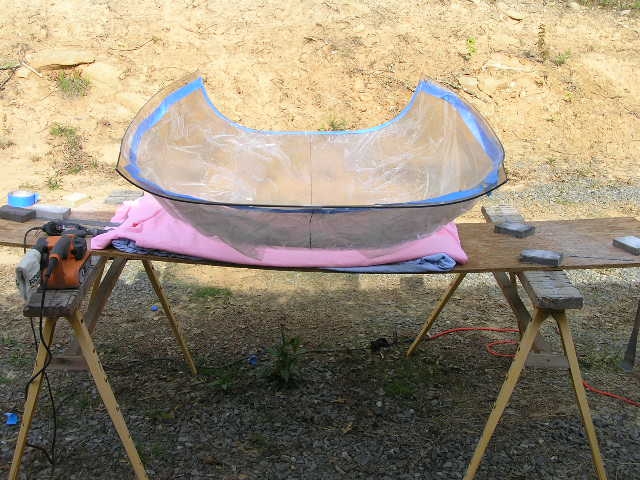
I set the canopy on saw horses outside in the sun
to really warm it up. After each cut I sanded the edge
using my belt sander with 120 grit then using various grits of
sanding pads (220, 320, 400) until the edge was smooth with no
cut marks. |
4.0 |
|
Fitting the Canopy |
||
Next, I put the slider frame
inside the canopy and determined the "best fit" position and
marked the latch hole. I used a Unibit and drilled to
11/16" to allow for paint on the latch as well as canopy
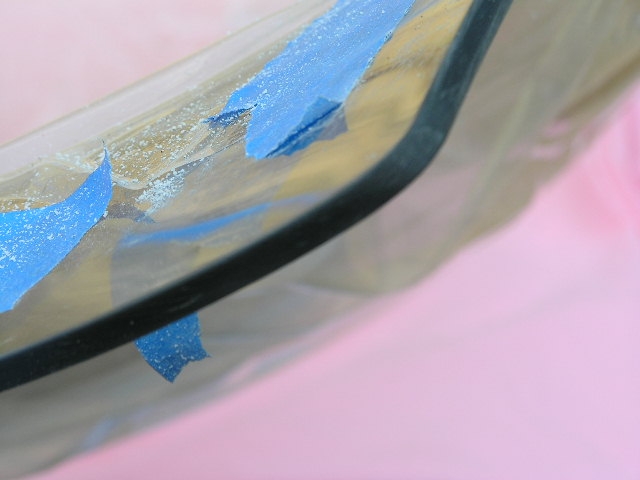
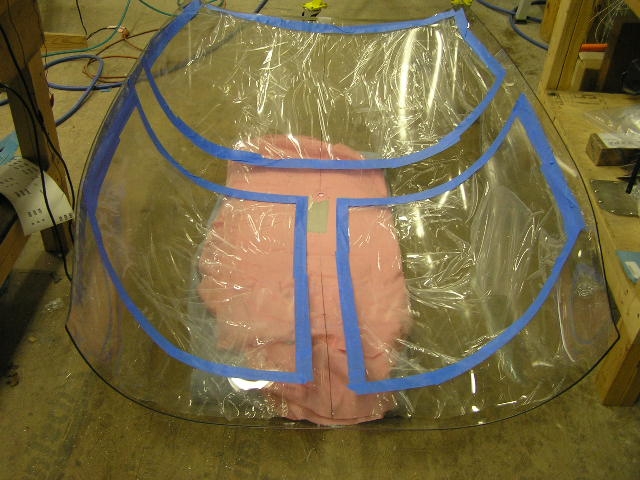
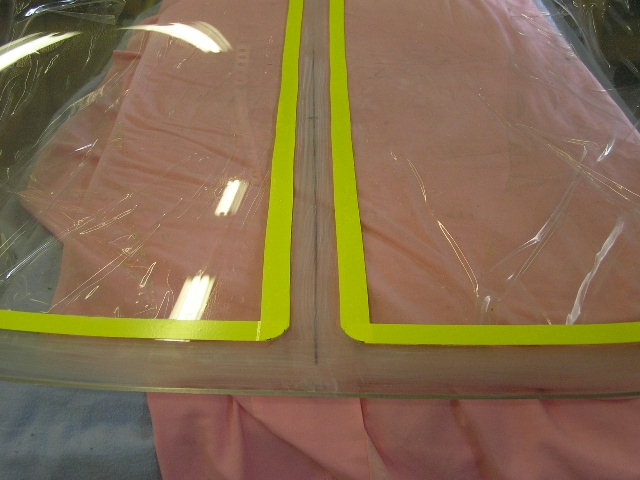
contraction and expansion.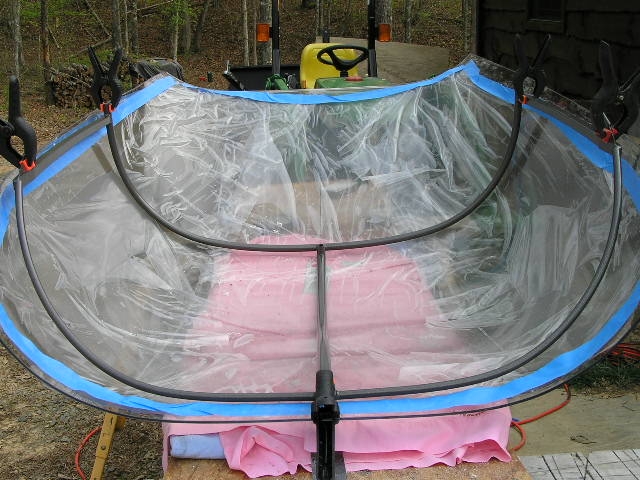 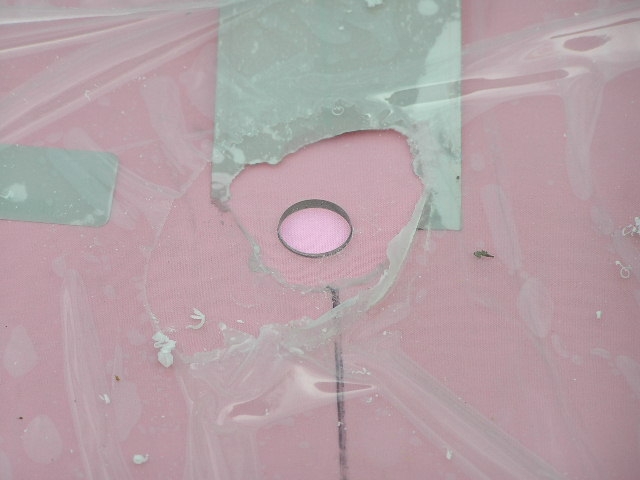 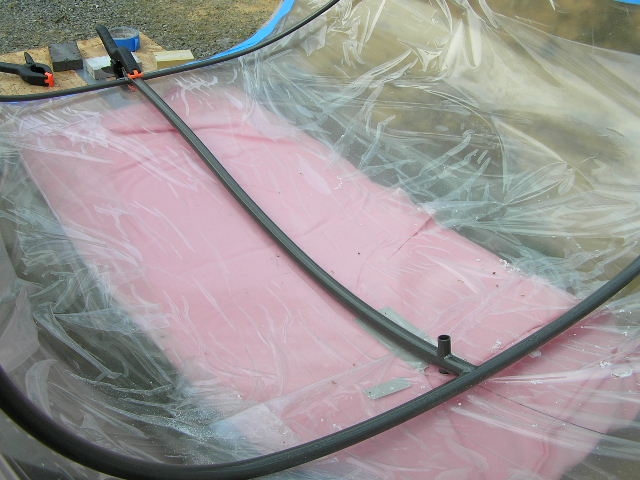 I trimmed the protective plastic back from the future glue and cut lines and taped the edges down. (NOTE: Normally
the Plans would have you trim the sides even further at this
point but if do, the sides of the windscreen are too short.
The best suggestion by other builders is to go ahead here and
make the BIG CUT. The sides for the slider frame can then
be cut as needed.) |
||
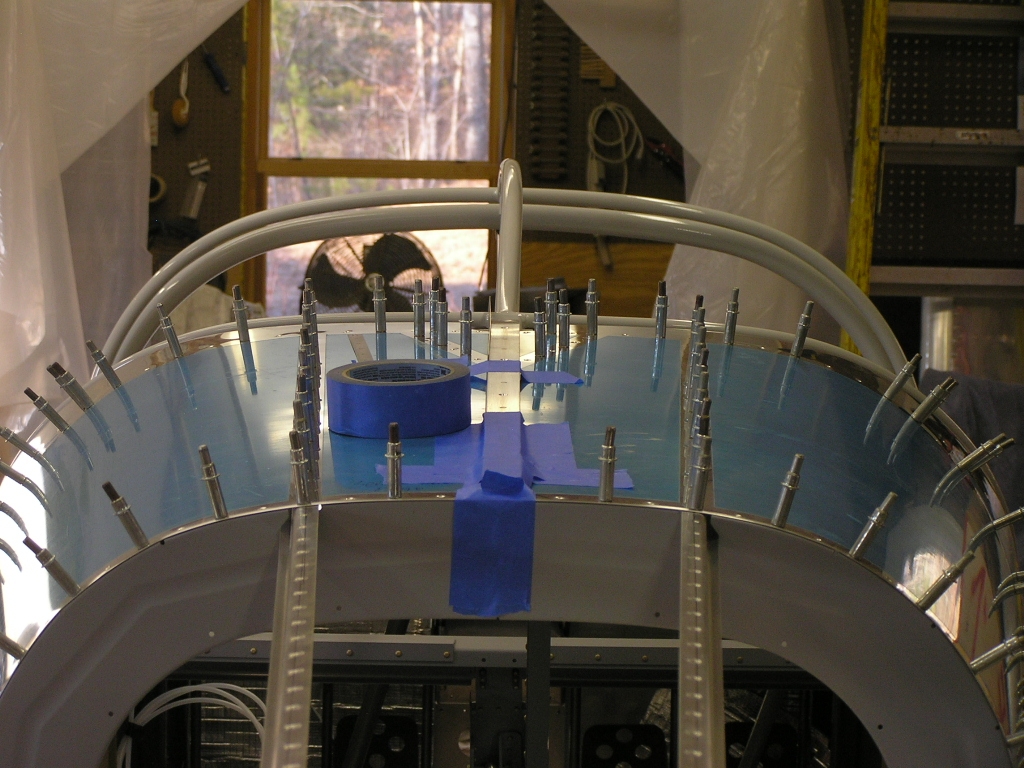
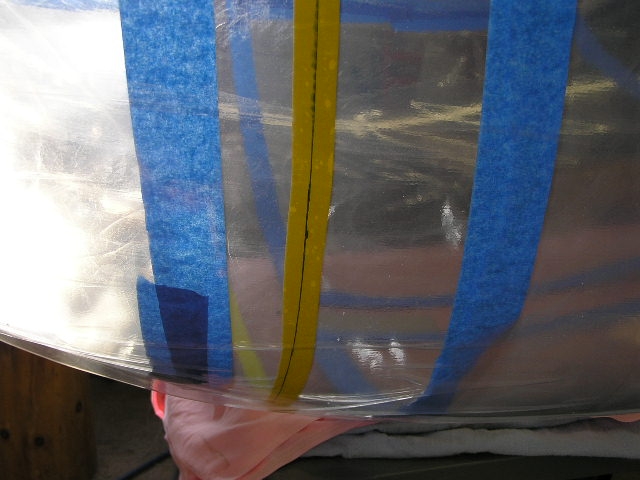
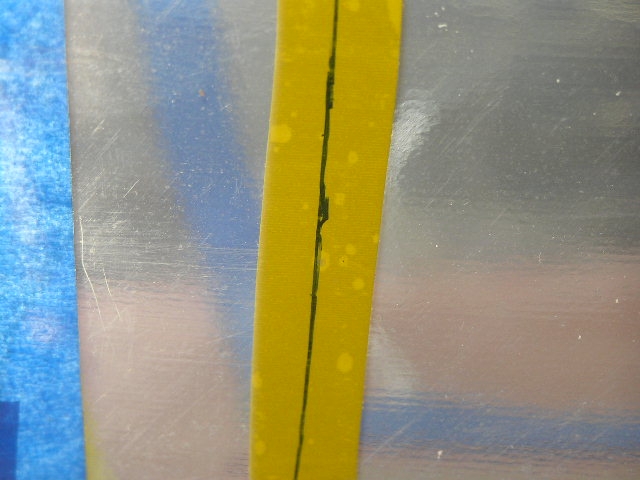
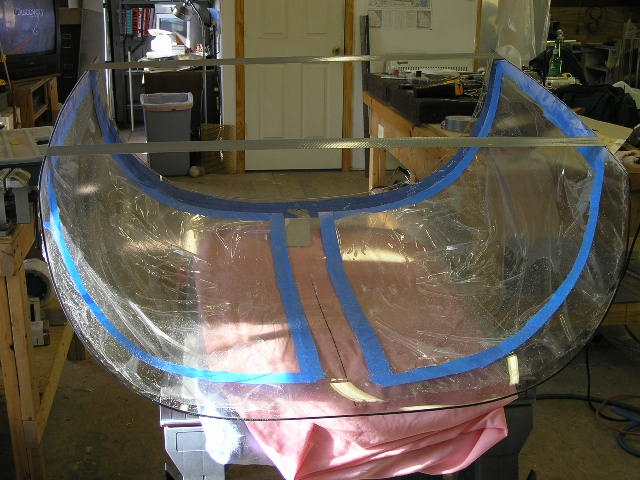
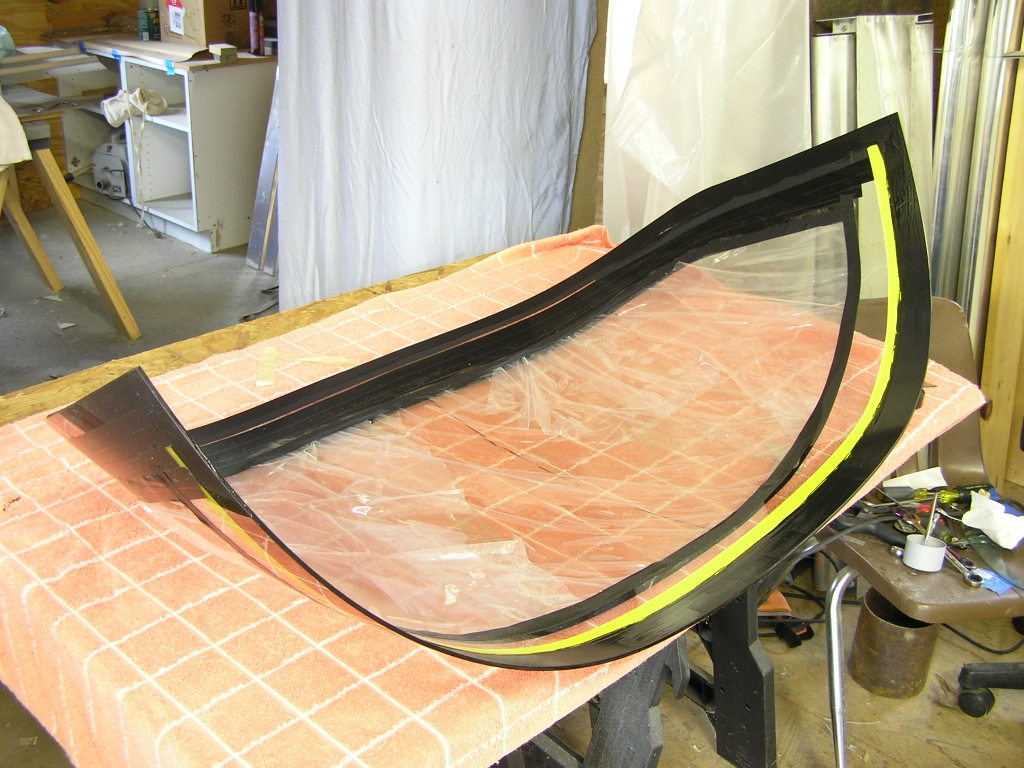
| 5/3/08 | Today it rained most of the day
and the temps are only in the low 60's so it's too cold to make
the big cut. I did, however, use a spare bolt to snug down
the canopy to the slider frame and mark the forward cut line.
I used a small block of wood as a gauge in order to make a mark
3/32" forward of the front slider bow.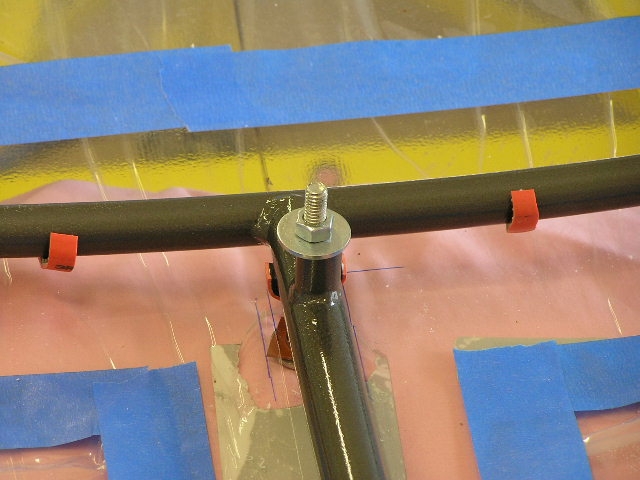 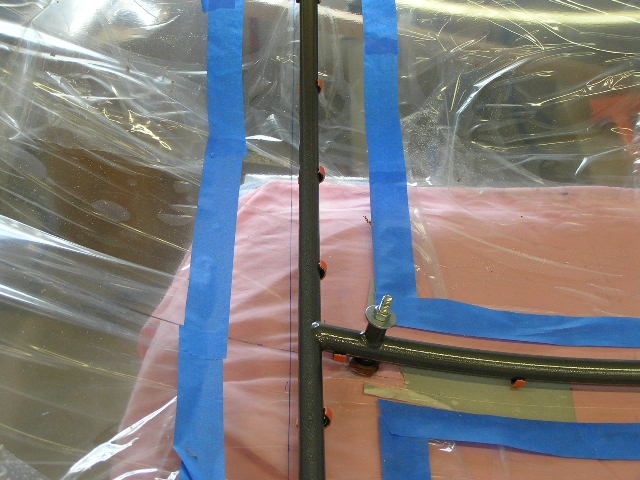 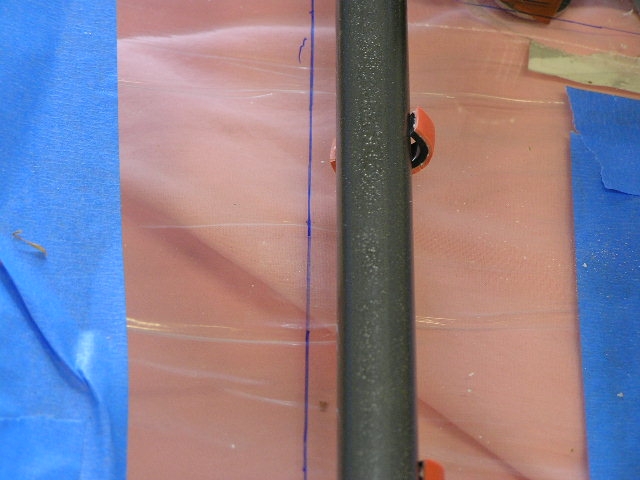
I then used yellow electrical tape over the cut
line to make it more visible from the outside of the canopy. |
2.0 |
|
The "BIG CUT" |
||
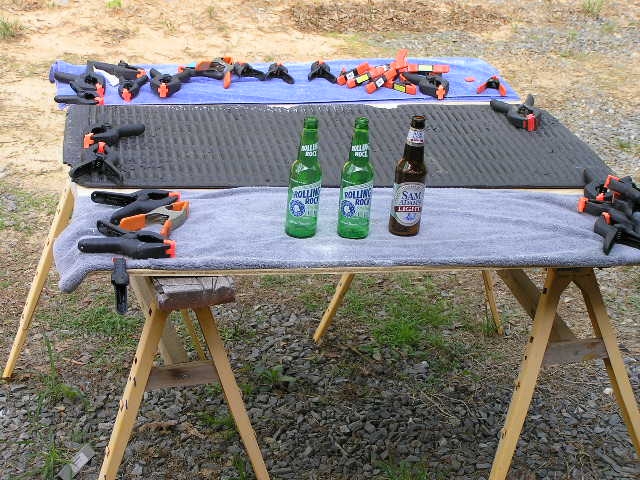
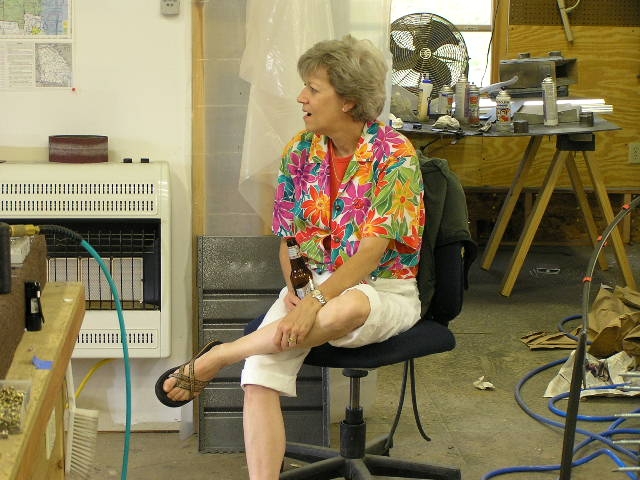
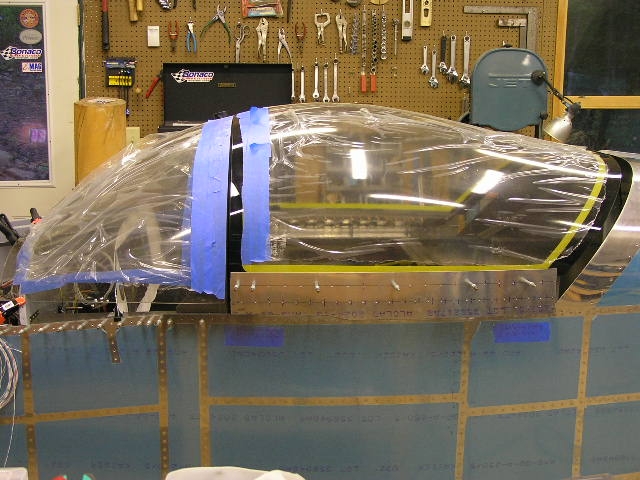
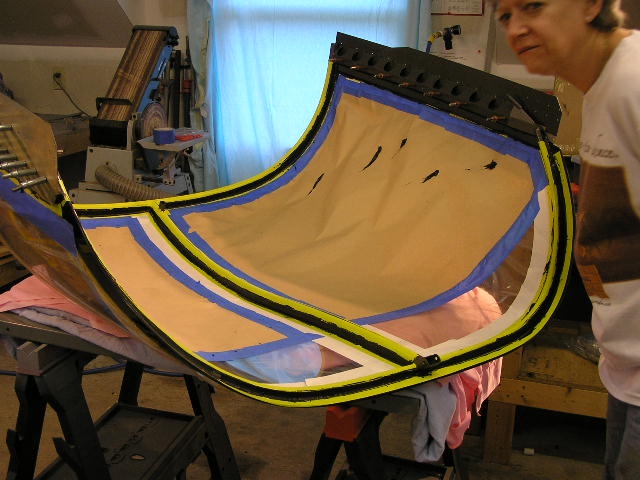
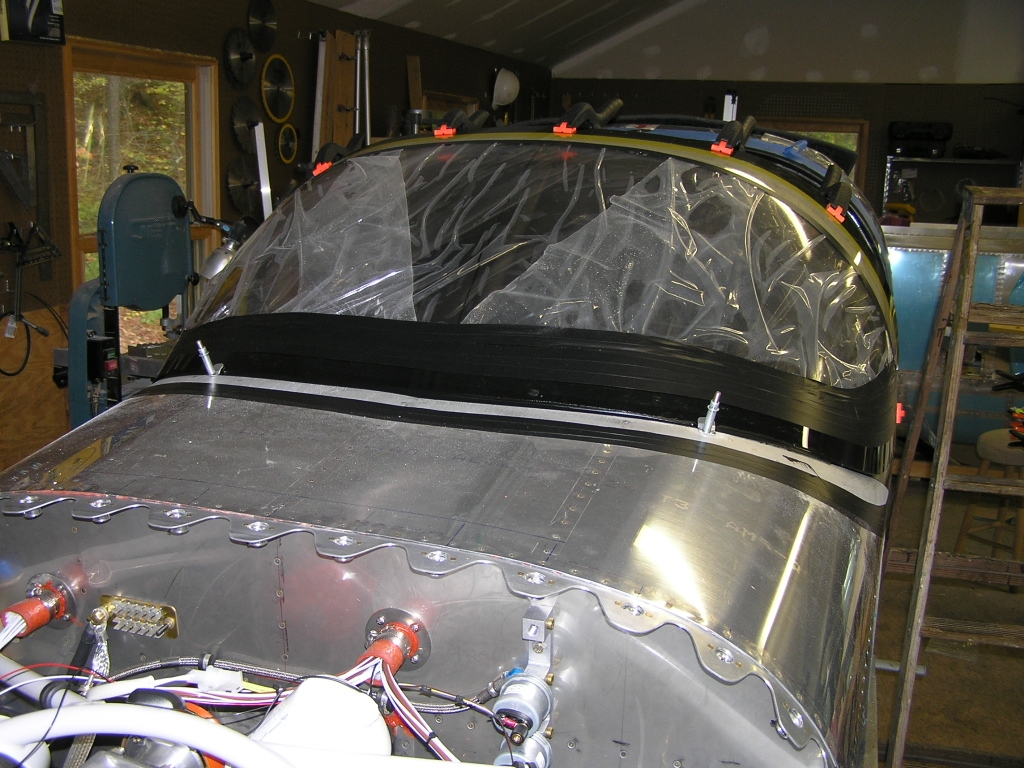
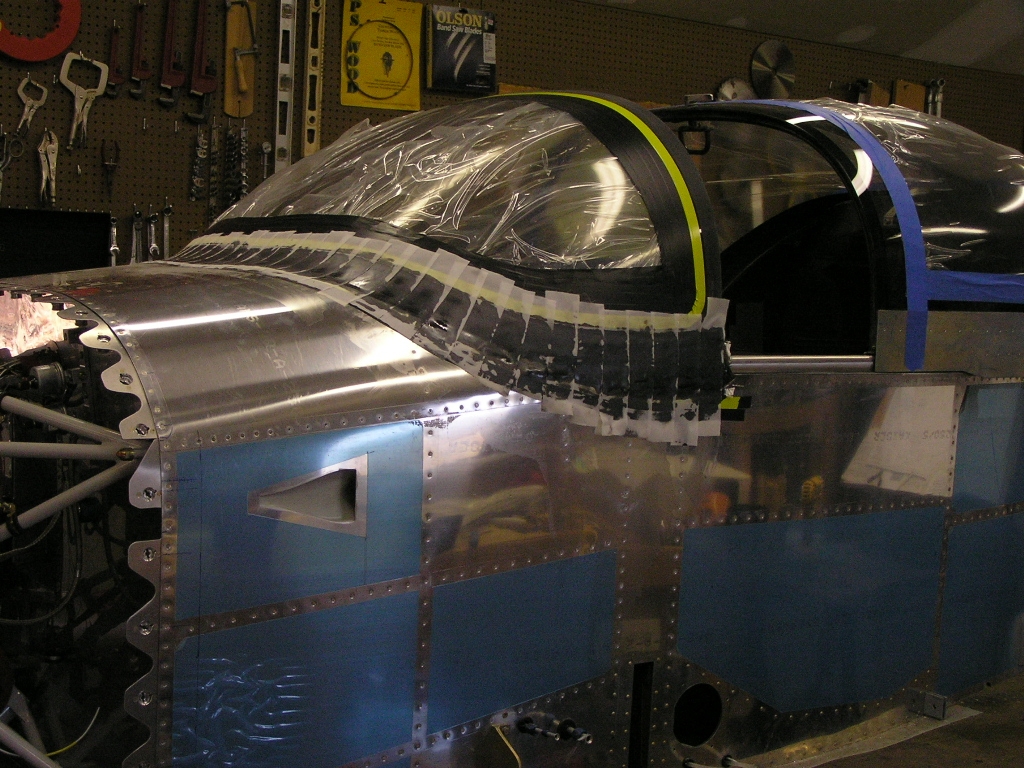
| 5/10/08 | Today was the day. The
temps were in the upper 70's and I was home alone.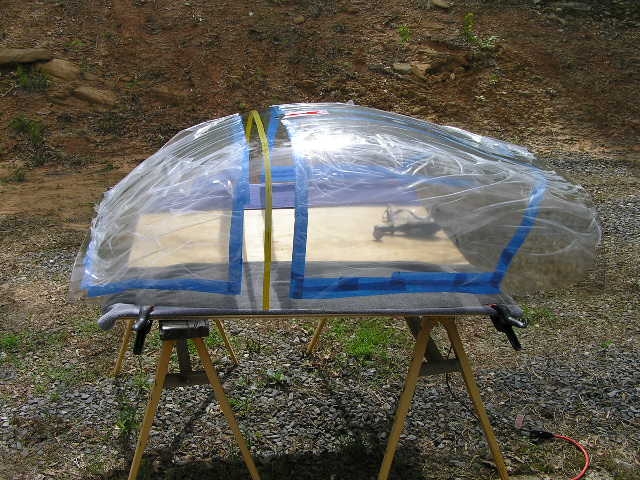 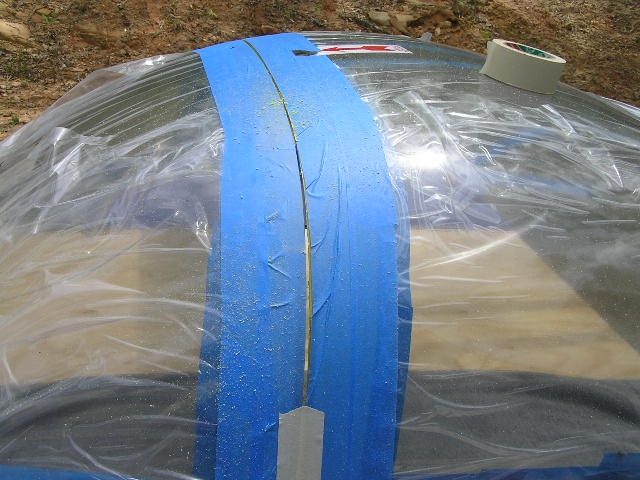 
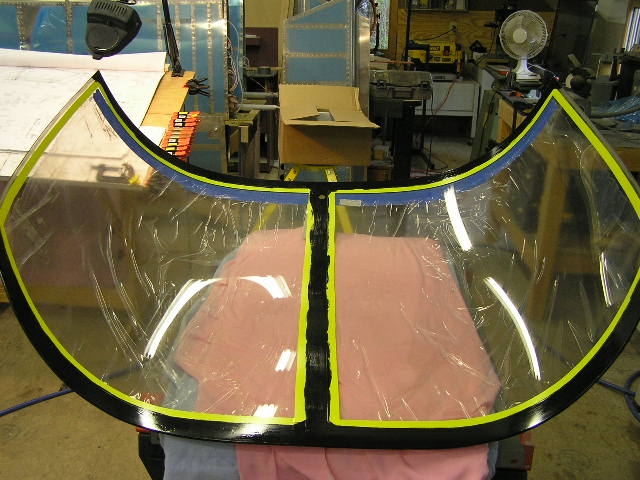
And here is the rear... And I had to lay up the windscreen just for
effect. I still needed to trim the rear of the slider
frame canopy so I clamped in the frame and taped off the cut
line 1.0" behind the aft bow. I also trimmed the sides to
be 3/8" above the square side tubes. After cutting, the plexiglass is really
"floppy" so I used duct tape to hold it together. Whew! Cutting the canopy is a stressful
and tiring event and I'm glad it is behind me. Someone
asked me how long it took... Three beers. |
6.0 |
| 5/11/08 | Happy Mother's Day! I
celebrated by scuffing and painting my slider frame rollers and
placing the cut canopy on the plane...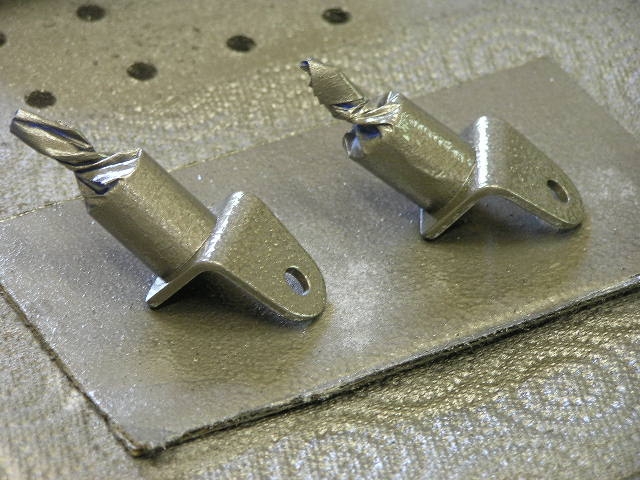 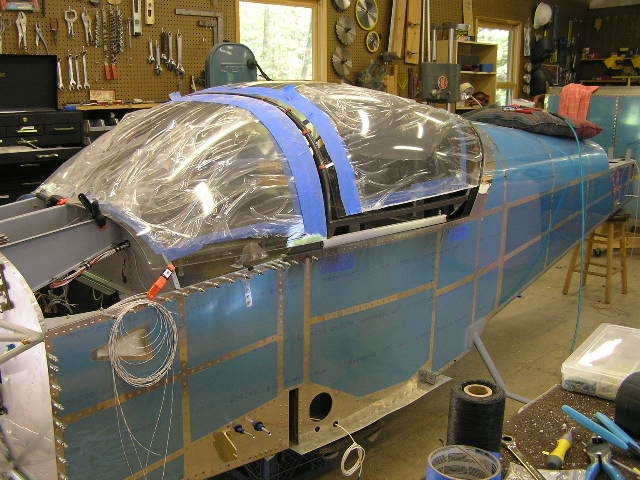 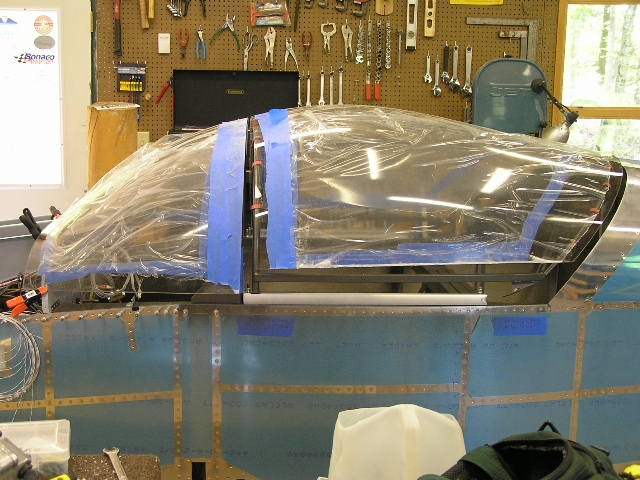
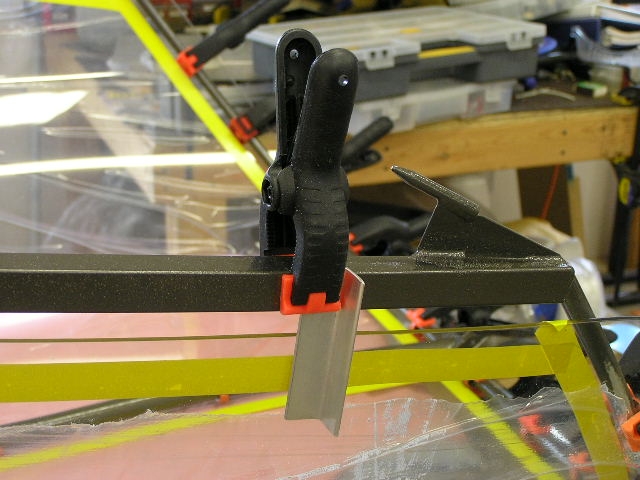
I cut some pieces of angle 3.0" to use as
brackets to hold in the canopy sides. I then placed the frame inside the canopy and
masked off for the primer. Here you can see the angle brackets at work.
The sides of the canopy have been cut 3/8" above the side rail. Gluing the Slider Frame Canopy I decided long ago I was
going to glue my canopy using Sikaflex 295 UV. The proper
procedure requires using the Cleaner and Primer as well.
I scuffed the top section of the slider frame
with 150 grit sandpaper to allow good adhesion.
I then scuffed the inside of the canopy with the
sandpaper. This really hurts to intentionally scuff up
perfectly good plexi.
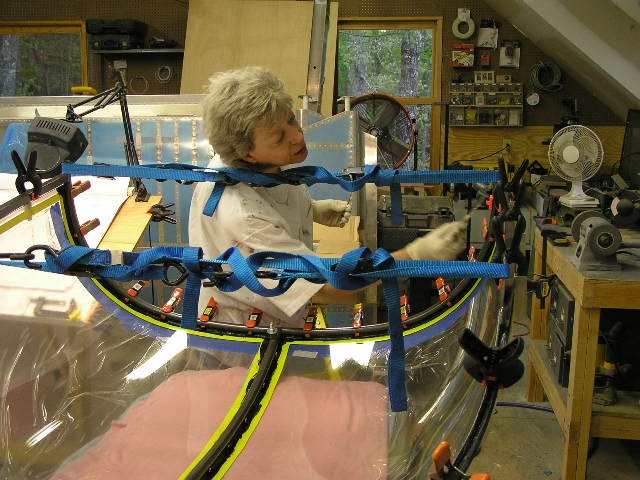
I got Lynne over for the next part. After
taping off the slider frame and cleaning it and the canopy with
the 226 Cleaner we primed them both with the 209-N Primer.
(IMPORTANT! We were using plastic cups to hold the primer as we brushed it on and within a couple minutes the Primer ate through the cups! Fair warning.)
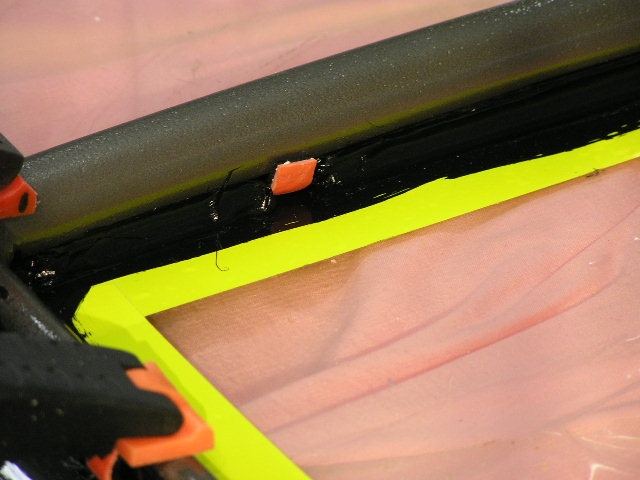
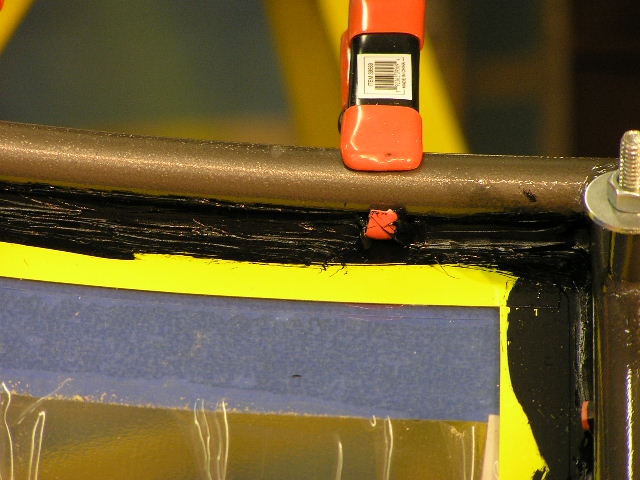
After
about 10 minutes we placed the hose spacers back on the slider
frame and placed the frame on the canopy and clamped. It
is also a good idea to pull the canopy sides in before gluing to
offset the canopy side pull. I used straps to pull the
canopy in about 3/8". While I applied the Sikaflex
adhesive, Lynne used popsicle sticks to smooth out the filets
between the spacers.
And a few
more pics. |
8.0 |
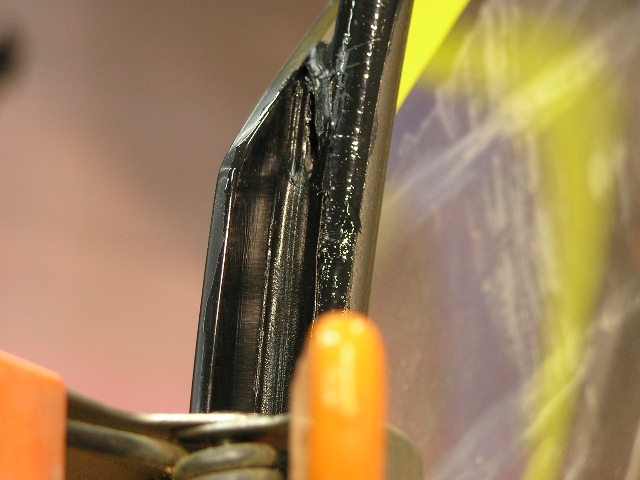
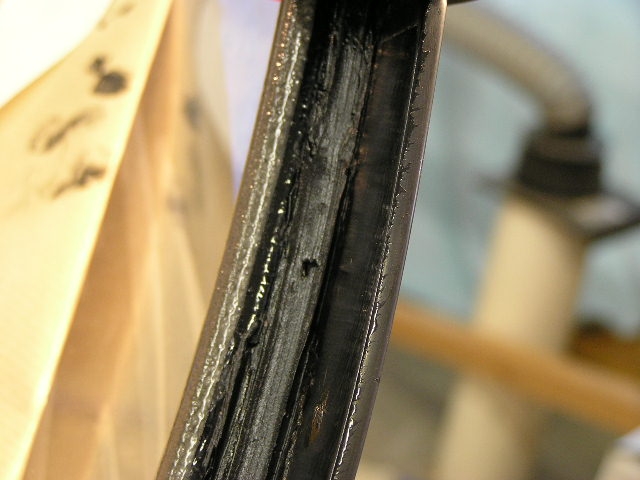
| 5/16/08 | I finally got out to remove the
clamps holding the canopy to the slider frame and used pliers to
remove the hose spacers. I must tell you that this was no
easy task. Even though I was careful to keep the Sikaflex
adhesive off the spacers the spacers that were simply "touching"
the adhesive were stuck pretty well. 
I also used a razor blade to trim the Sika in
preparation for the finish (cosmetic) coat which I will do once
the side skirts are ready to glue. I glued the entire
frame with exactly one tube of the Sikaflex and I don't want to
open another tube until I have a lot to do since this stuff
cannot be used again after it has been opened. |
2.0 |
|
Fitting the Side Skirts |
||
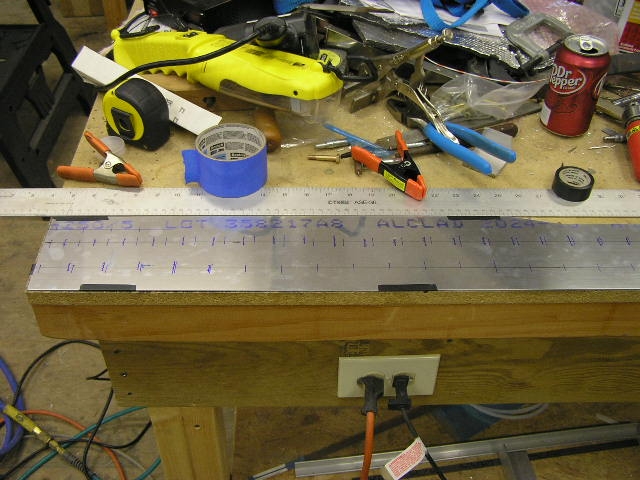
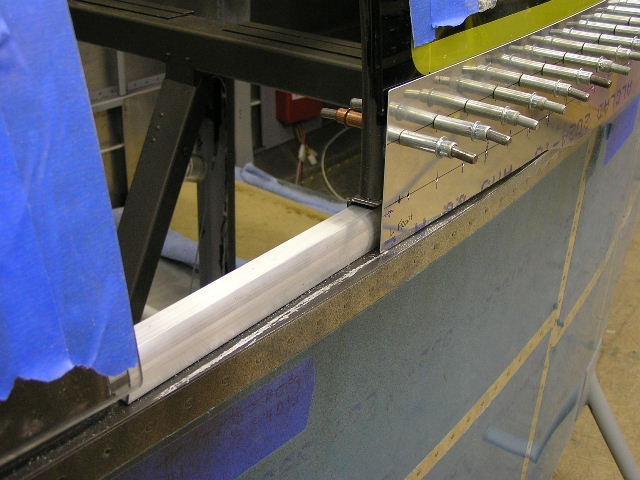
| 5/17/08 | I fabricated the C-791 canopy
skirt braces by trimming them to length and drilling the
lightening holes and deburring.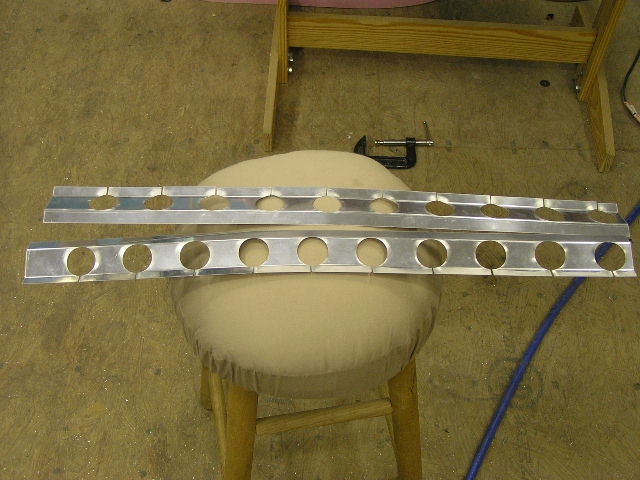
Before drilling them to the slider rails I used
some towels to cover the canopy to keep drilled shavings out of
the Sika filets and to keep from scratching the canopy. I
burned through two new #30 drill bits drilling into the steel
frame. |
4.0 |
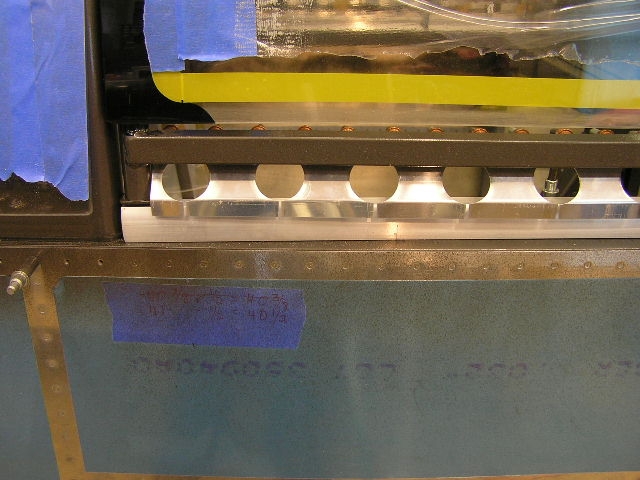
| 5/18/08 |
I got Lynne to help me place the canopy on the
fuselage and began to work on the side skirts.
After fitting the frame to the fuselage (prior
to gluing the canopy) the inside dimension between the two
rollers was 40 5/8". I had used straps to hold the slider
frame in about .75" when I glued the canopy to the frame to
compensate for the canopy "pulling out" the frame sides.
When I released the straps the frame only expanded to a width of
40 3/4". This allows the canopy to roll in the center of
the tracks with no binding at all. (I am REALLY pleased
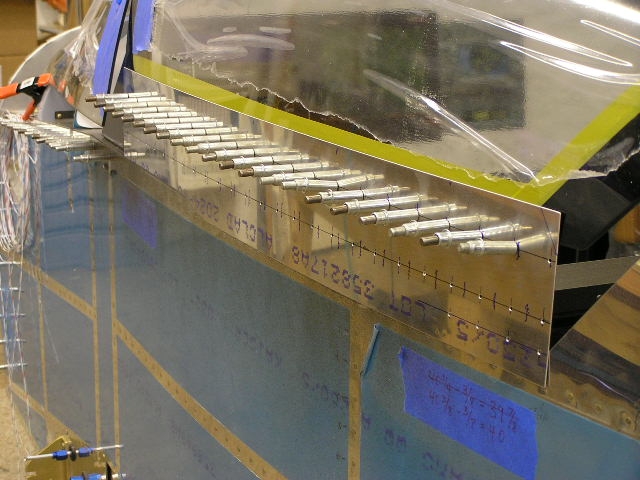
with how well this turned out). I carefully laid out the dimensions on both
C-660 canopy skirts by taping both skirts together (they are
symmetrical pieces) and drilled all but the top row of holes
that are designed to drill through and bolt the canopy. I
will be using the Sikaflex for this attachment. I also trimmed the C-759 inside canopy skirt
and then, measuring carefully and taping into position, I
drilled the C-660 canopy skirt and C-759 inside canopy skirt to
the slider frame side tube. I repeated for the right side
as well. |
6.0 |
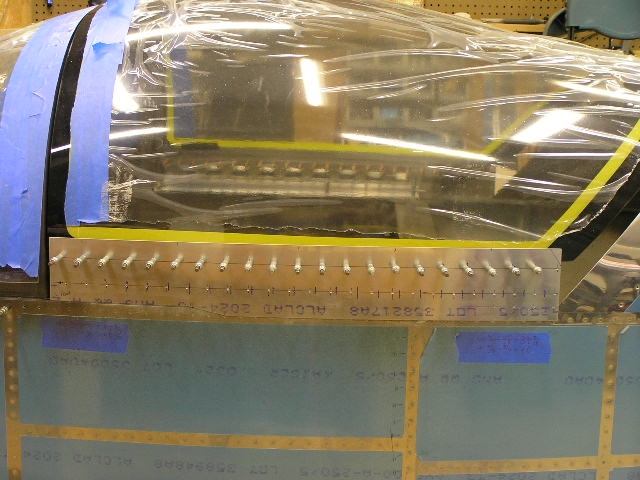
| 5/24/08 |
I got Lynne to crawl inside the plane and hold
the side skirt braces with a wood block while I drilled from the
outside and clecoed. I am pleased that the skirts are nice
and tight against the fuselage.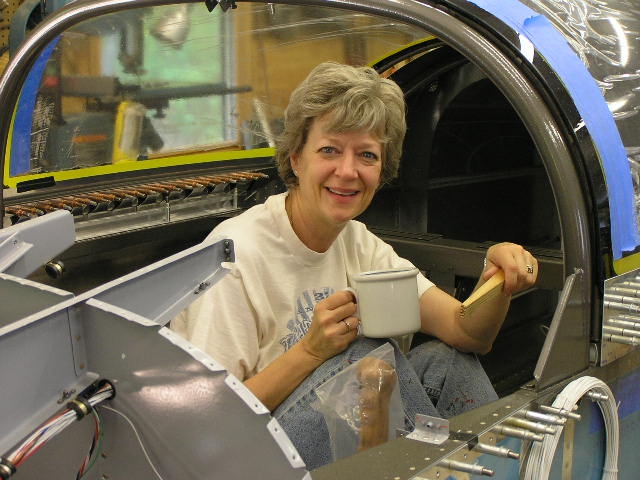 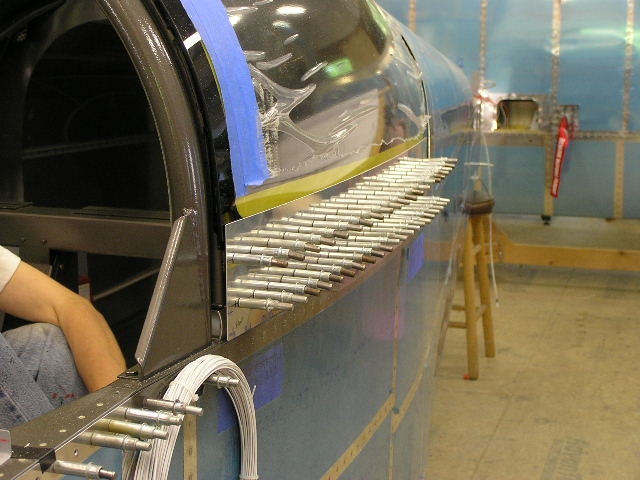
I removed the canopy and disassembled the side
skirts. I deburred the C-660 canopy skirts, C-759
inside canopy skirts and the C-791 canopy skirt braces.
The plans say the canopy skirts and inside skirts will be
riveted to the slider rail with MK-319-BS pulled rivets but also
says to drill the parts to #40. I had to enlarge these
holes to #34 in order for the rivet to fit the holes. |
2.0 |
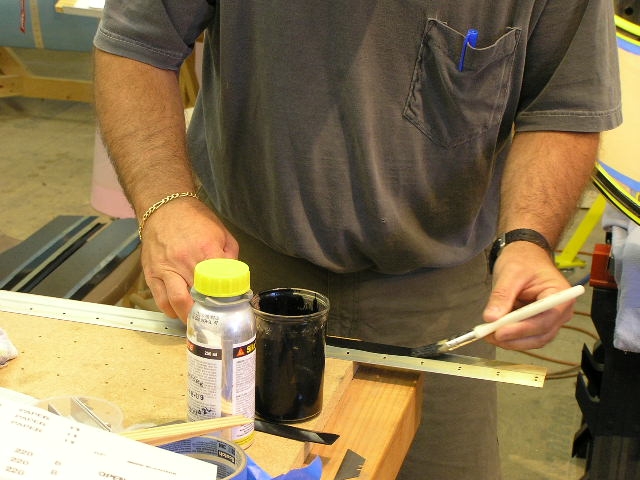
| 5/26/08 | Countersunk the C-660 canopy
side skins (except where the aft skirt will overlap) and
alodined. |
2.0 |
| 5/30/08 | Tonight I shot the inside of the
C-660 side skirts as well as the braces with rattle can paint.
I also taped off the slider frame in anticipation of applying
the finish fillet of sikaflex.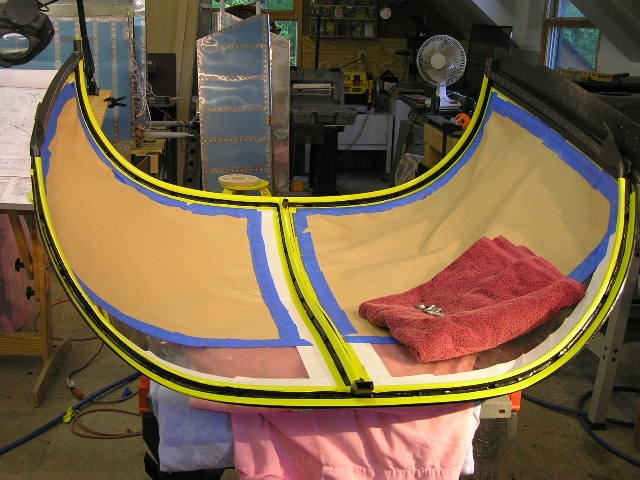 |
2.0 |
|
Gluing the Side Skirts |
||
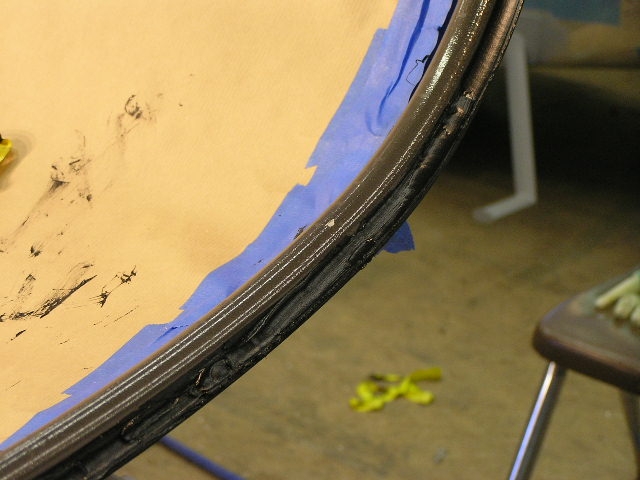
| 5/31/08 | Today was the day to sika the
side skirts and apply the finish fillet of sikaflex on the
canopy frame. I got Lynne to come over to the shop since
she is great at making smooth fillets.
After thoroughly cleaning the former glue areas as well as the
side canopy I applied the primer on all parts which would be in
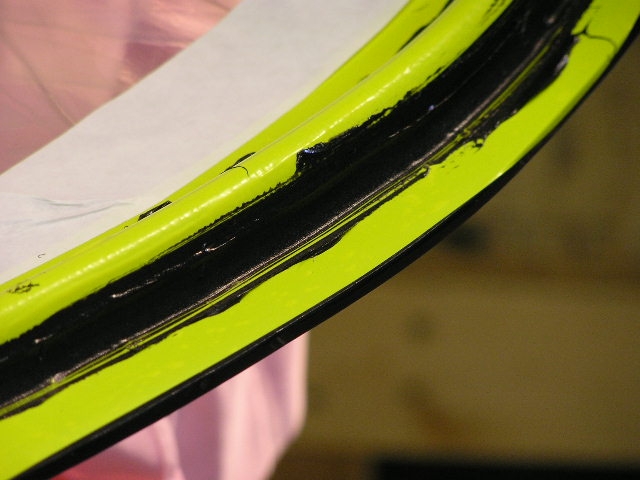
contact with the sika. Next, while I applied the Sikaflex, Lynne used
popsicle sticks to smooth and spread the sika on the side
skirts. Then we clecoed them to the slider frame. Next, I quickly applied more Sikaflex to the
original fillets while Lynne
came behind me and smoothed the fillets. I am very pleased
with the end results. One point that I can share for
others wishing to glue their canopies is to make smooth fillets
ONE TIME. Resist the urge to come back and "touch up" an
area. It will only end up worse than it was to begin with. Here is the final result. |
2.0 |
| 6/1/08 | Today I wanted to finish up on
the side skirts. Riveting the skirts requires the use of
three different types of rivets; AN426-3-3.5 and two different
pulled rivets. I chose to countersink the holes in the
side skirts rather than dimple because I have seen how dimpling
the skirts has distorted the skirts on other RVs.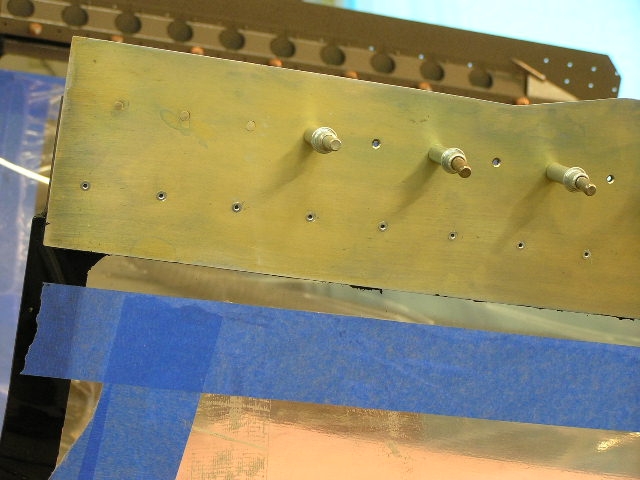
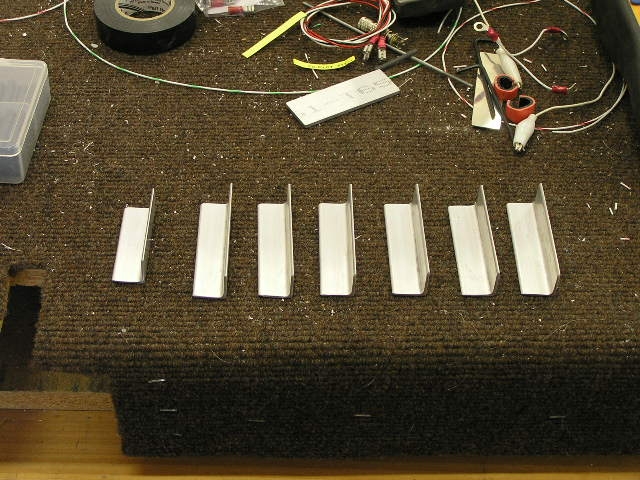
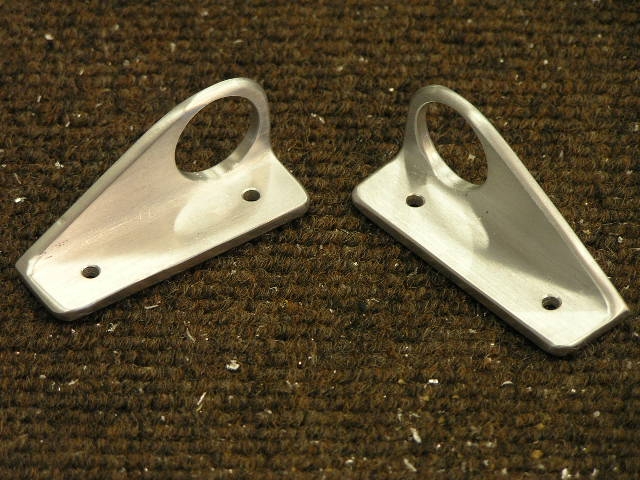
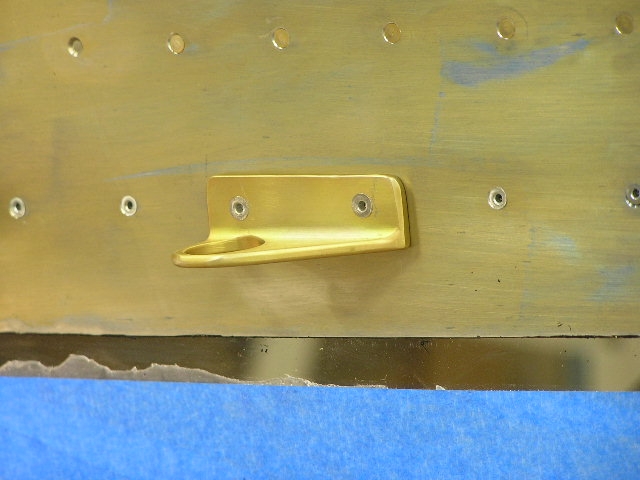
I also spent time and fabricated some side
handles for helping open the slider canopy. I flagrantly
stole the design from
Mike Schipper and
made them out of some .125x.75x.75 angle. After shaping
the handles I alodined and riveted to the slider frame. |
4.0 |
|
Fitting the Windscreen |
||
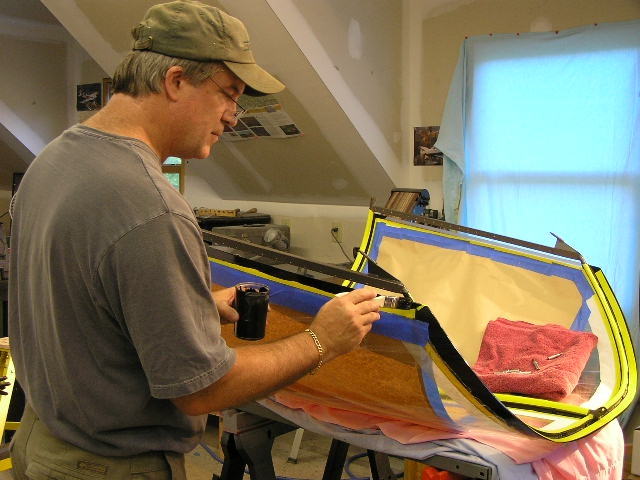
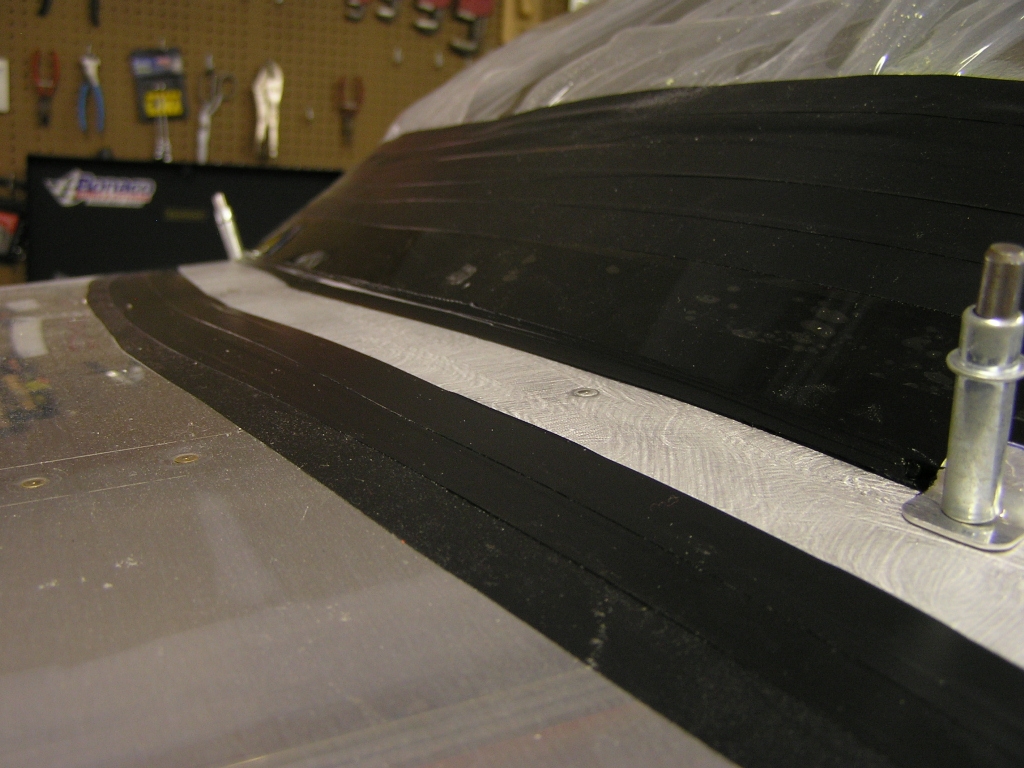
| 9/21/08 | I started working to trim the
windscreen by setting it on the front deck and roll bar and
marking a cut line. I then would take it outside and cut
it with my Dremel followed by sanding the cut edges with a belt
sander (120 grit) and sanding blocks. I would re-clamp it
to the roll bar and determine where it needed trimming, mark,
and then repeat the cutting and sanding process. 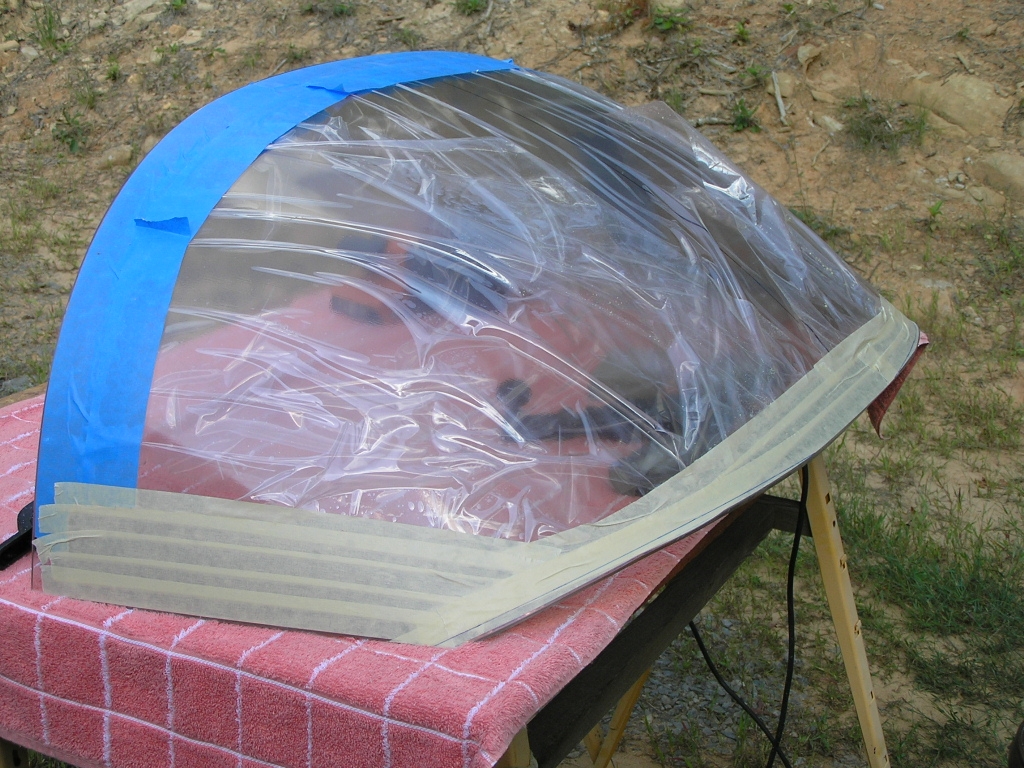 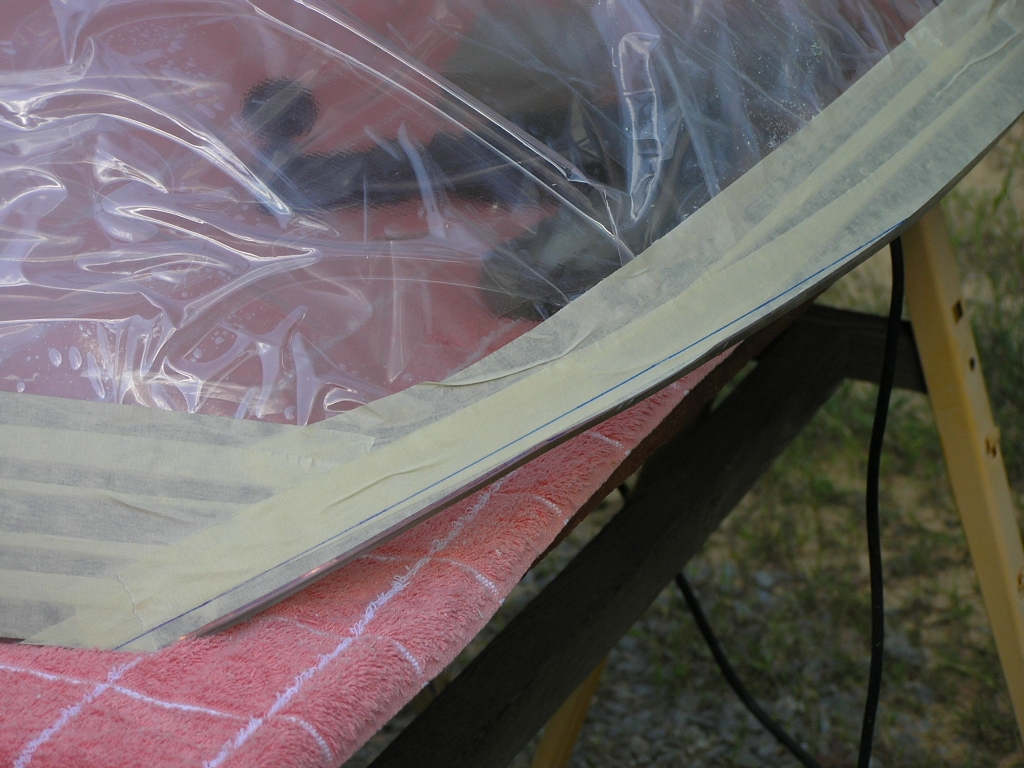 |
2.0 |
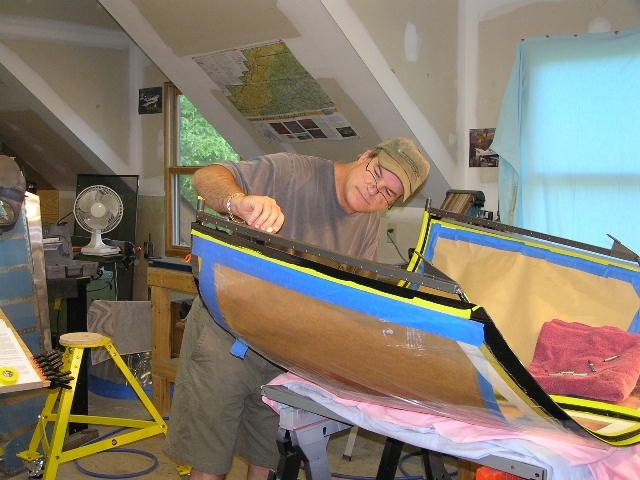
| 9/22/08 | Today, I continued the above
process until I got the windscreen fit fairly close. I
attached the slider canopy and will now use it to determine the
final windscreen dimensions.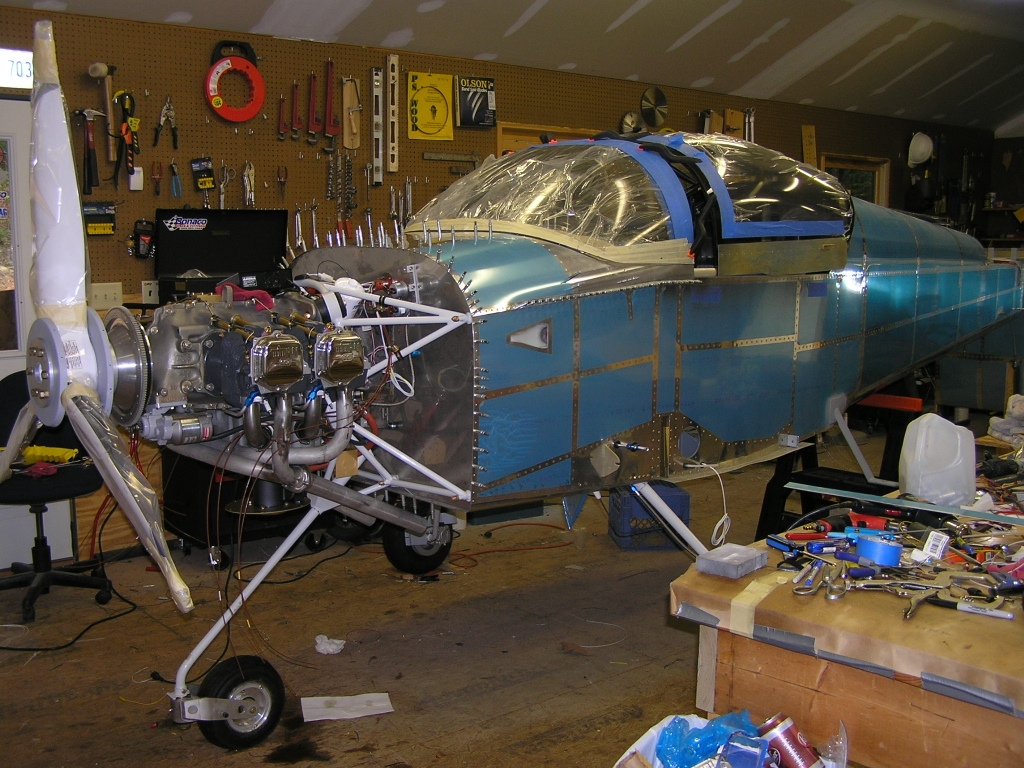 |
3.0 |
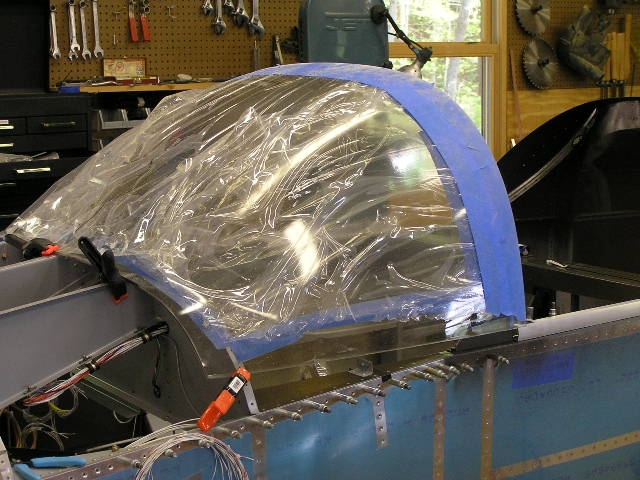
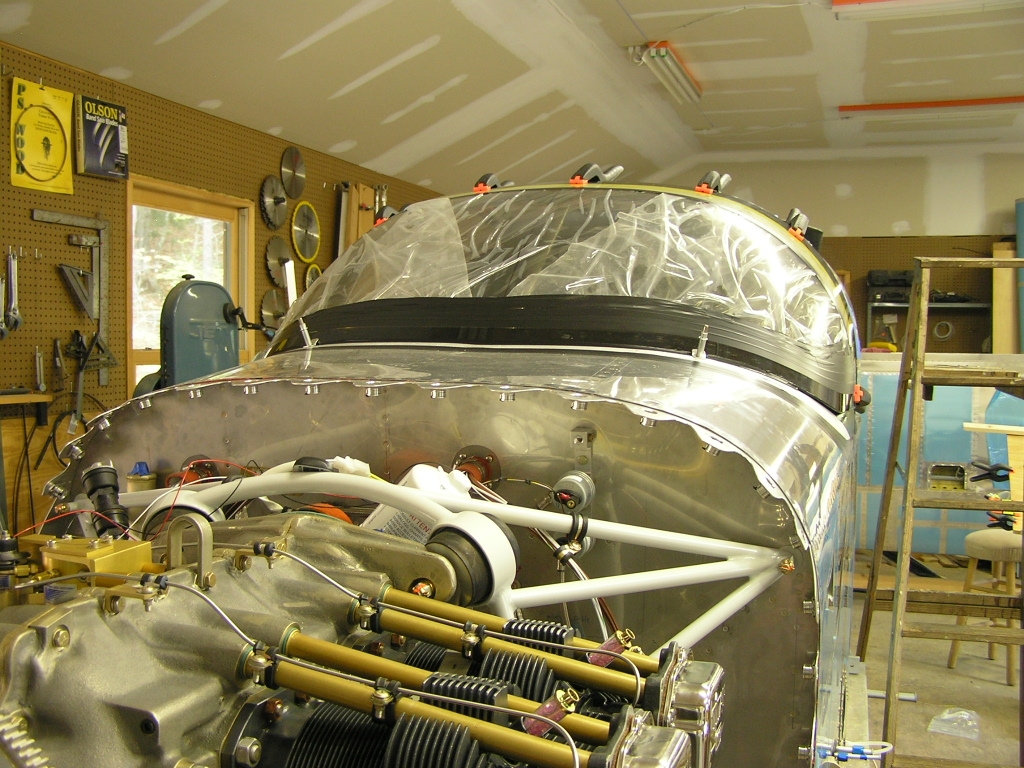
| 10/10/08 | I finally got the top skin
riveted today so I was able to move on to attaching the
windscreen. I will be using Sikaflex adhesive for the
attachment to the roll bar and side skins. I will be using
lay ups for fiberglass and epoxy for the front fairing as well
as over the trim strip over the roll bar. I started by
scuffing the top skin and taping off the aluminum as well as the
windscreen.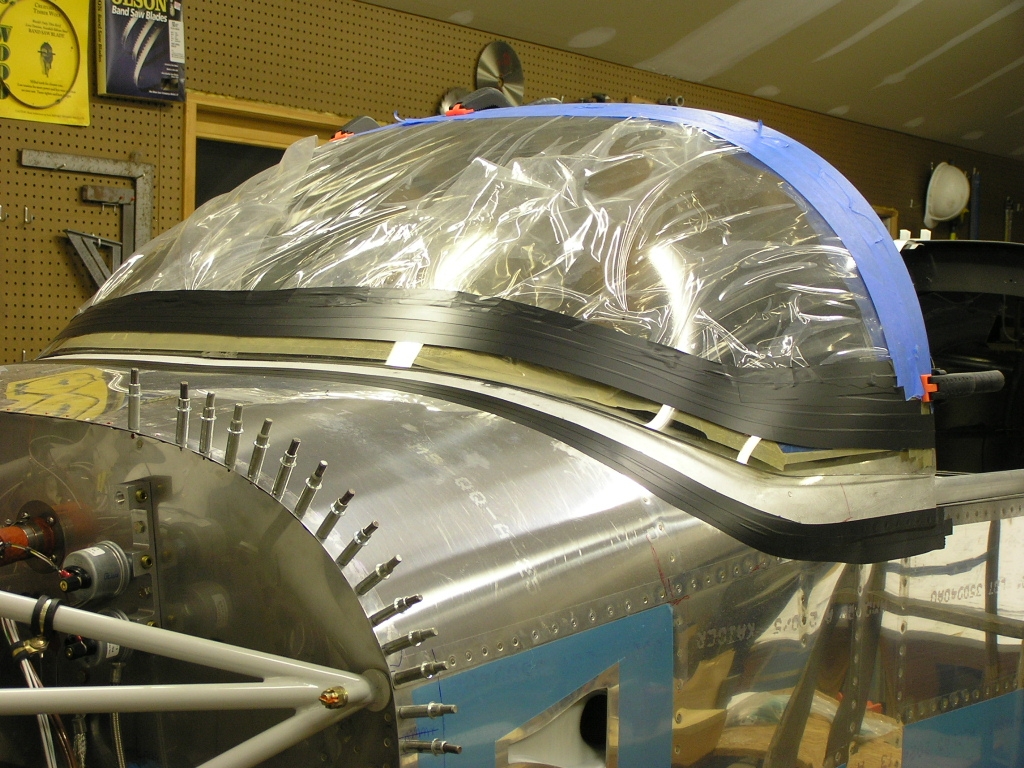
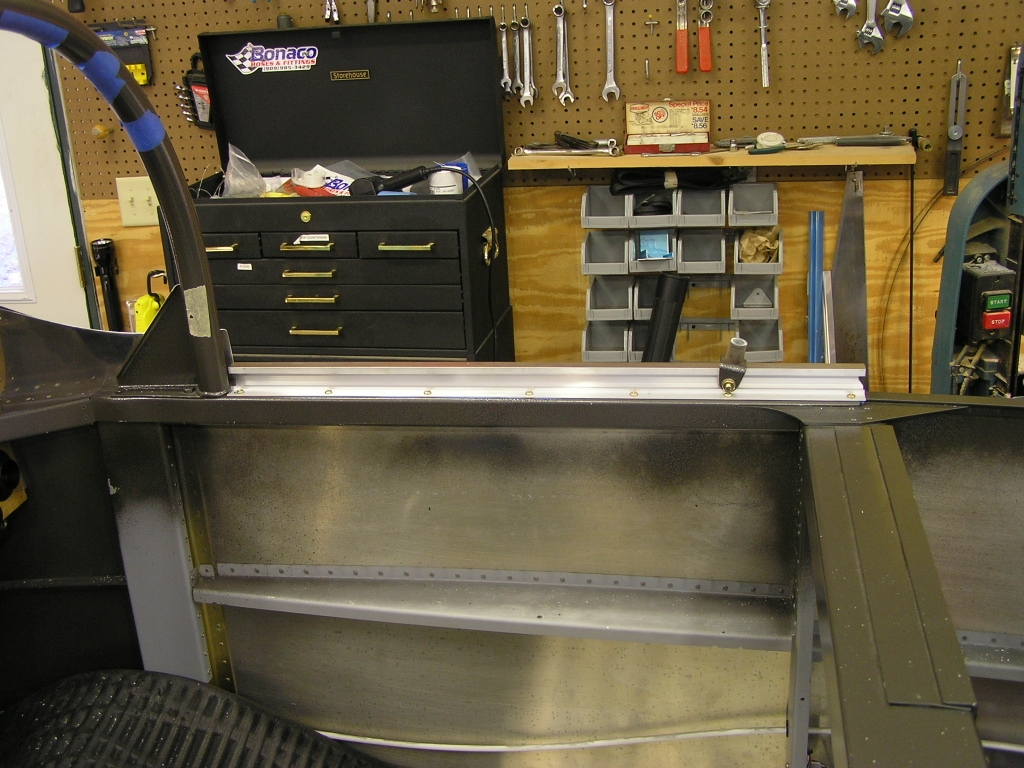
I went ahead and drilled and screwed the slider
rails. |
4.0 |
|
Fitting the Latch |
||
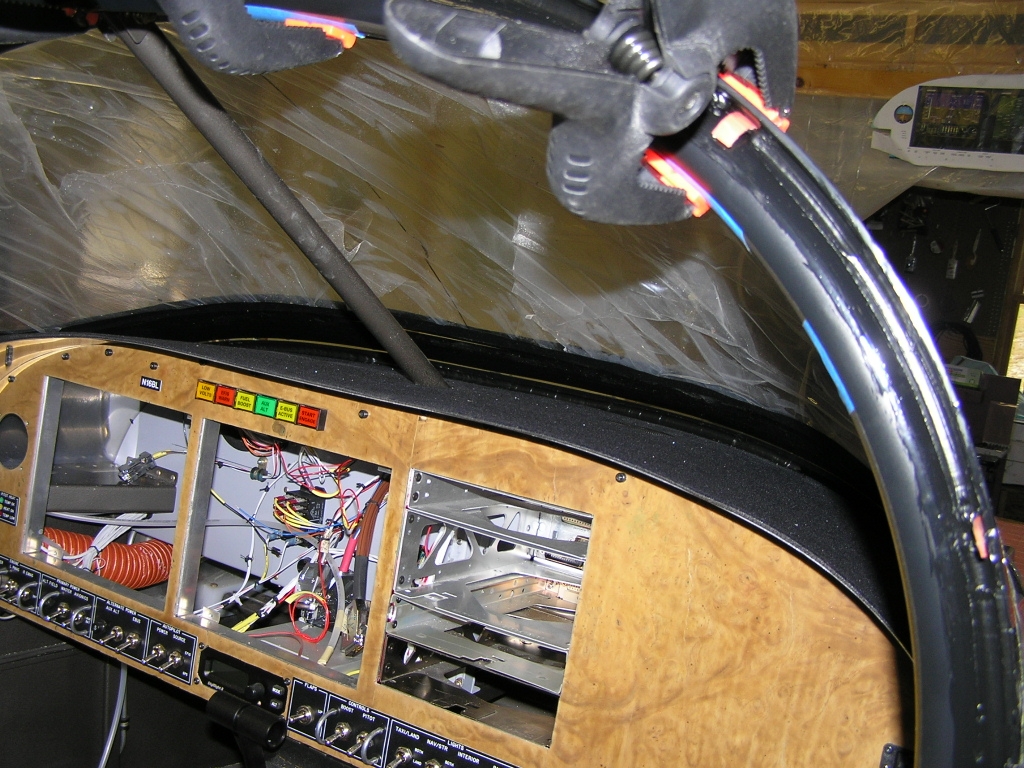
| 10/16/08 | I spent some time assembling and
fitting the canopy latch. I had to trim the shaft about
3/8" in order to allow for the amount I lowered the slider fore
legs. I also ground down the exterior handle to be more
aerodynamic.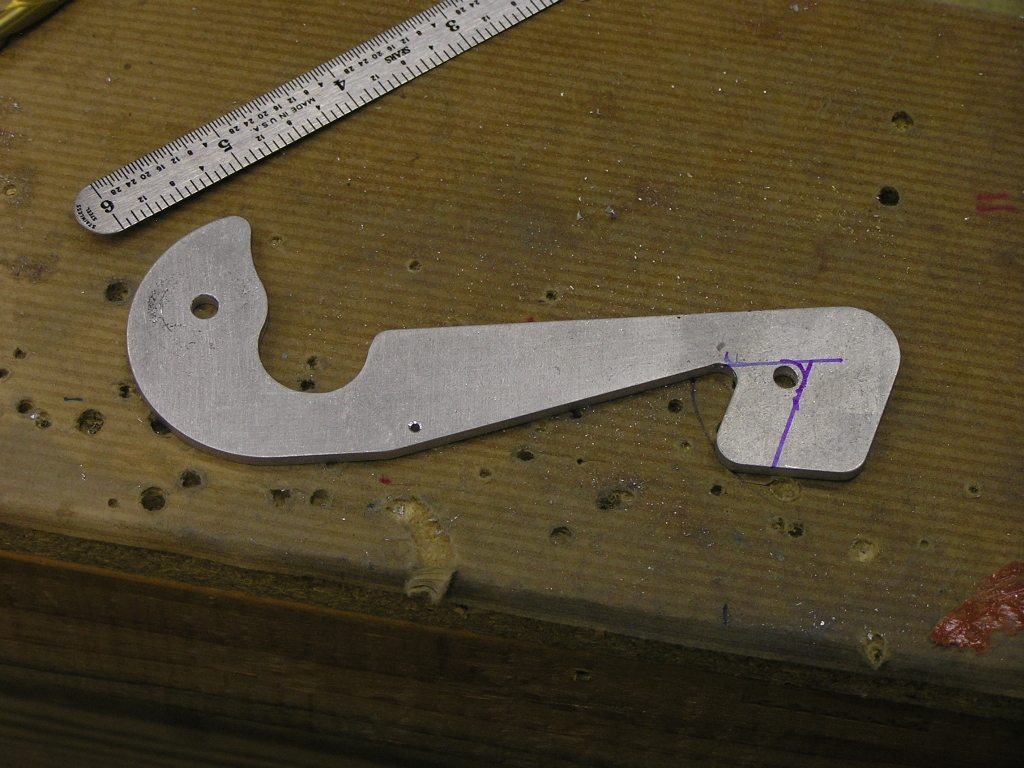 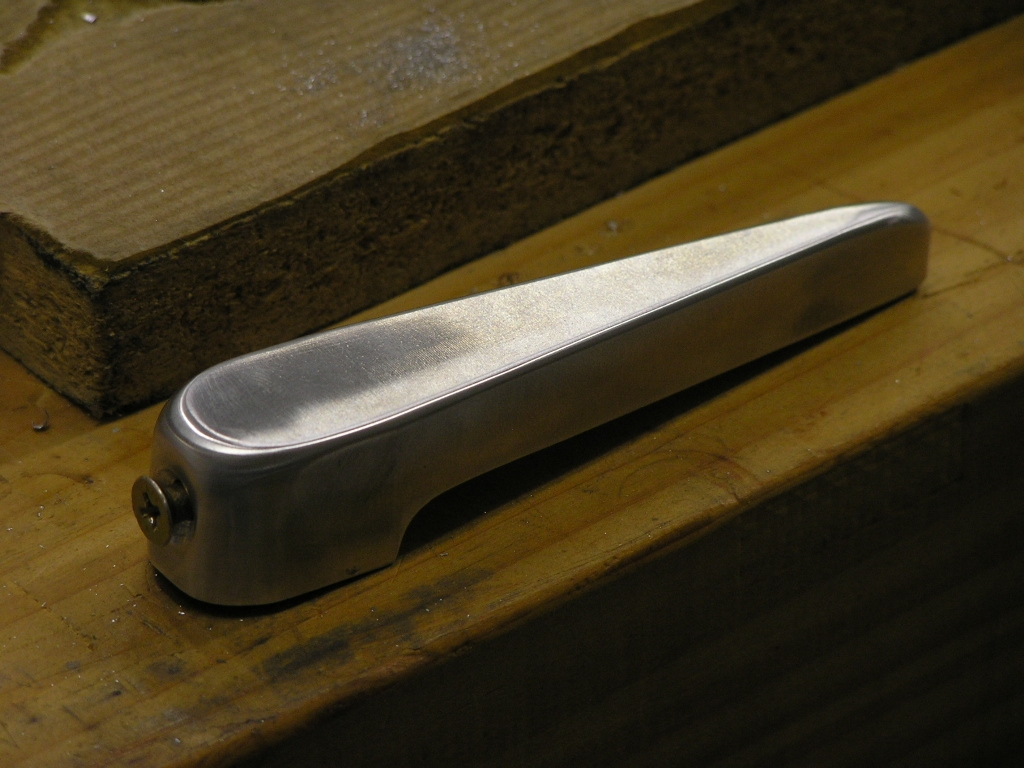 |
2.0 |
|
Gluing the Windscreen |
||
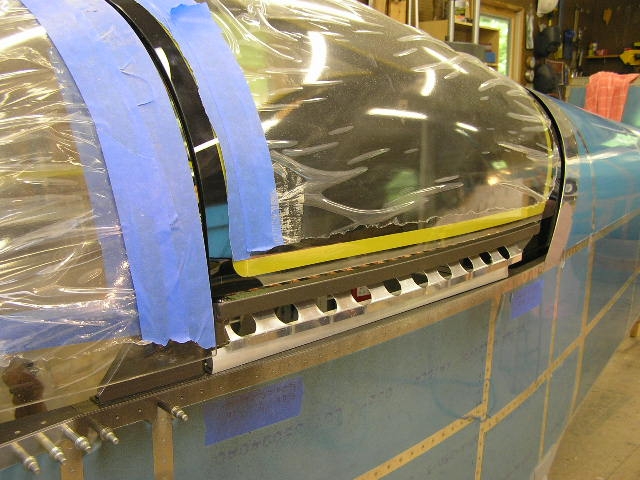
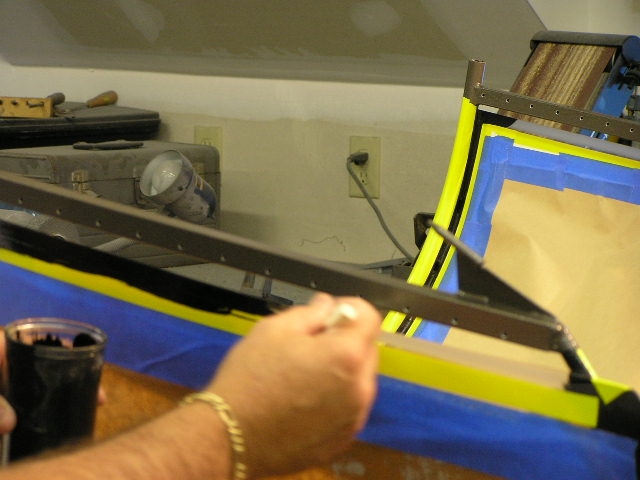
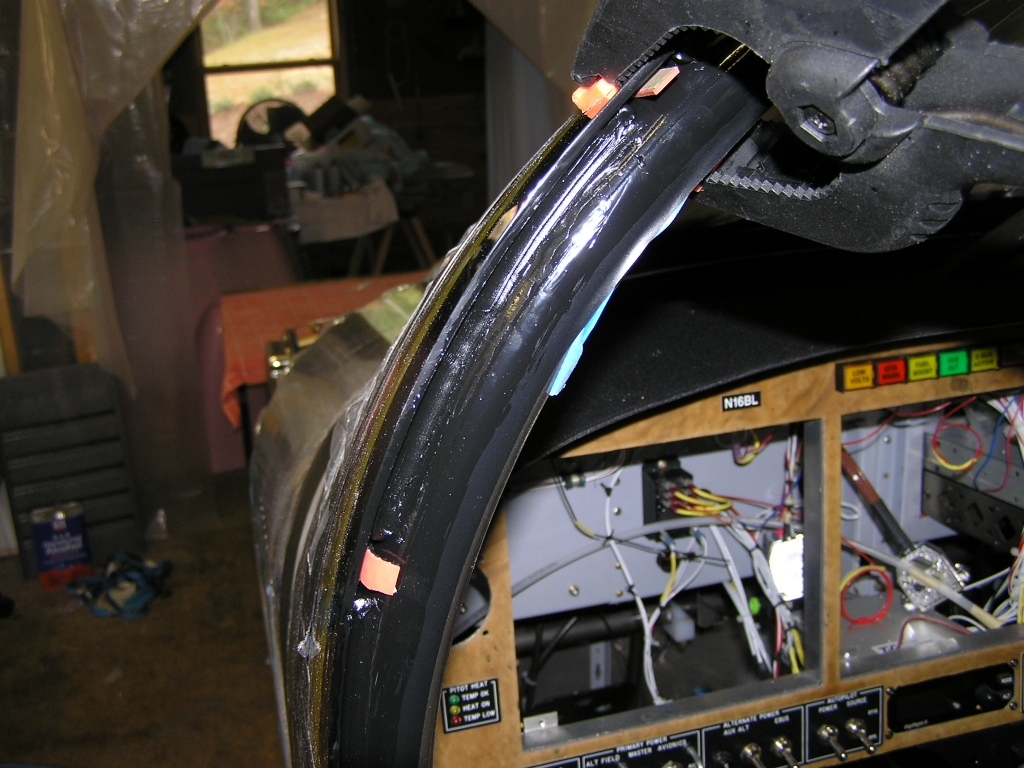
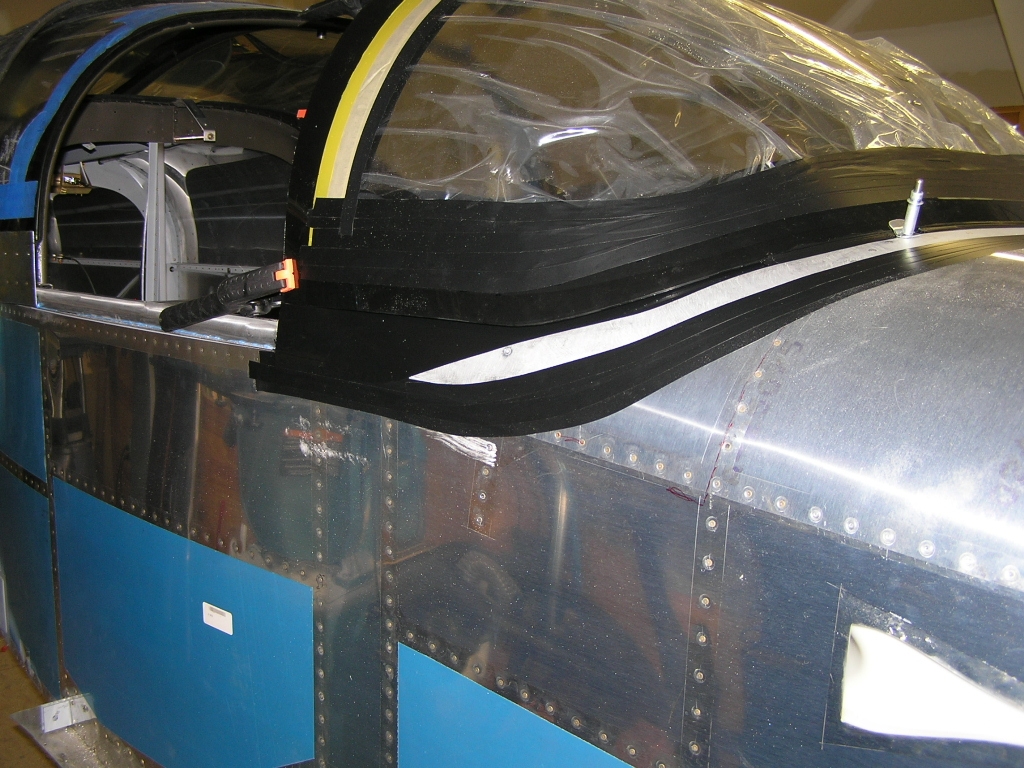
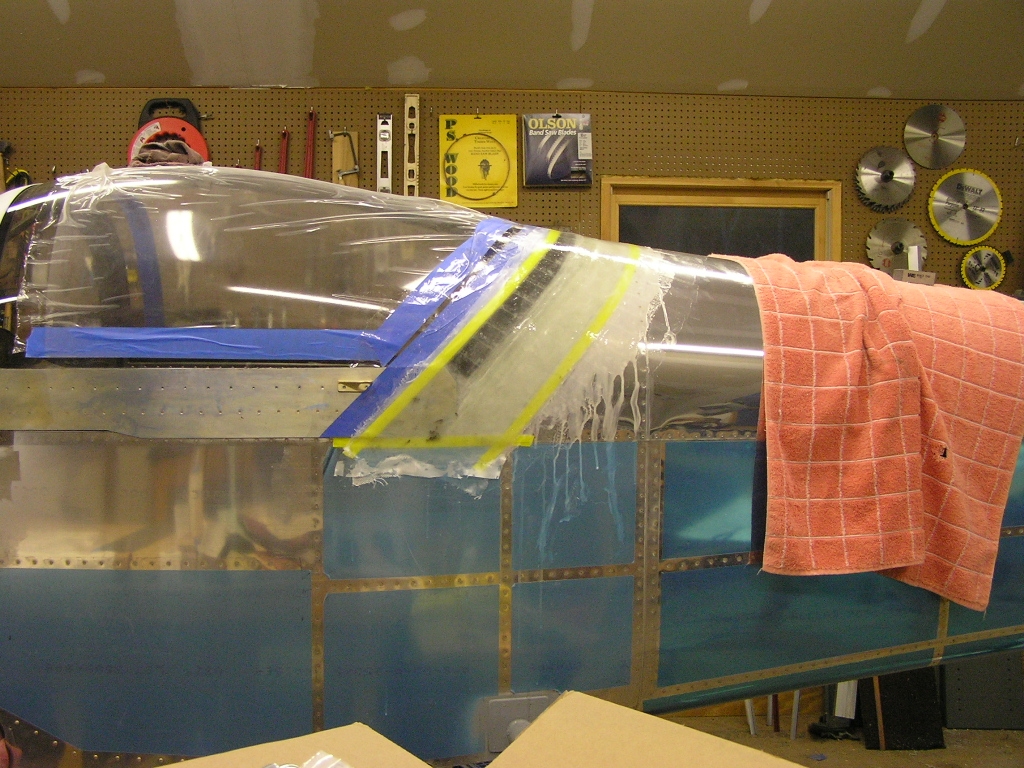
| 10/17/08 | I received another order of
Sikaflex adhesive so today I decided to glue up the windscreen.
I started with scuffing the windscreen as well as the rollbar
and top skin. 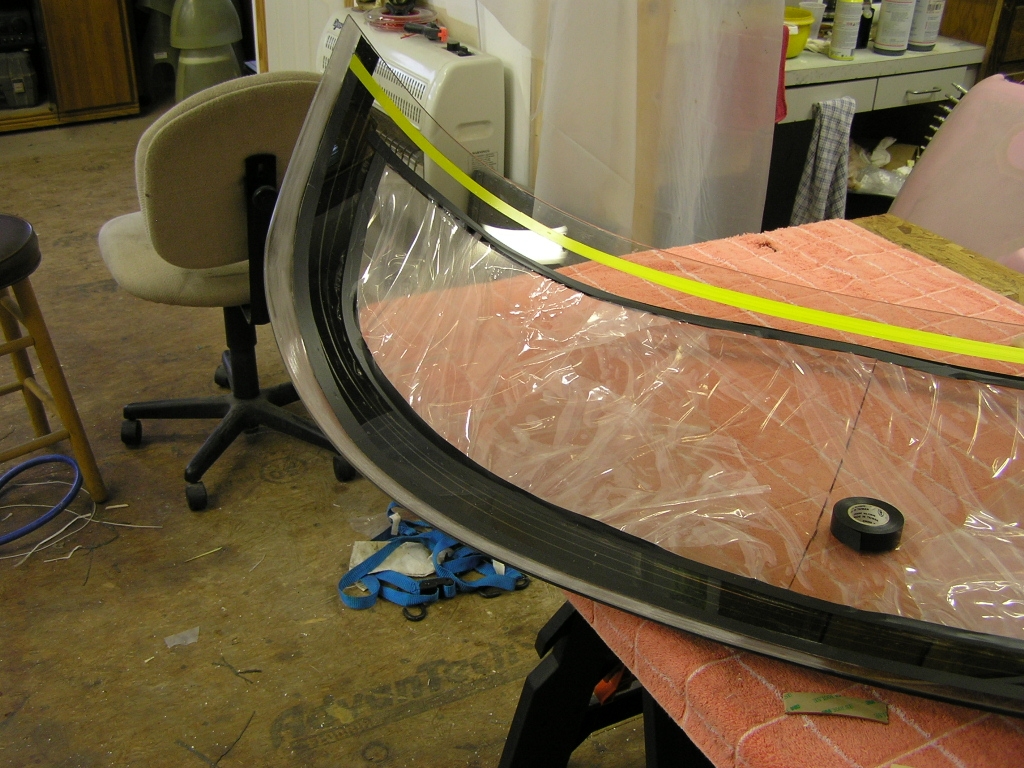
I taped off the roll bar and top skin with
electrical tape to mark where the primer line would be.
Next, I cleaned the areas to be glued well with the Sika cleaner
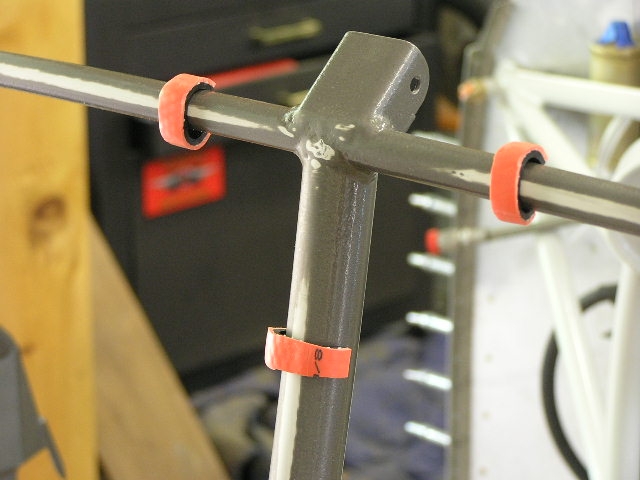
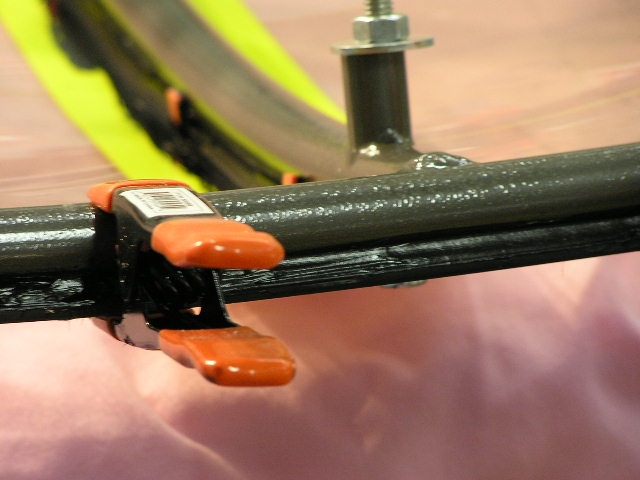
and then applied the primer with a small brush. After letting the primer set for about 20
minutes, I clamped the windscreen to the roll bar and inserted
the appropriately sized spacers (1/16" and 1/8") along the roll
bar in order to align the windscreen with the slider.
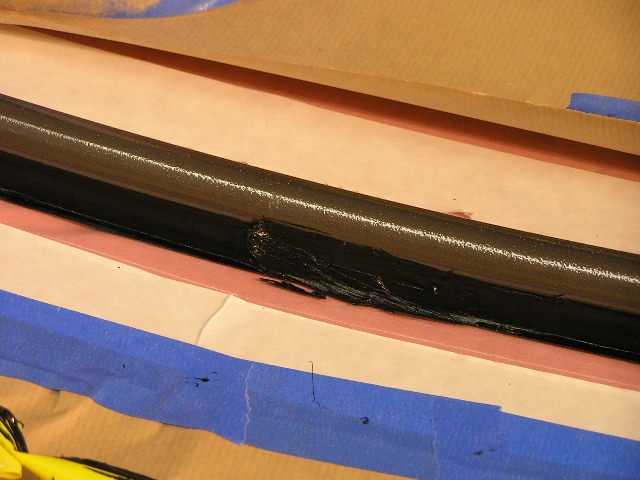
Then, I applied the first filet of Sikaflex adhesive between the
spacers along the rear of the roll bar as well as along the
front of the windscreen where it meets the top skin. I did not glue the sides where it bows out
yet. I will need to let the Sika cure first and then I
will have to use leverage to force the sides in before gluing. |
|
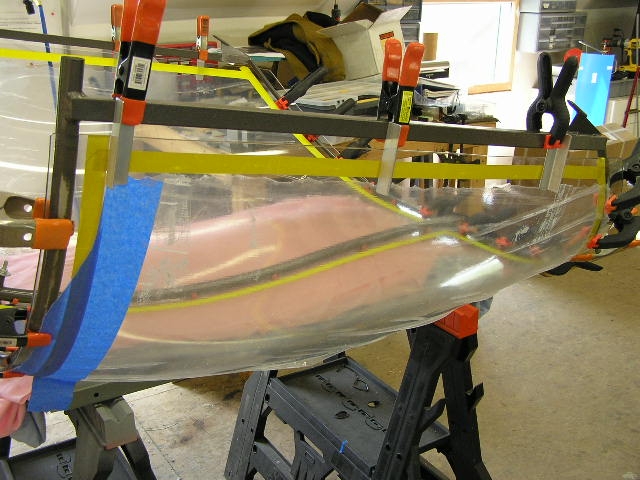
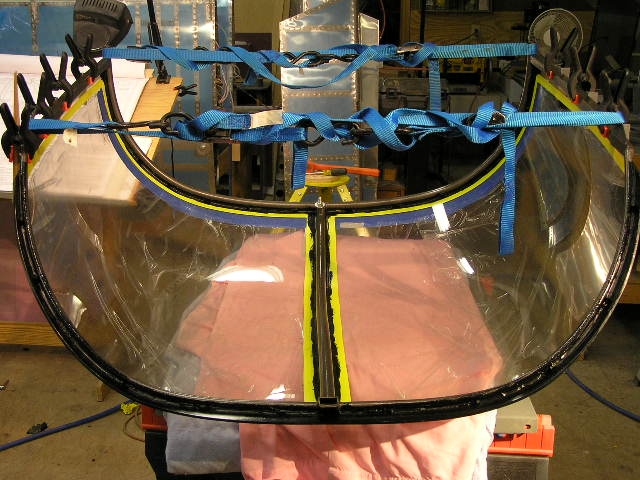
| 10/18/08 | After letting the Sikaflex set
up for 24 hours, I removed the spacers and filled the holes.
I then uses 2 x 2's, clamps and duct tape to devise a brace to
pull in the sides of the windscreen. With the sides drawn
in I sika'd the sides and let sit to set up.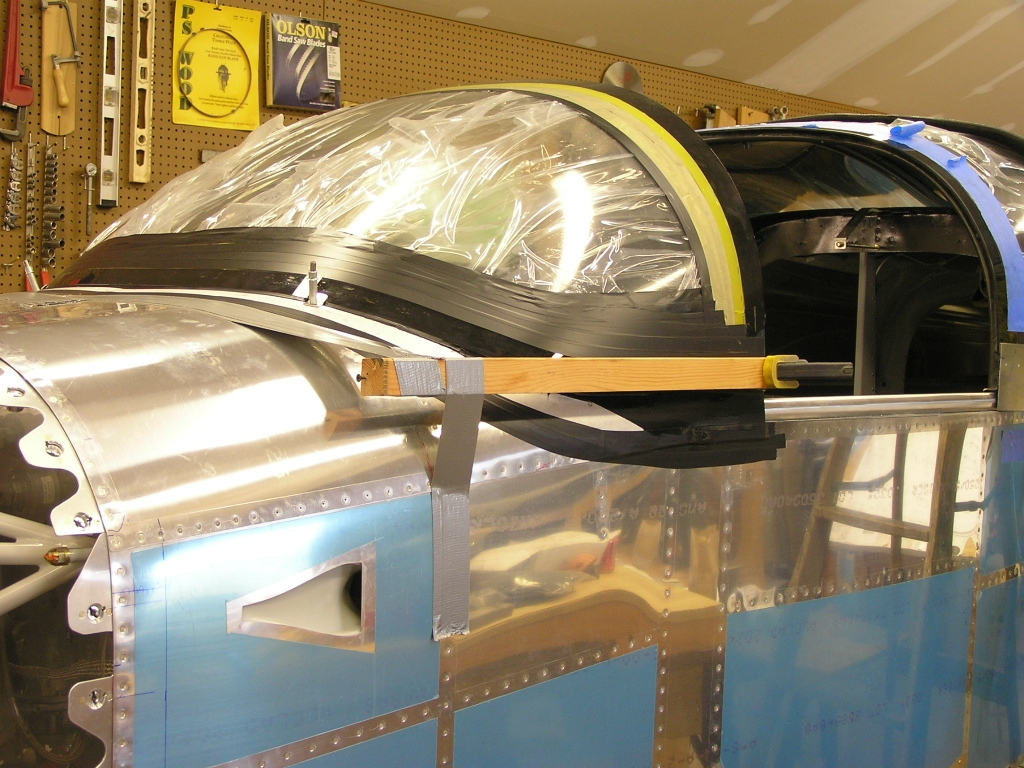 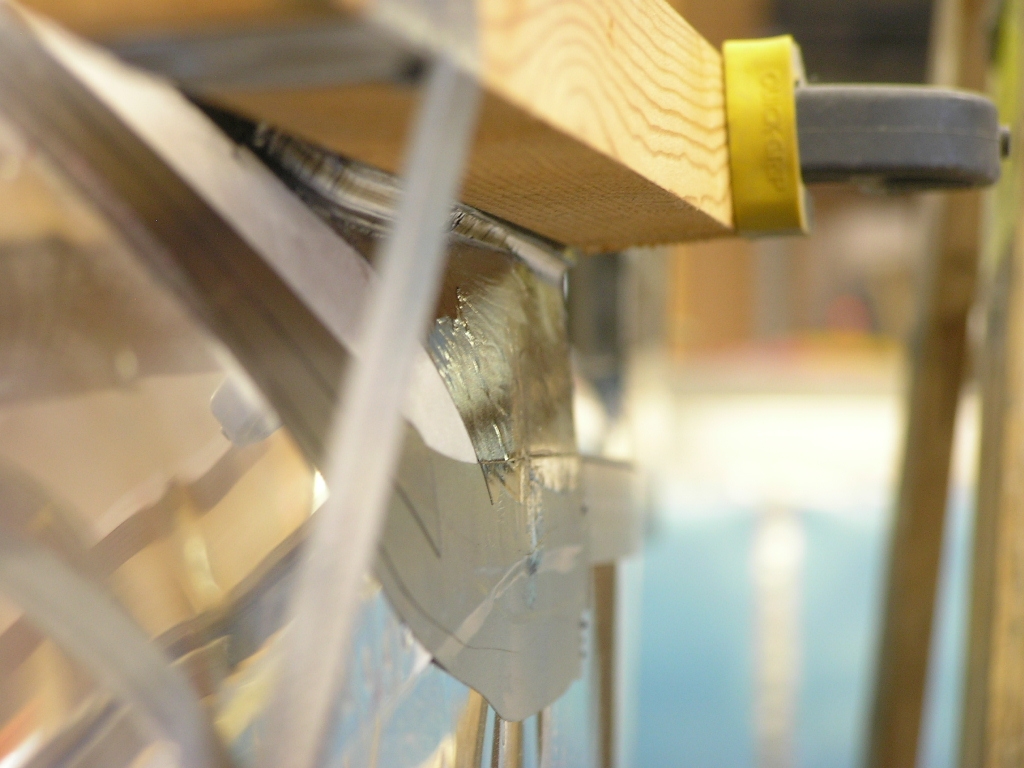 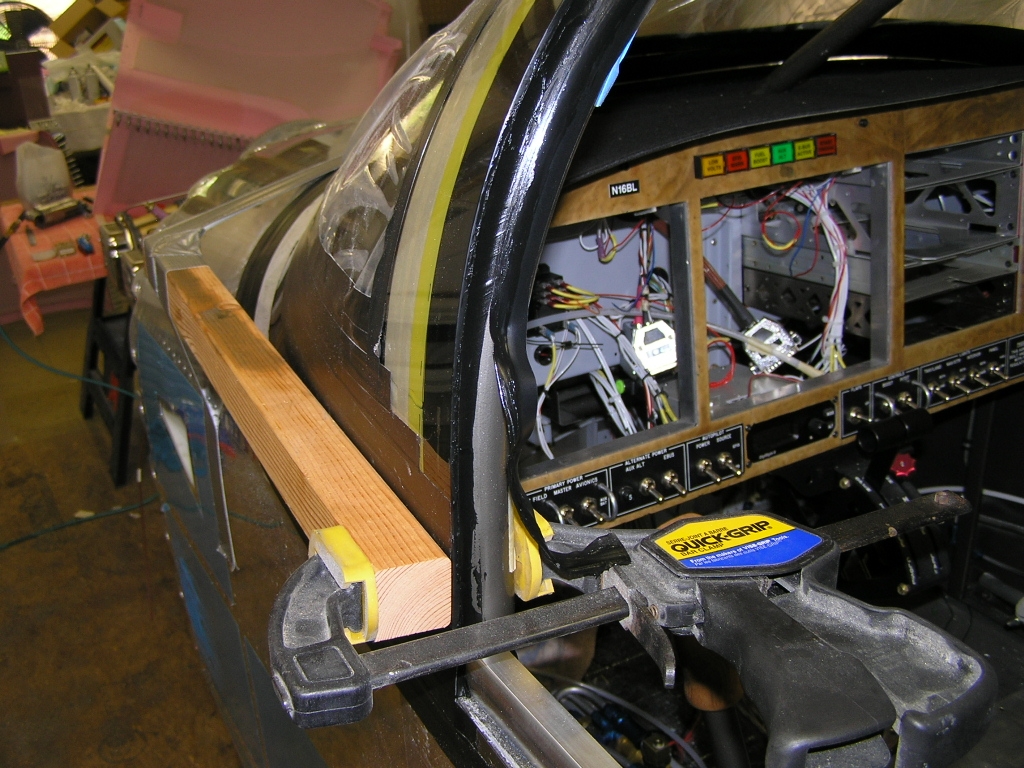 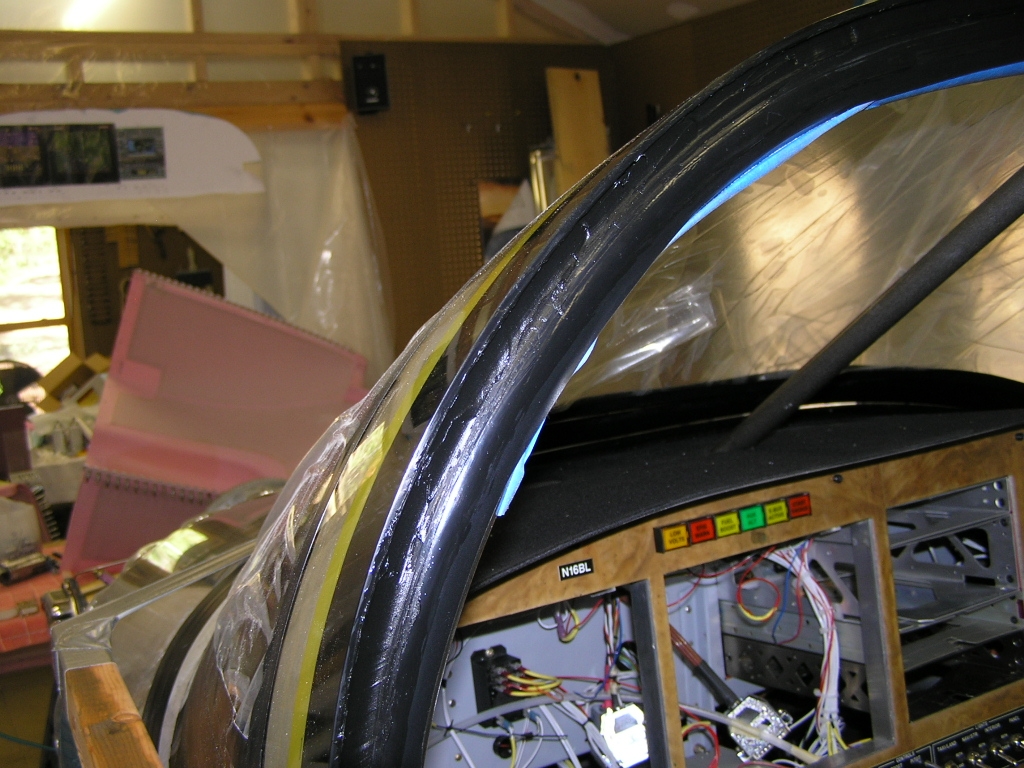 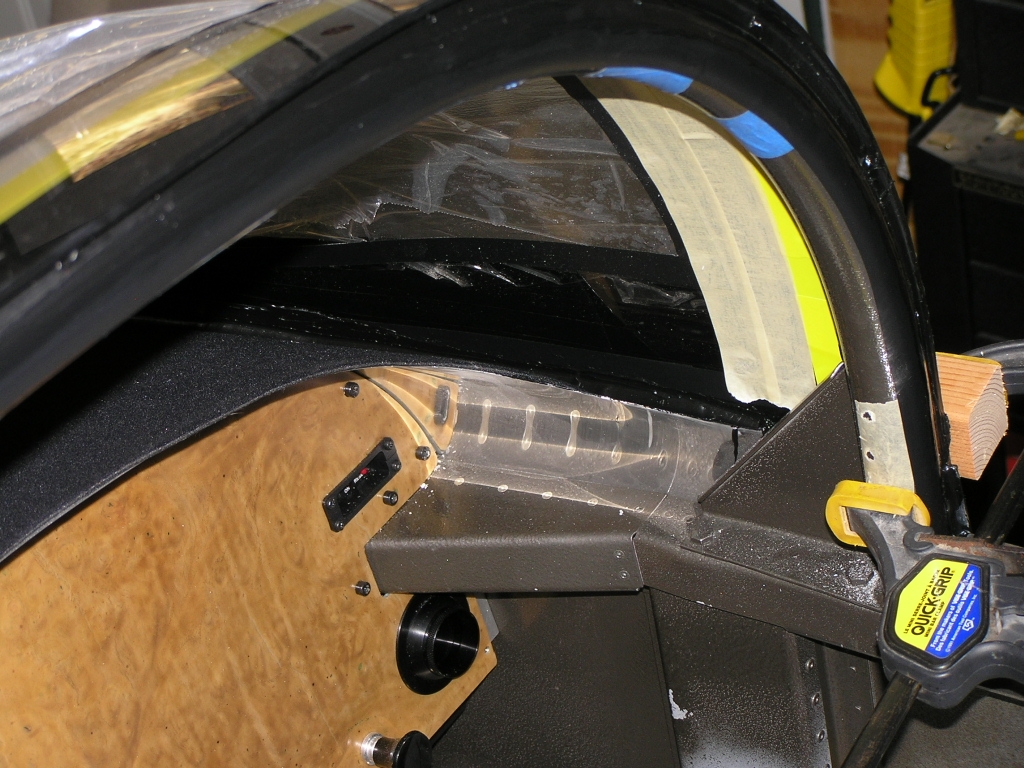 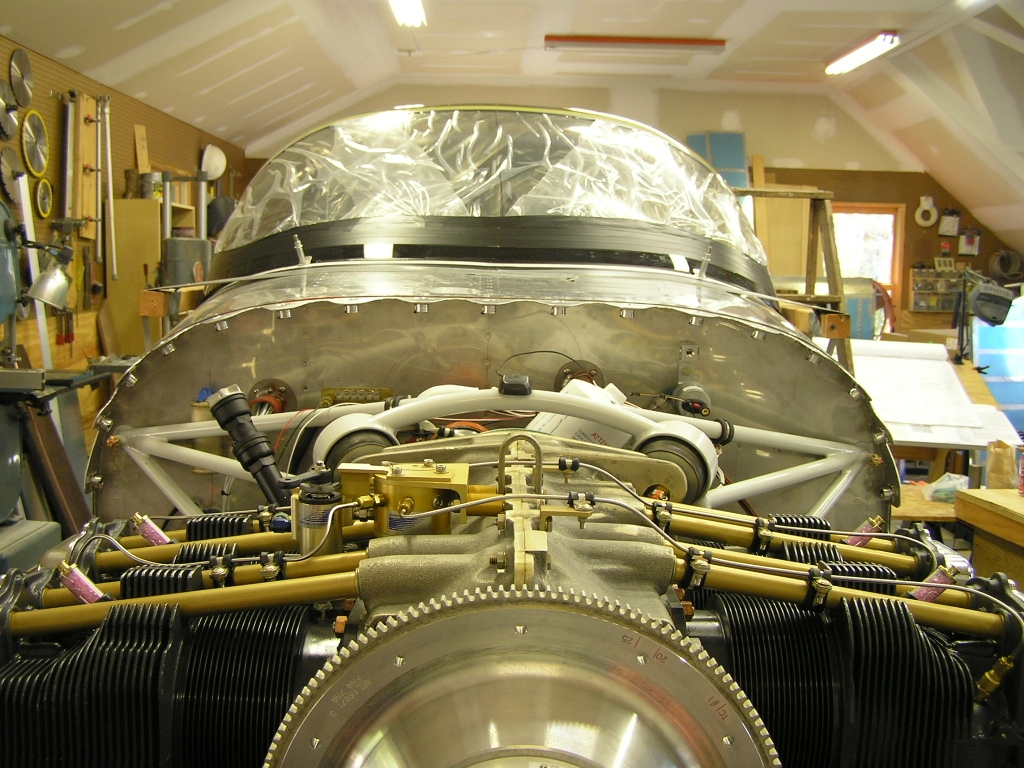 |
2.0 |
|
Rear Anchor Blocks |
||
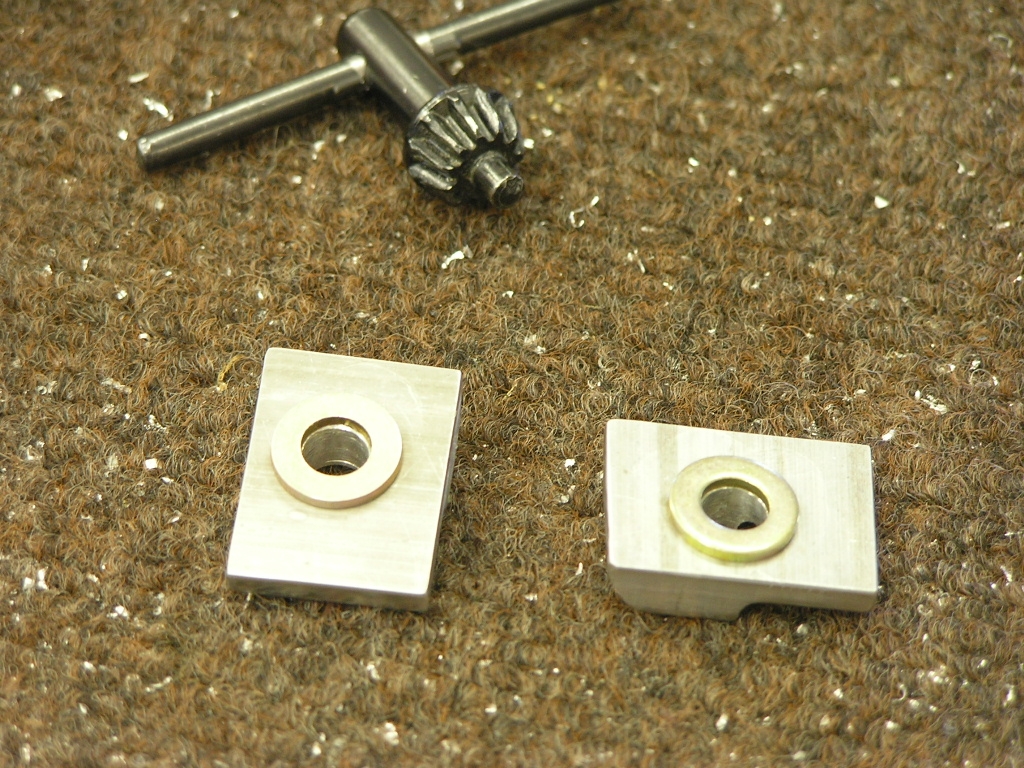
| 10/21/08 | Tonight I installed the canopy
latch and started fabricating the rear canopy blocks. I
drilled the C-677 rear pin mounts and deburred.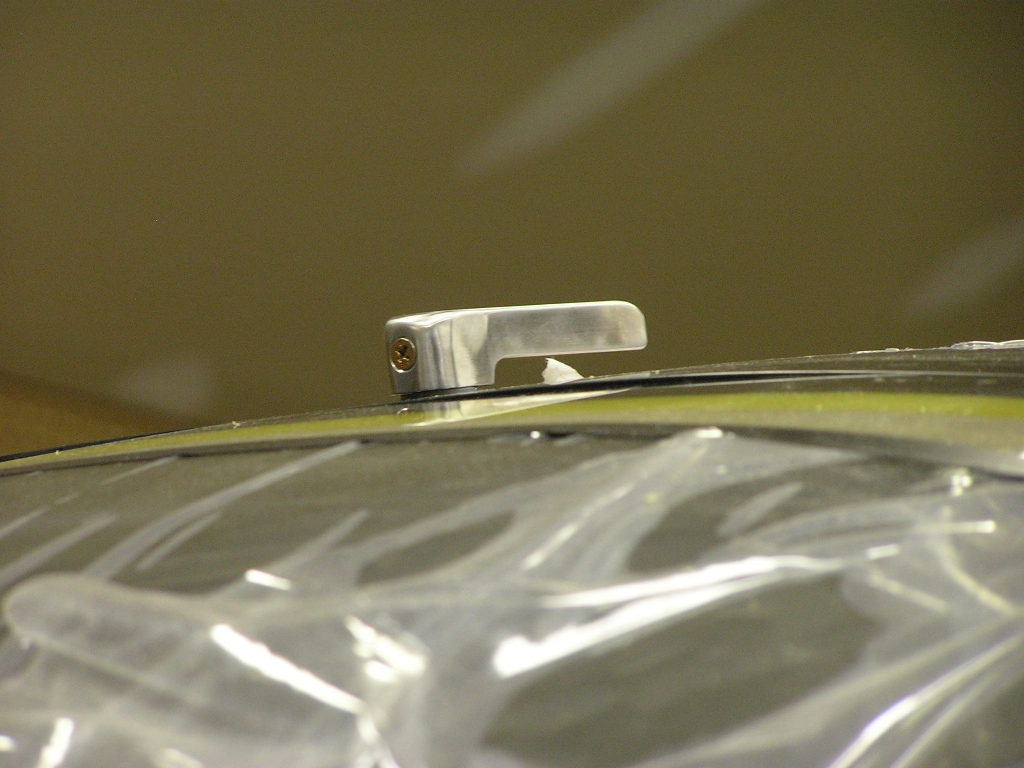 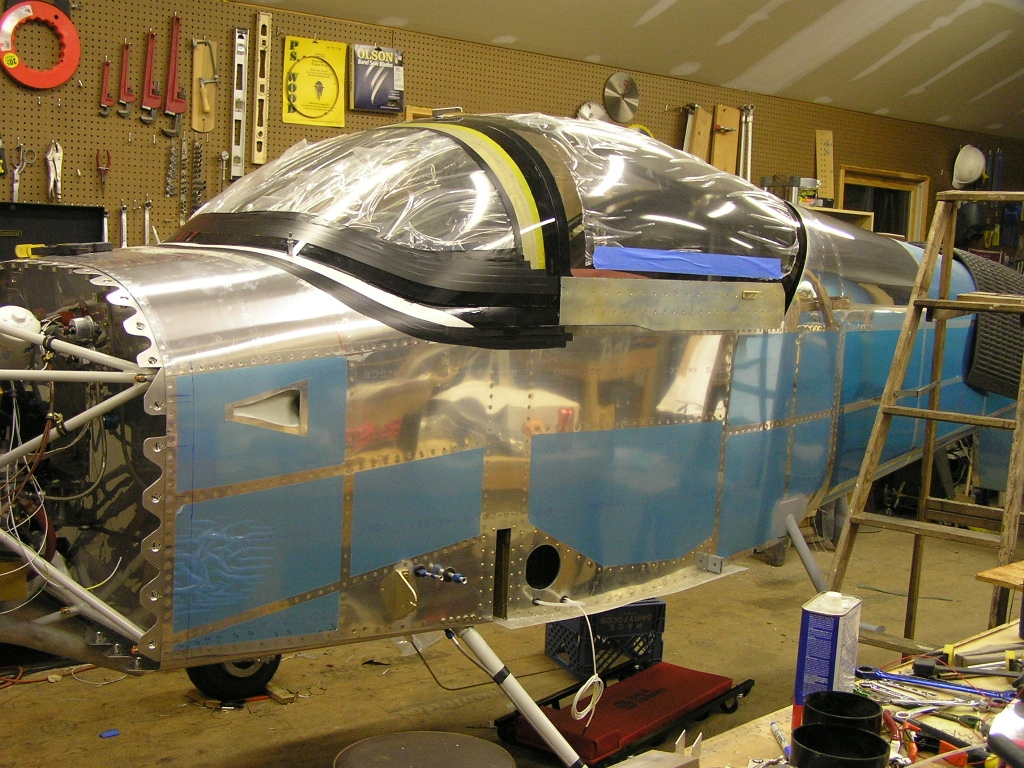 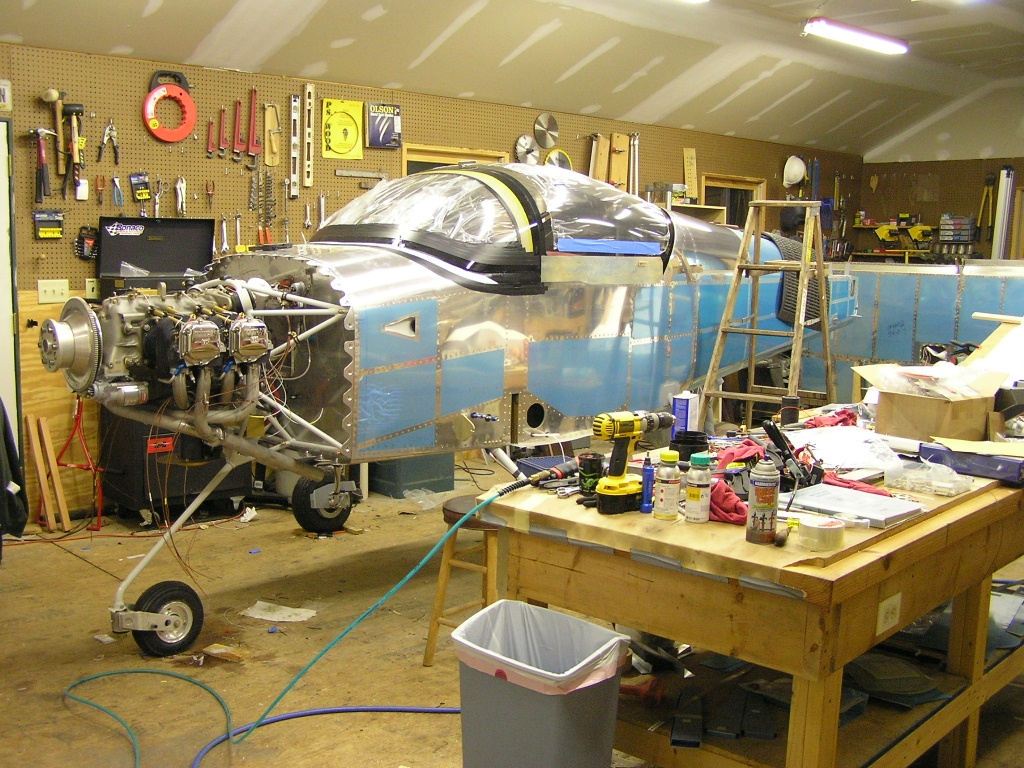 |
1.0 |
| 10/23/08 | Drilled the C-677 rear pin
mounts to the longerons and marked where the pins touch the
C-655 rear anchor blocks. I then marked the angles where
the pins will enter. |
1.0 |
| 10/24/08 | I drilled the anchor blocks
after setting up my Shopsmith in order to set the correct angle
for the holes. I had to slightly enlarge the holes but
they were dead-on. I then drilled and countersunk for the
side screws to hold the anchor blocks in place.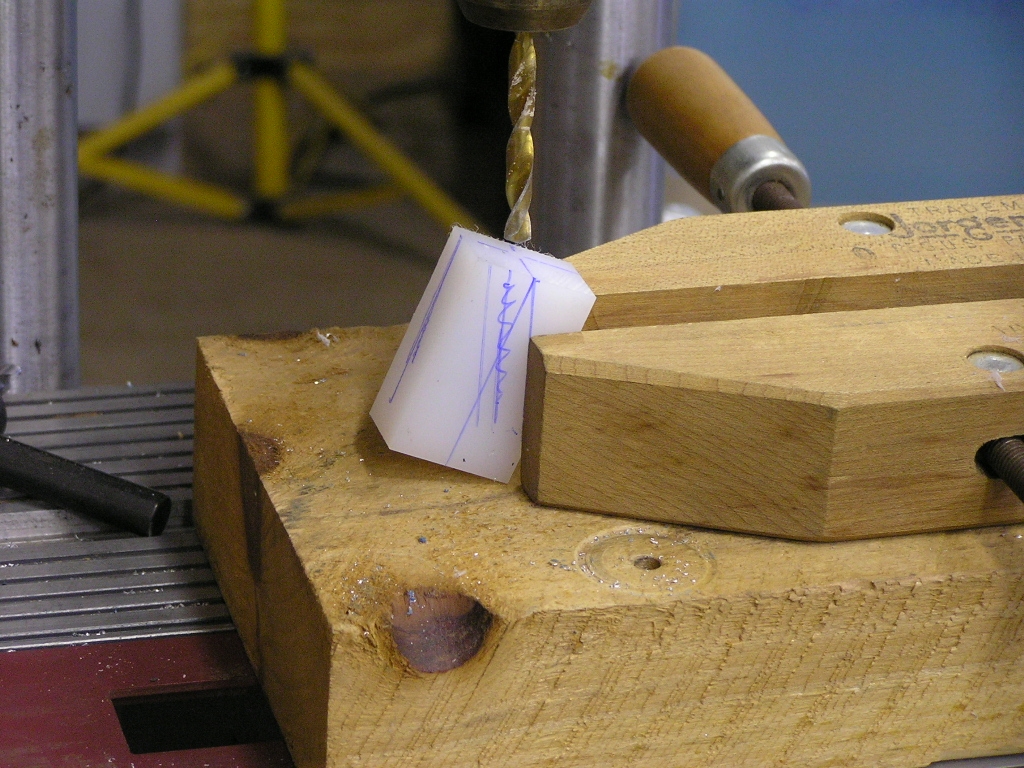 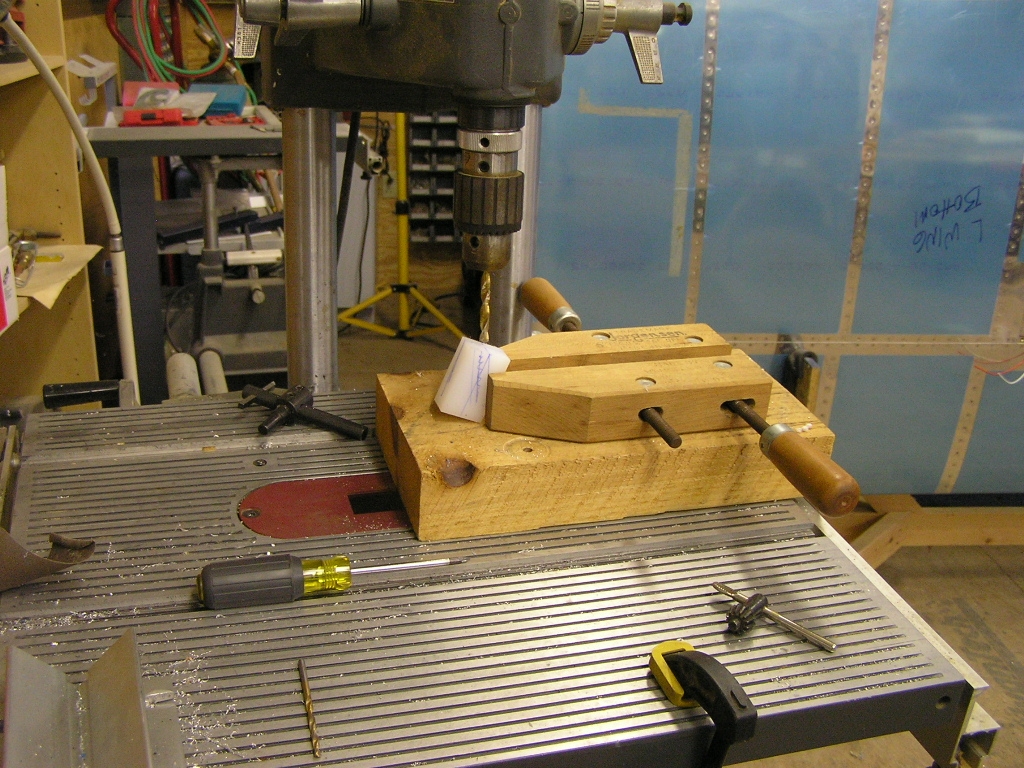 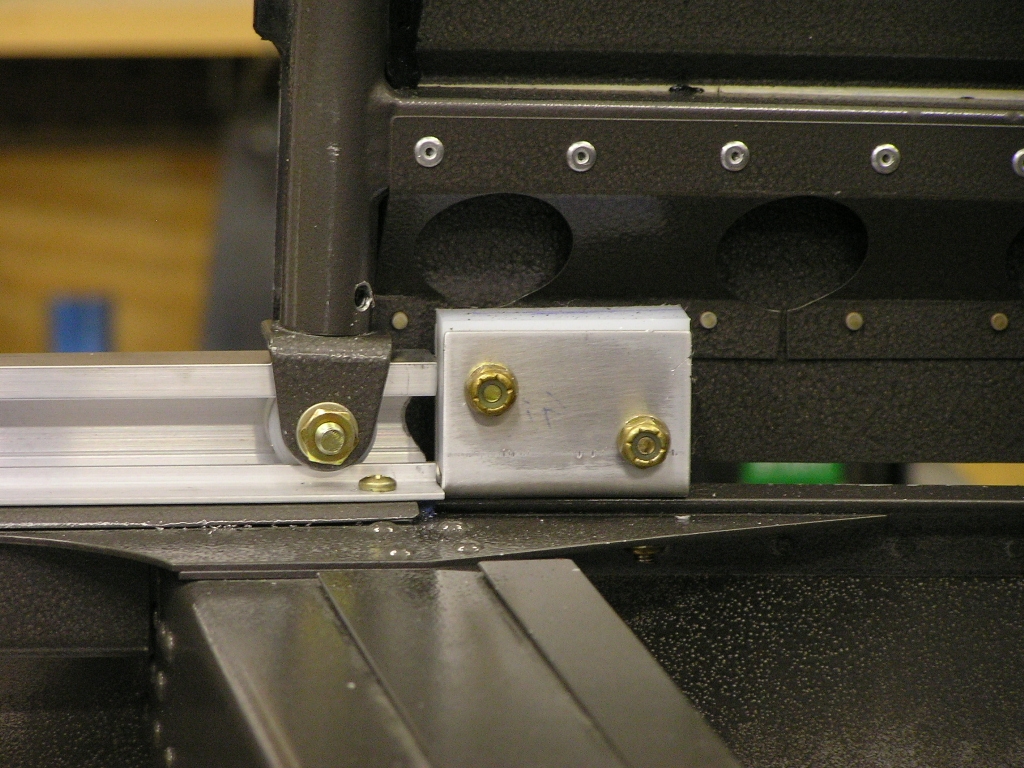
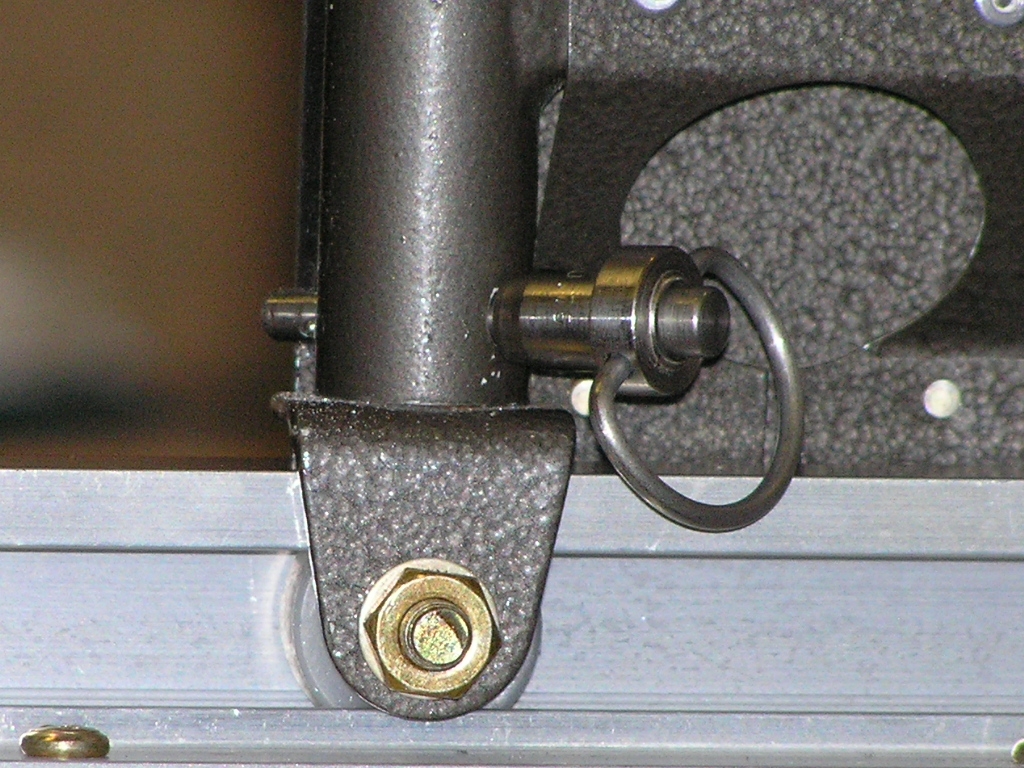
I drilled the rollers at the front of the slider
and installed hitch pins. The hitch pins are a safety
modification instead of the bolts that can be pulled in the
event of an emergency and allow the canopy to be easily opened. |
3.0 |
|
Glassing the Windscreen |
||
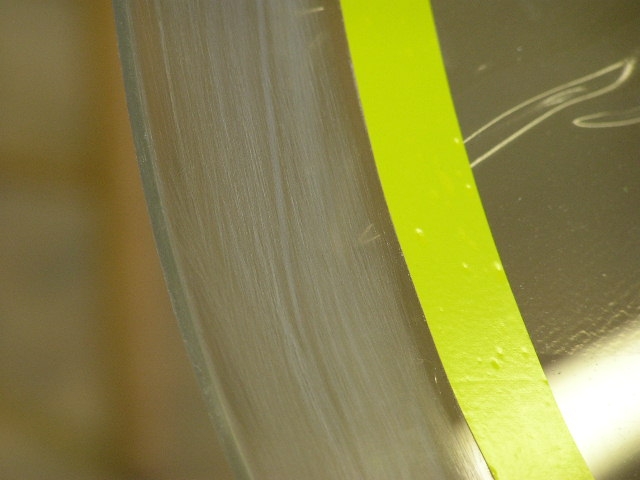
| 10/24/08 | I spent quite a lot of time
taping off the areas to be glassed. I also had to sand the
edges where the slider canopy met the windscreen at the roll bar
because I wanted to make sure they didn't touch when the latch
was closed. I then added a second strip of yellow tape to
act as a sand line for the fairing.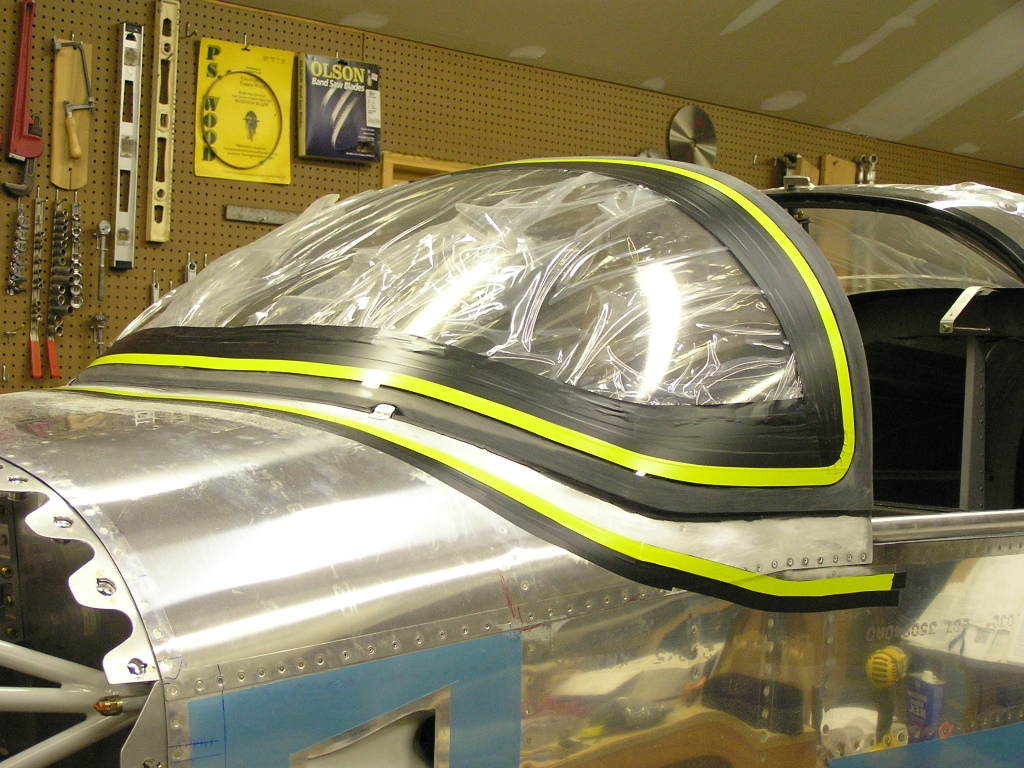 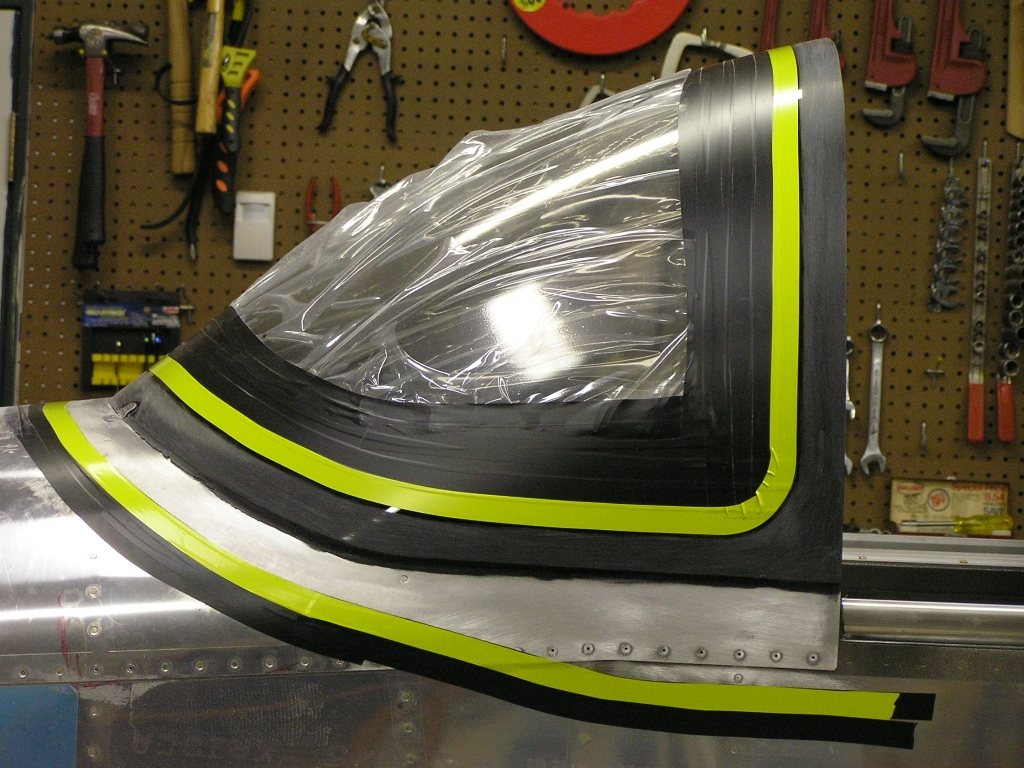 |
2.0 |
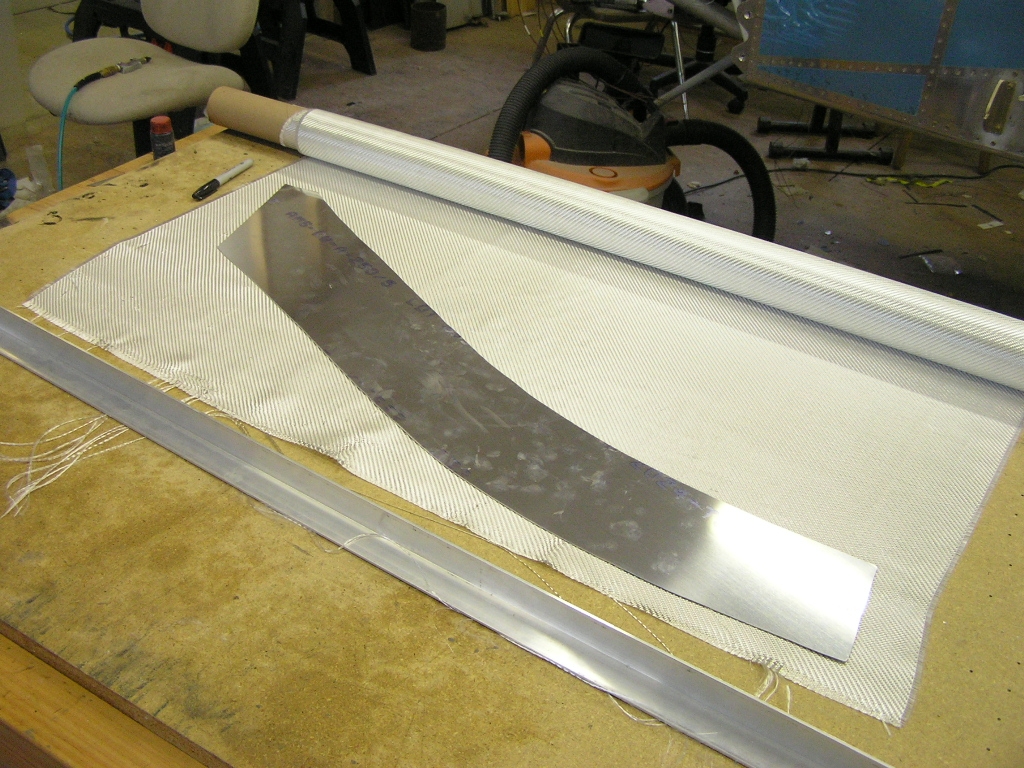
| 10/25/08 | I cut strips of 12 oz fiberglass
in varying widths starting at .50" and increasing .25" up to a
final width of 2" for a total of seven layups. I began by
mixing up some epoxy with flox and applied it to the sides below
the windscreen in order to "fill the gap". I also mixed
black dye in the epoxy in order to create a black visual image
when viewed from the cockpit.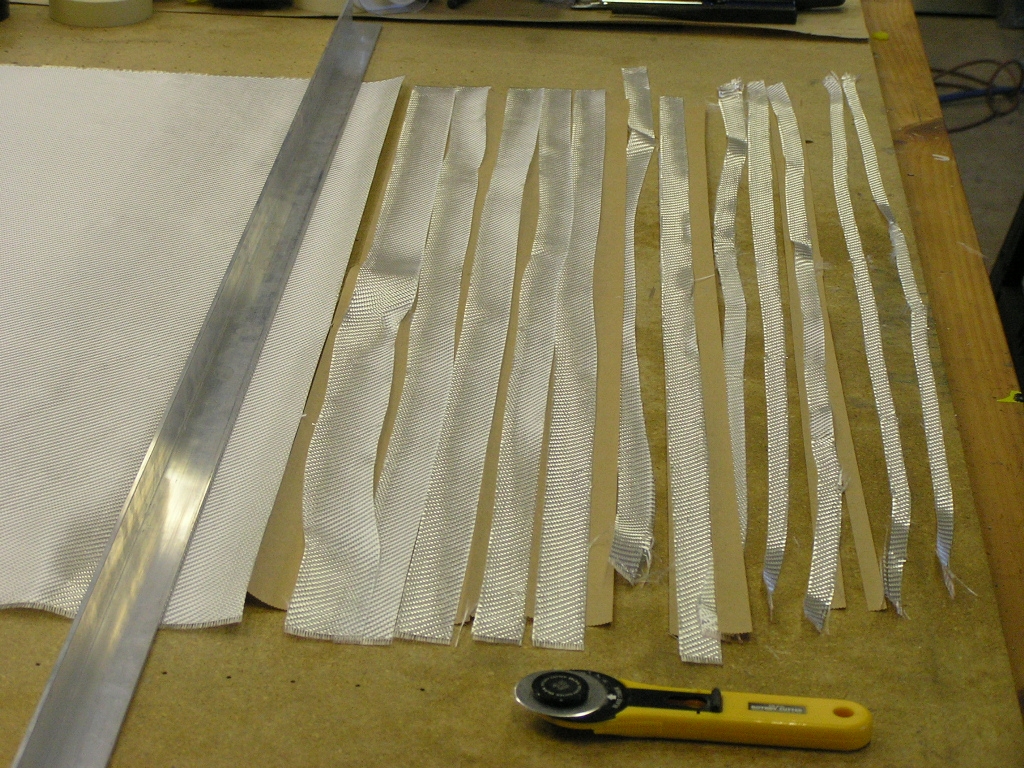 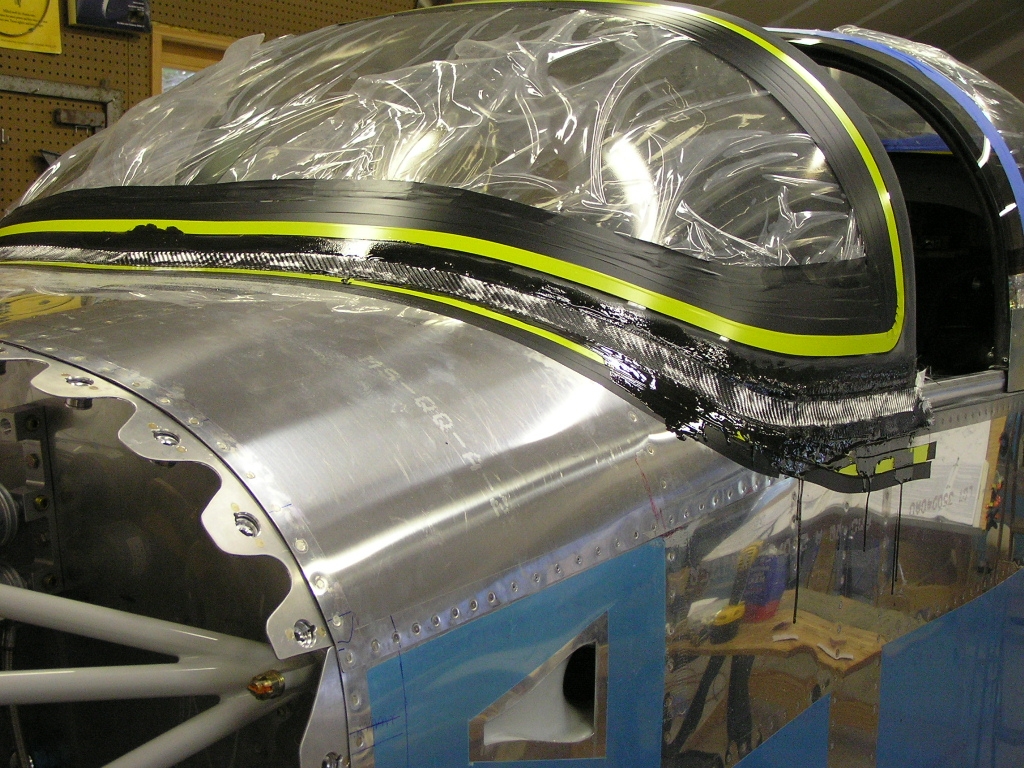
Finally, I cut and applied strips of dacron
"peel-ply" to smooth out the epoxy layups. |
4.0 |
| 10/26/08 | Today I bought some 3M 60 grit
automotive sandpaper and started sanding down the windscreen
fairing. I used a round sanding block to follow the
contour. The sanding is pretty tedious but the effort
should be worth it.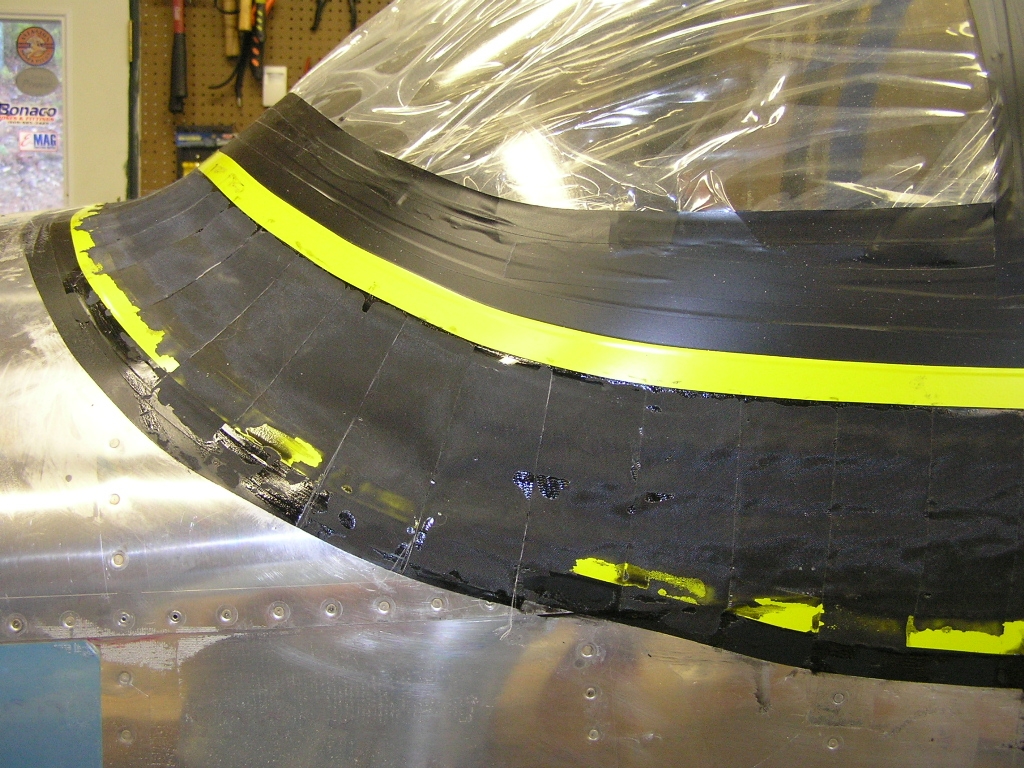 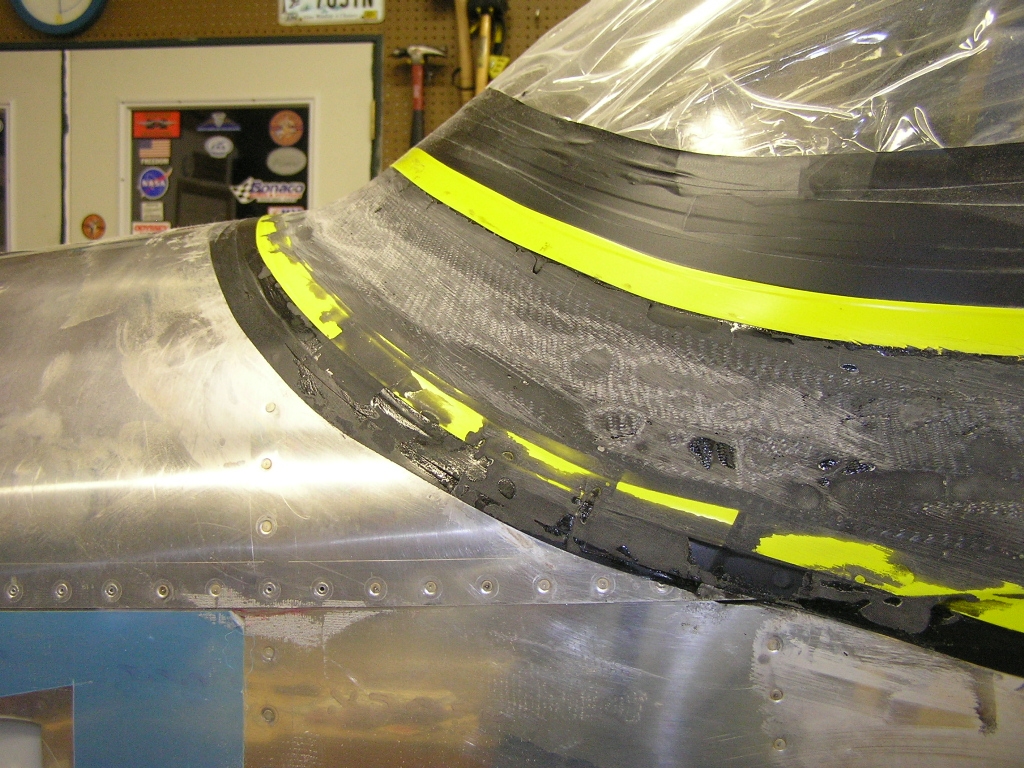 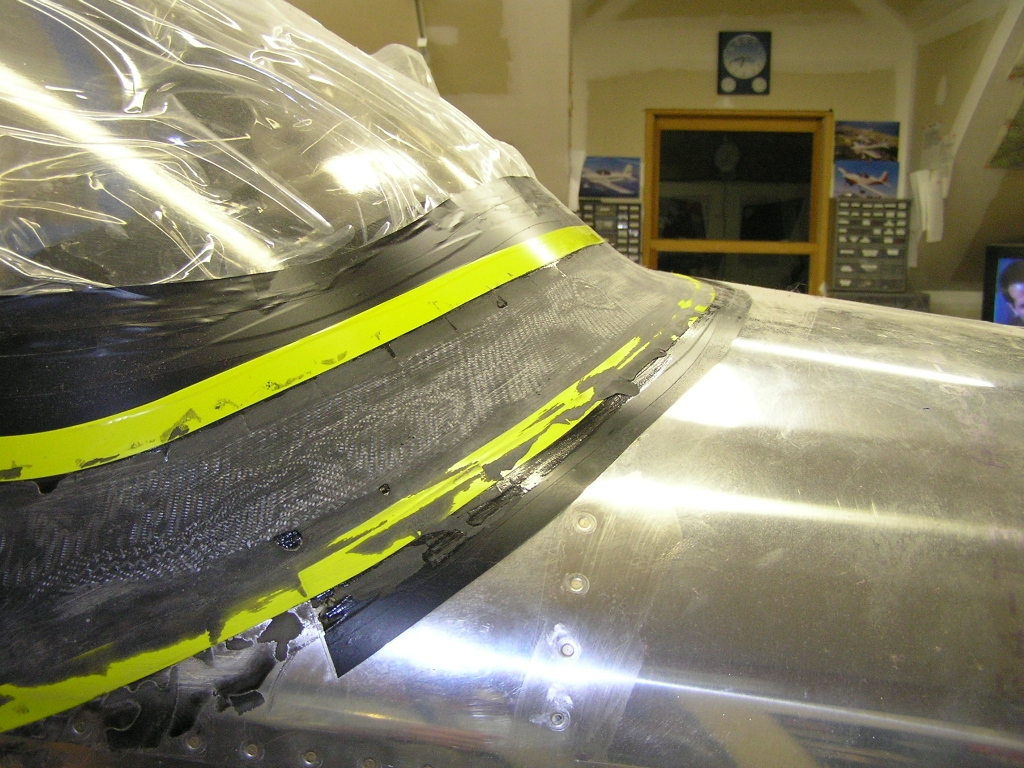 |
3.0 |
|
|
||
| 10/25/08 | In preparing to glass the rear
skirt I noticed the canopy had a .50" "ski slope" at the rear
edge. In order to ensure a smooth transition I taped off
and cut off the rear edge at the point it began to slope upward.
After deburring and sanding the rear edge I cut out one of the
aluminum rear skirts as supplied in the finish kit to use as a
pattern. |
1.0 |
| 10/26/08 | I began by cutting several strips of 12 oz
glass into 1.0", 1.5" and 2.0" strips. I then used packing
tape to cover the sliding canopy and then mixed some epoxy with
a little micro-balloons and black dye. I brushed the roll
bar with epoxy and began laying up three layers of glass.
I then brushed on a final coat of epoxy and covered with the
peel-ply.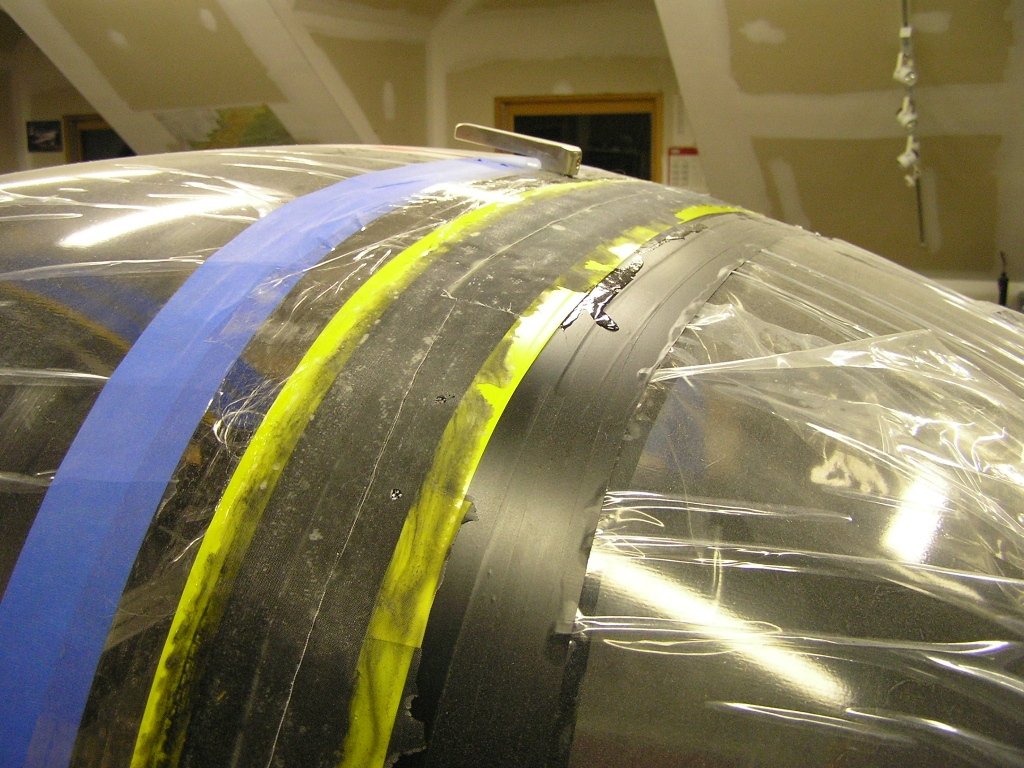 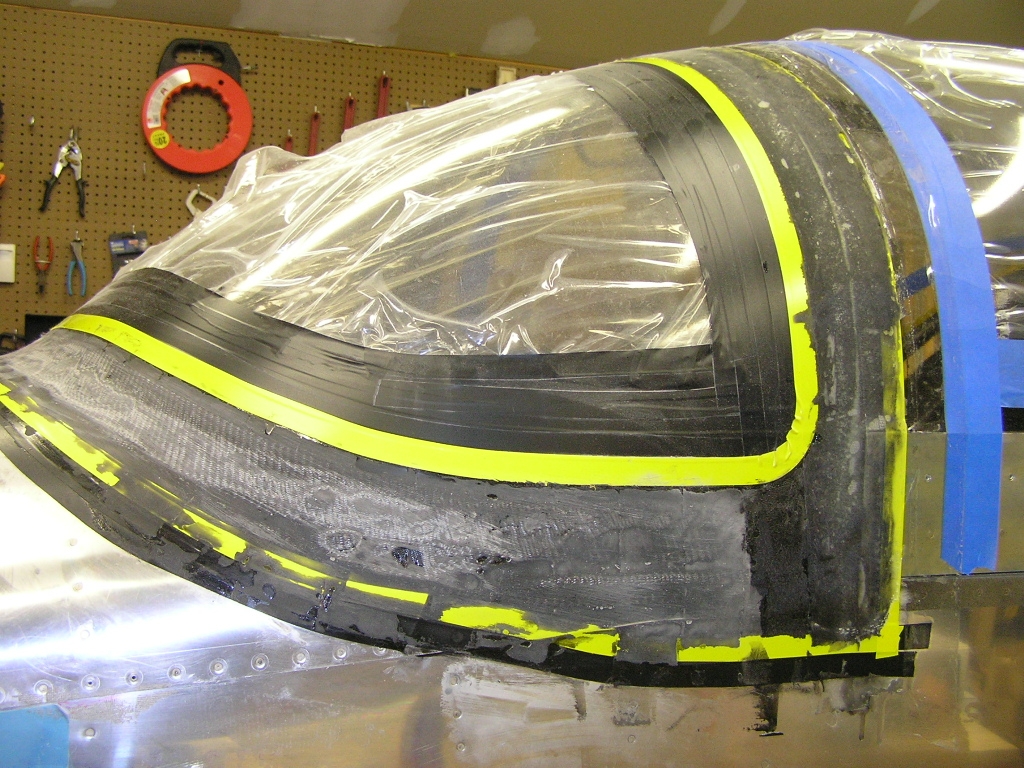 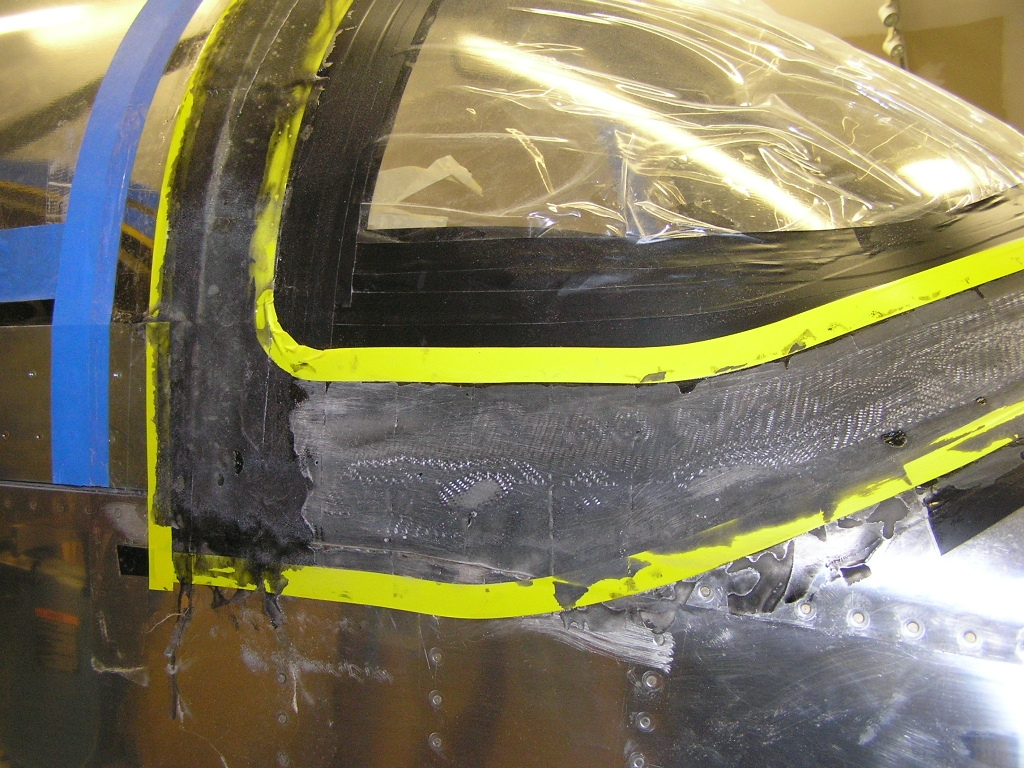 |
4.0 |
| 10/30/08 | Well I finally got out to the shop tonight and
spent 3 hours sanding the fairing over the roll bar. Lots
more to do before I can start applying the finish epoxy layers.
Epoxy dust is EVERYWHERE!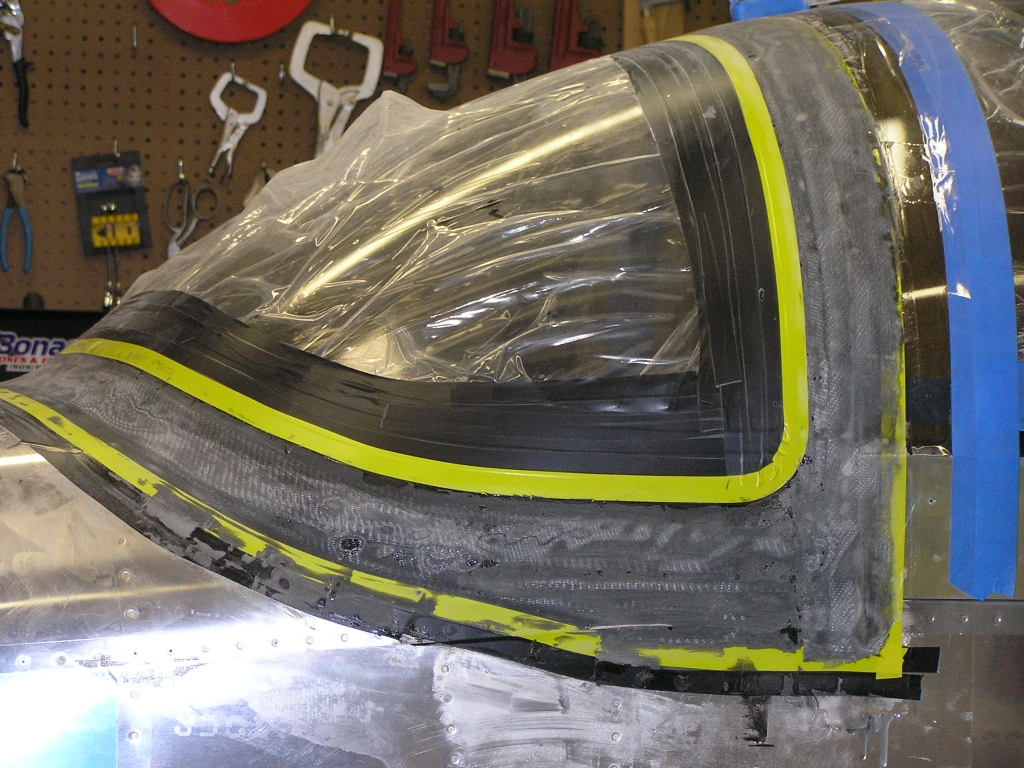 |
3.0 |
| 10/31/08 | I got another hour of sanding in before I had
it well enough to blow off and add another thickened coat of
micro. I still get quite a bit of sag on the sides where
it is vertical so I added peel-ply.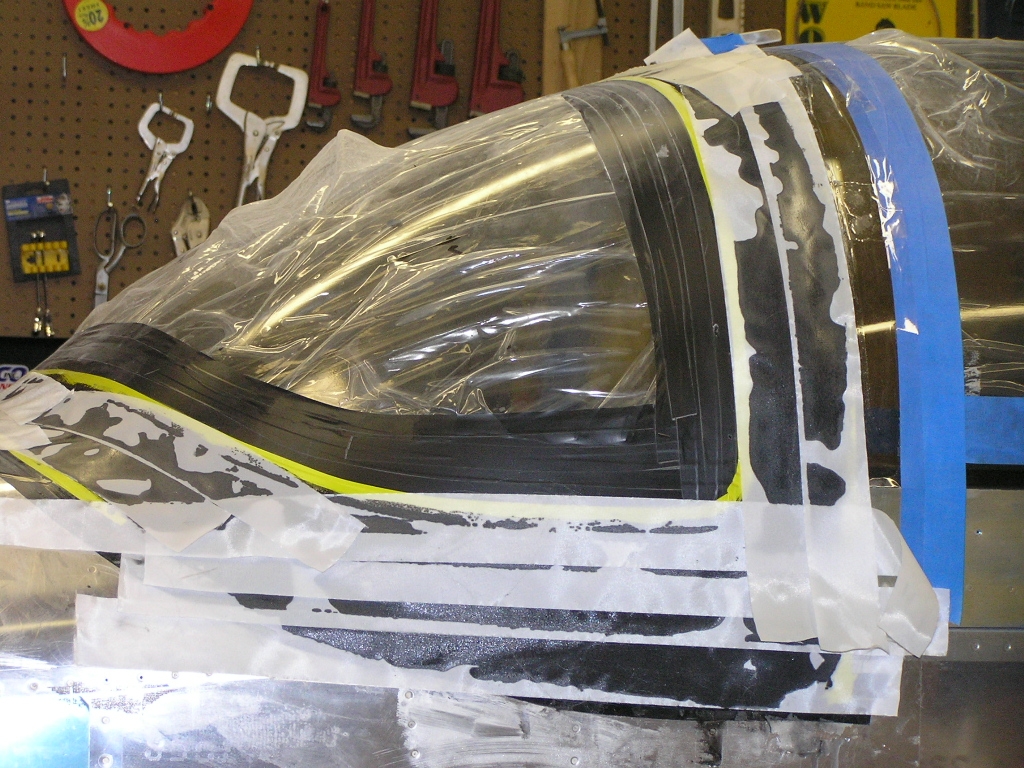 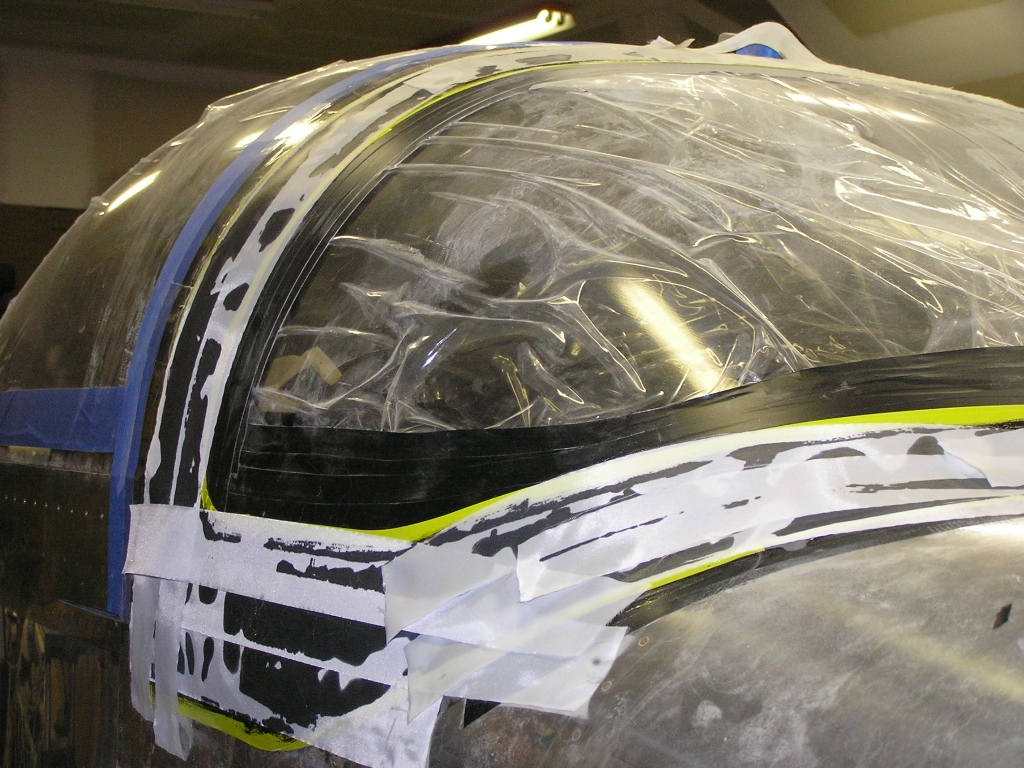 |
4.0 |
| 11/1/08 | Today I sanded the epoxy down. Sanding
epoxy mixed with microballoons is way easier than straight
epoxy. I have a few low spots and bubble voids so I mixed
up a dry mix of micro and used a scraper to spread it out.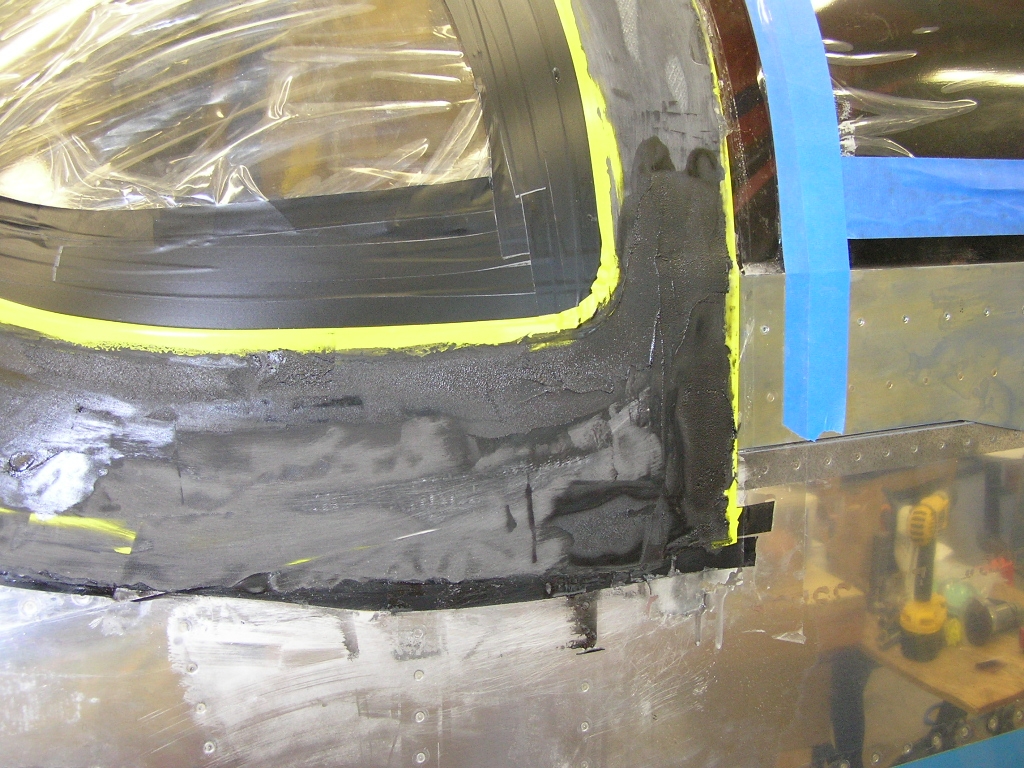 |
2.0 |
| 11/2/08 | I sanded the fairing down and must say I am
getting really, really close to a final product. I will
hopefully add a final coat of micro this week and see if I can
finish it up next weekend. Then, I will hopefully be able
to open the canopy again! |
3.0 |
| 11/4/08 | Tonight I celebrated the election by un-gluing
my slider canopy from the windscreen fairing. I must
strongly suggest to all who read my builder's log to use a wax
to act as a release agent on the packing tape. |
2.0 |
| 11/5/08 | Re-taped off the slider canopy and prepped the
roll bar fairing for an additional couple of lay-ups. The
roll-bar fairing is often "grabbed" by occupants while entering
or exiting the cockpit so it needs to be pretty beefy. I
think I would rather have it thicker than normal than having to
repair the fiberglass fairing. |
1.0 |
| 11/6/08 | Added two more strip lay-ups to the roll bar
fairing. |
1.0 |
| 11/7/08 | Washed the layup with soapy water and covered
the area with a thick mix of micro.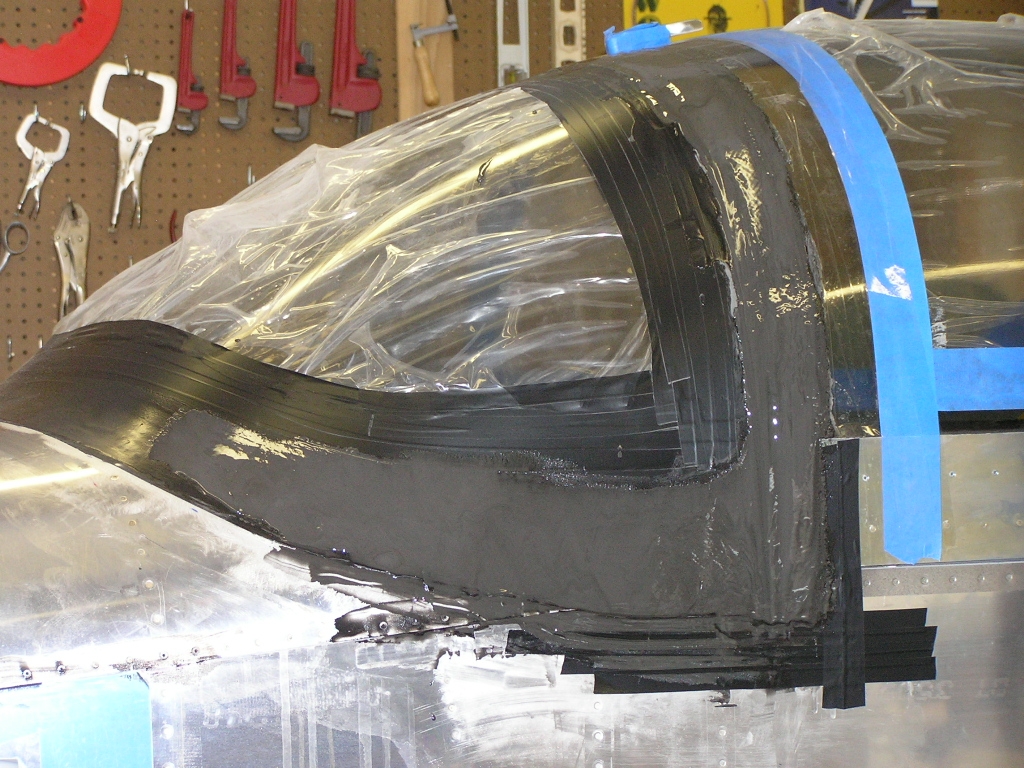 |
1.0 |
| 11/8/08 | Today I sanded down the roll bar fairing.
It is a tedious job. I washed with soapy water and
re-taped off the area.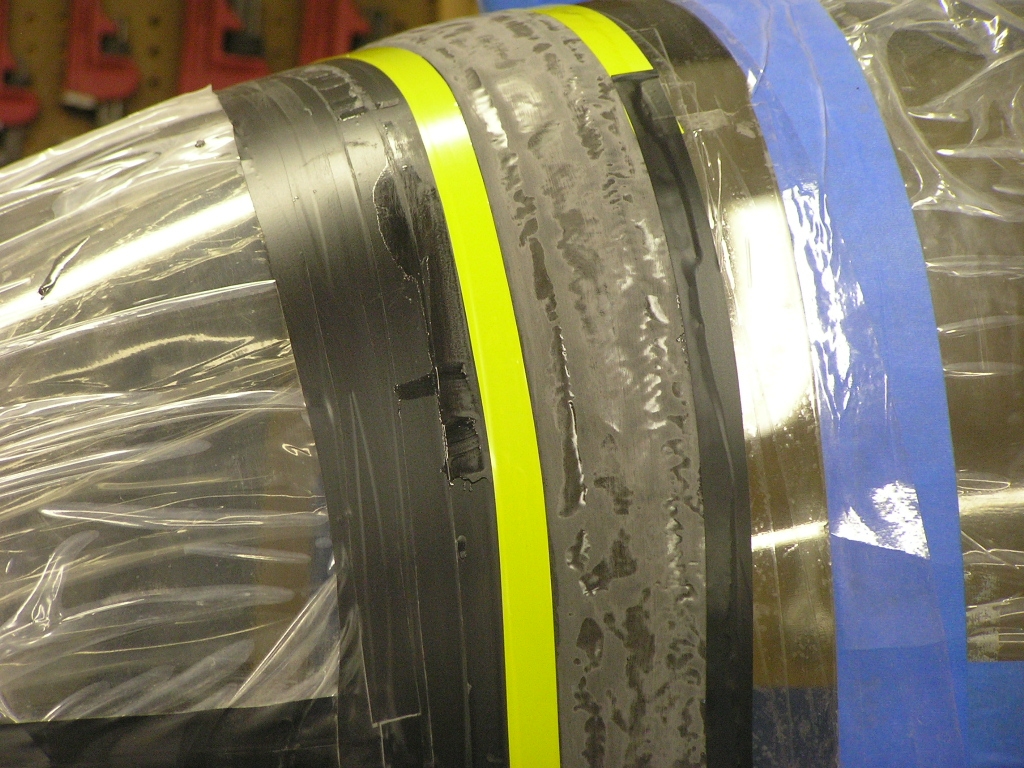 |
4.0 |
| 11/9/08 | Mixed up a thick mix of micro and applied to
the roll bar fairing. |
1.0 |
| 11/10/08 | Began the slow process of sanding down the
micro being careful around the windscreen. |
2.0 |
| 11/12/08 | After sanding down, I used my Dremel and cut
the rear edge off the roll bar fairing. I then mixed up a
small batch of thick micro and touched up the low spots. |
2.0 |
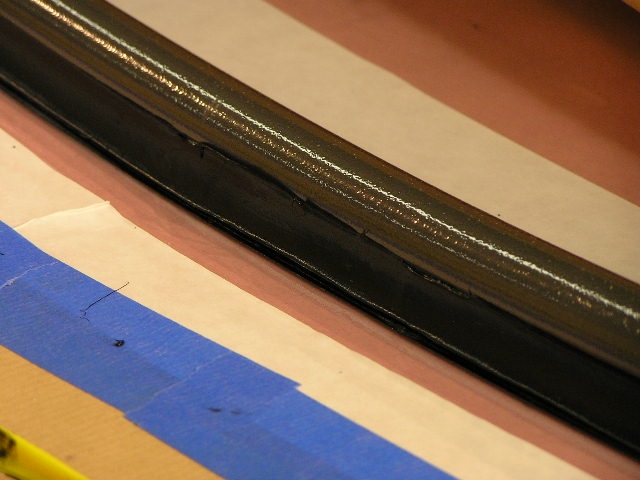
| 11/13/08 | Sanded the roll bar and sprayed it with three
coats of SEM high-build sanding primer. 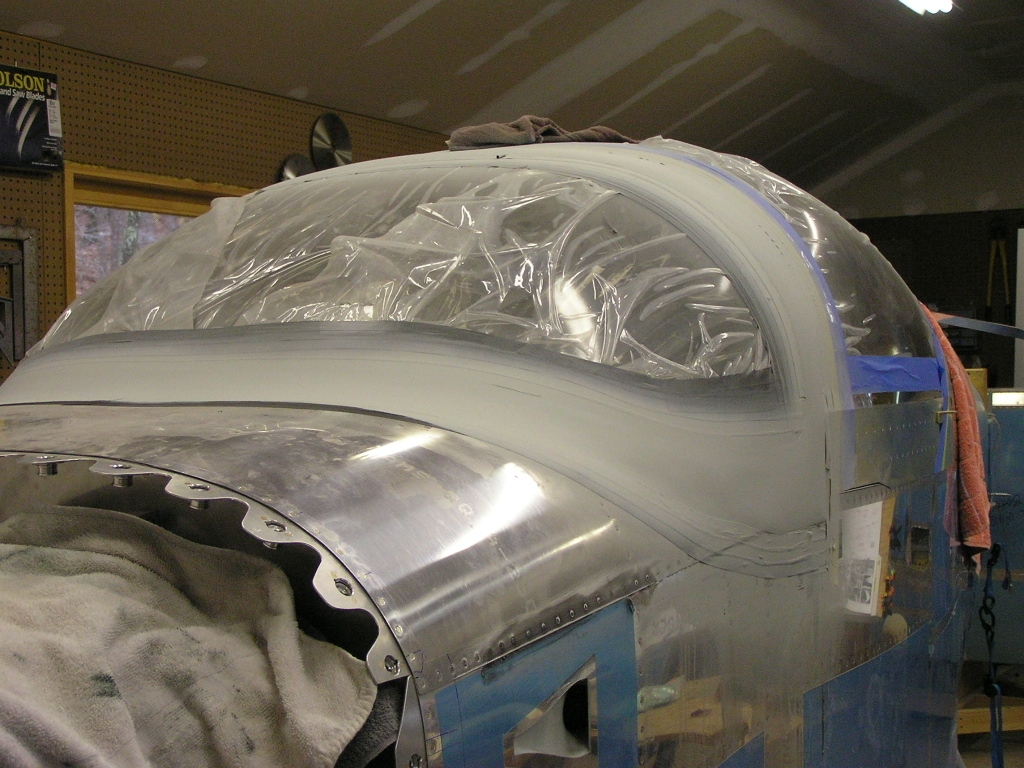 |
1.5 |
| 11/14/08 | Today I rough sanded the primer and removed the
tape in order to see the finished product. It turned out
nicer than I expected.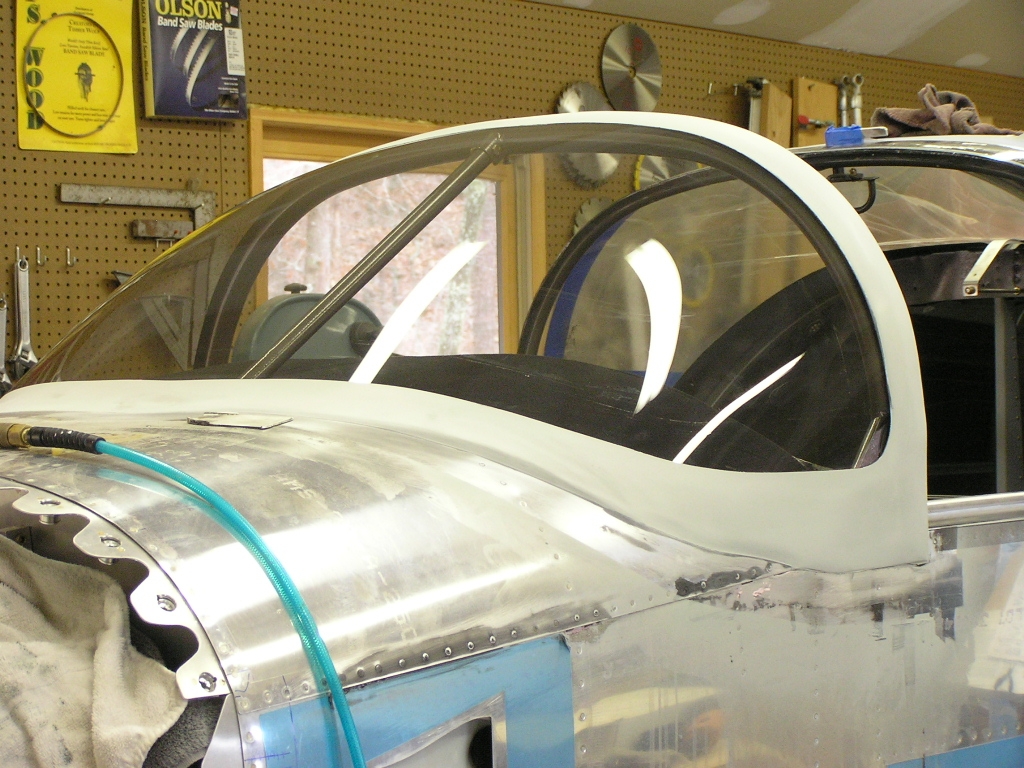 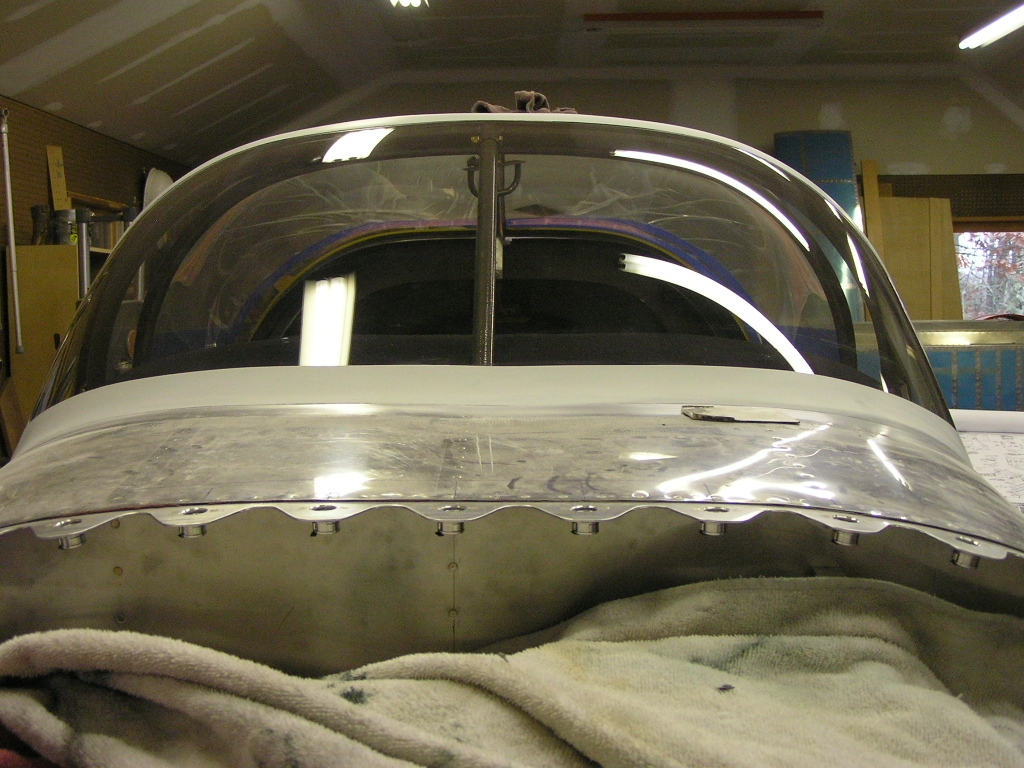 |
|
|
Glassing the Rear Skirt |
||
| 10/25/08 | In preparing to glass the rear
skirt I noticed the canopy had a .50" "ski slope" at the rear
edge. In order to ensure a smooth transition I taped off
and cut off the rear edge at the point it began to slope upward.
After deburring and sanding the rear edge I cut out one of the
aluminum rear skirts as supplied in the finish kit to use as a
pattern. |
1.0 |
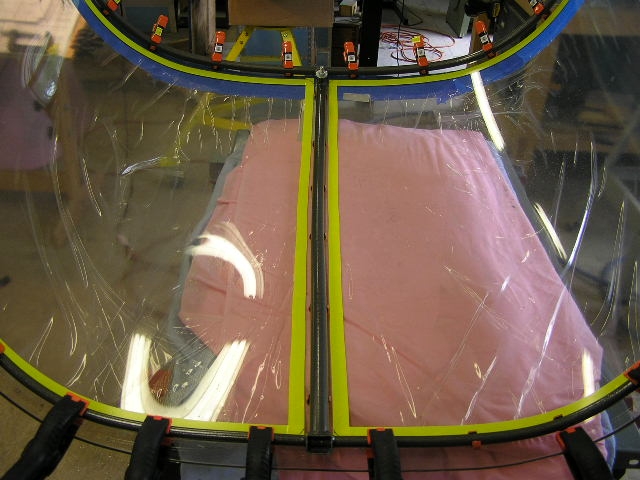
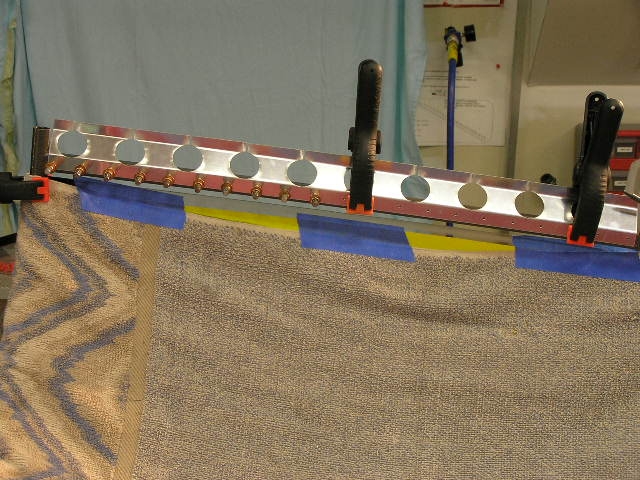
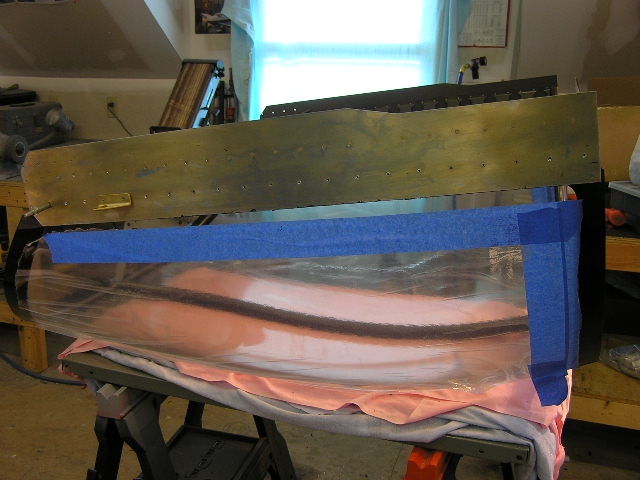
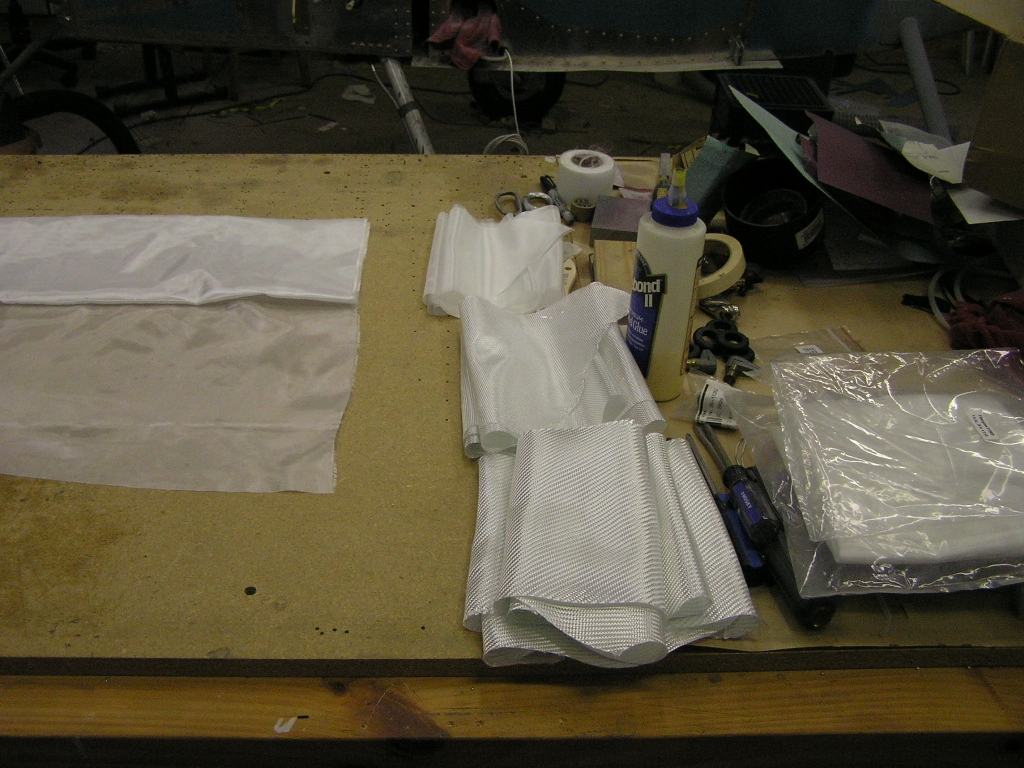
| 11/14/08 | I added 1/8" spacers at the canopy stop on the
roll bar and pushed the canopy closed. I then taped the
rear skirt area making sure to allow plenty of room for
over-sizing the layups.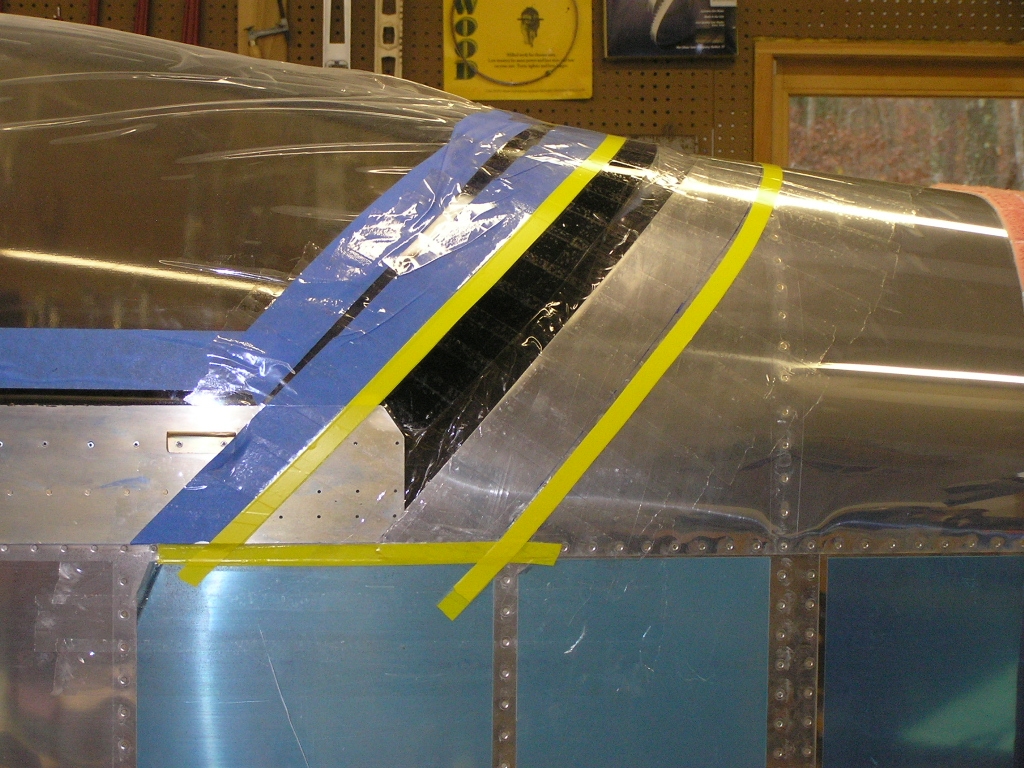 I pre-cut out enough strips of
fiberglass to allow six complete layups, 2- 12oz, 2- 6oz and 2-
1.7oz. I applied each layup on each side, wetted the glass
and laid up the next layer until I was finished. |
3.0 |
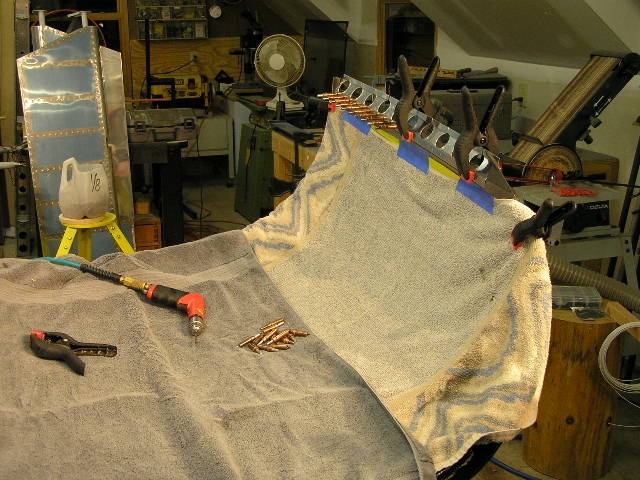
| 11/15/08 | Next, I course sanded the rear skirt and washed
with soapy water. Next, I added a thick coat of micro.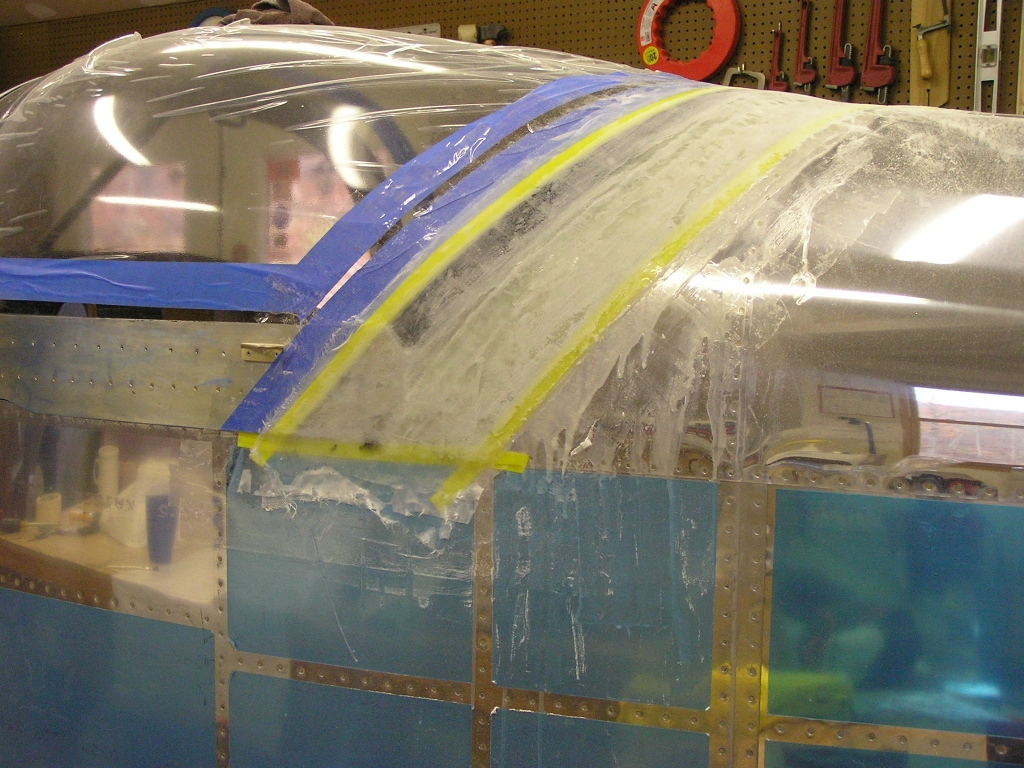 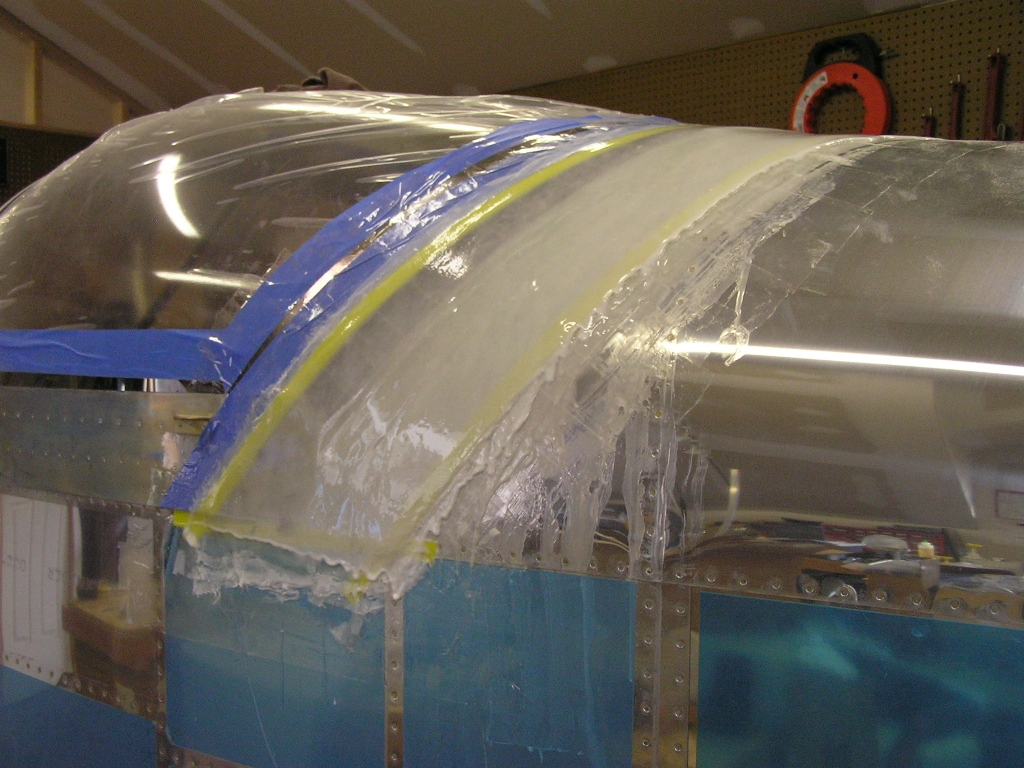
After about five hours the micro had set up well enough to sand. |
3.0 |
| 11/16/08 | Mixed up some thick micro and applied layer #2.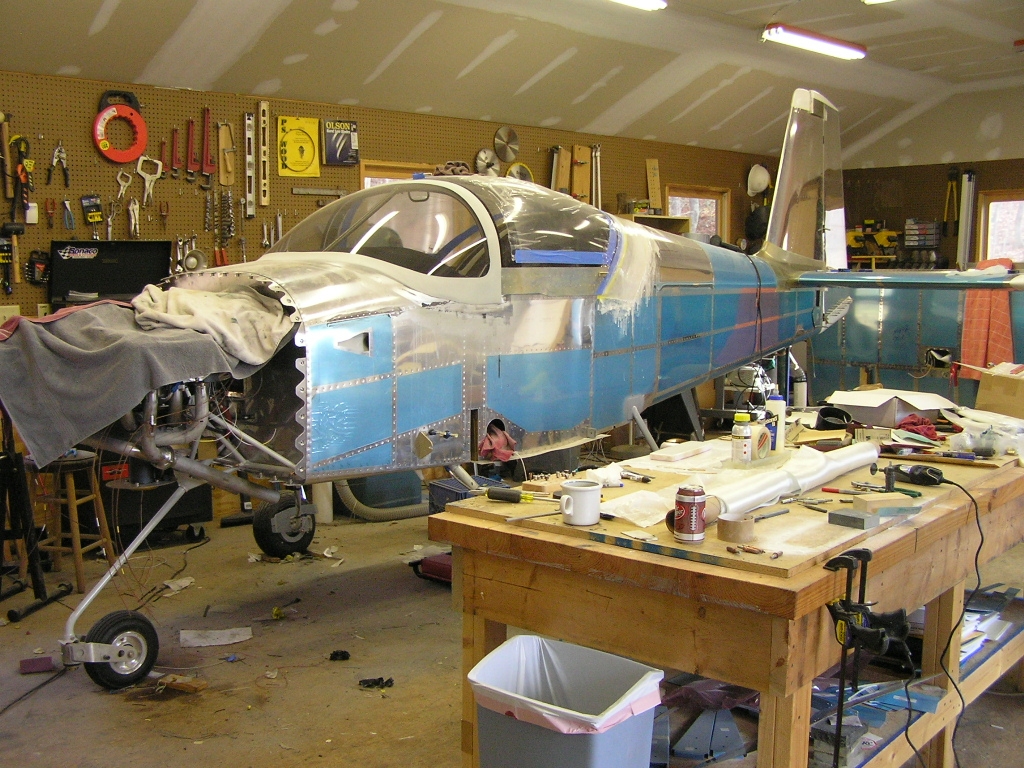 |
1.0 |
| 11/27/08 | Sanded down and applied layer #3 of thickened
micro. |
1.0 |
| 11/28/08 | Sanded down and popped the fairing off the
canopy and rear fuselage. I then marked tape line with a
marker and cut out the fairing with the Dremel tool.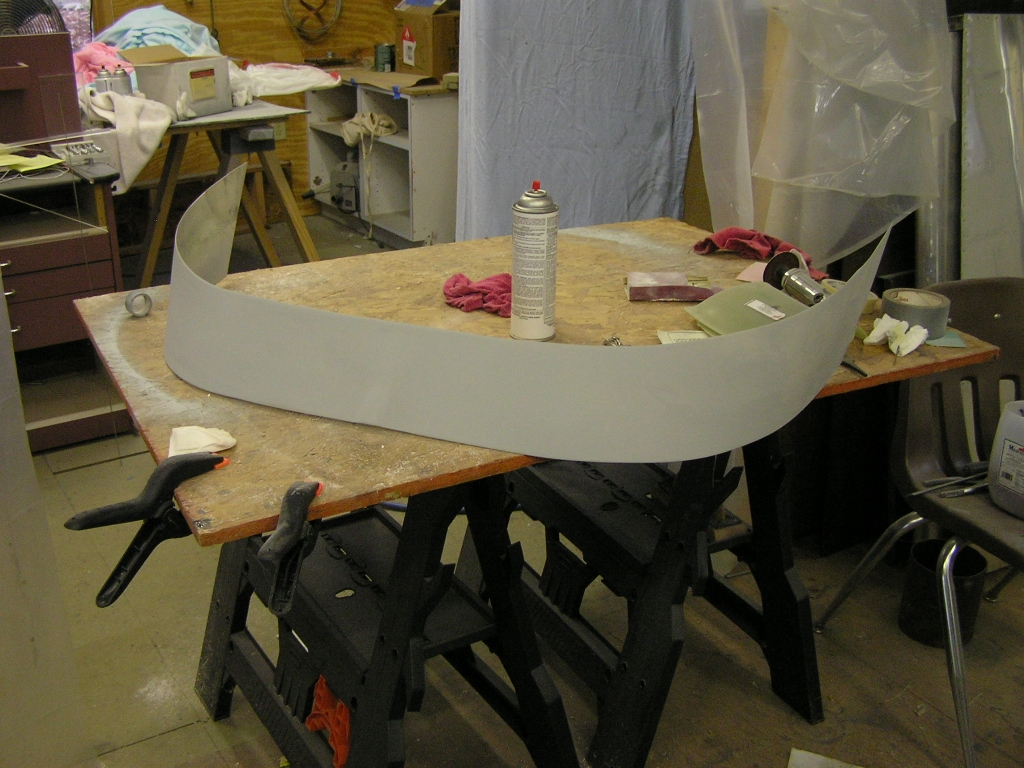 |
2.0 |
| 11/29/08 | I sanded the fairing and used some micro to
touch up some small indentions. After sanding, I sprayed
with SEM sanding primer and sanded again. I then sprayed
again with another coat of primer and let dry.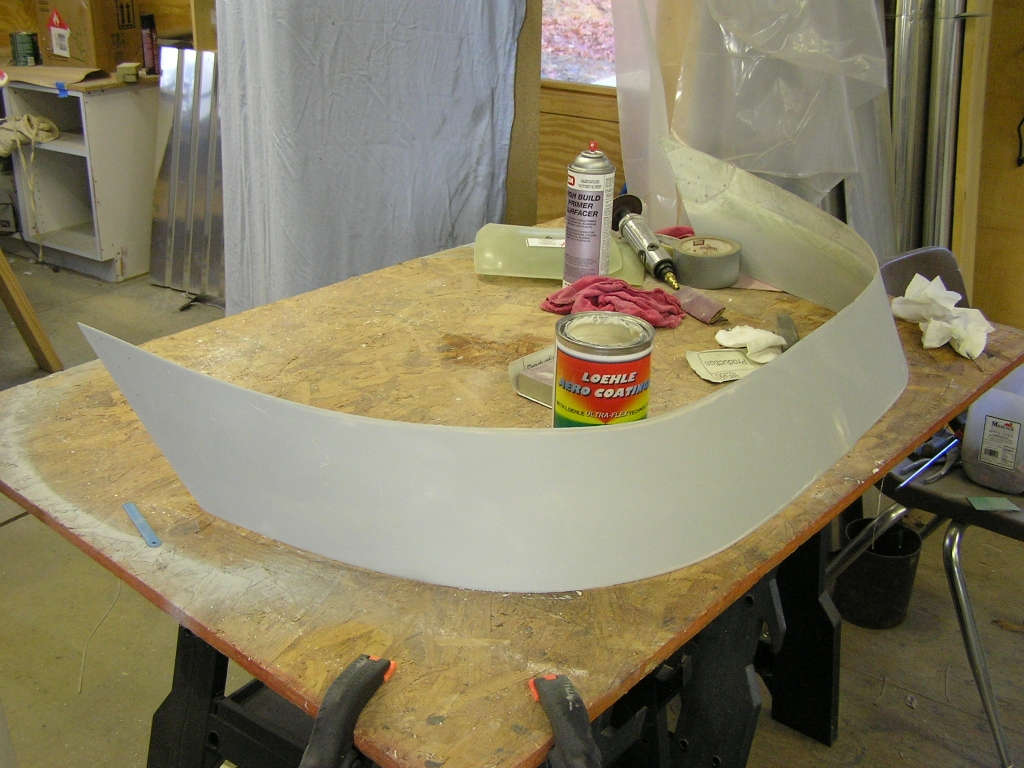  |
2.0 |
| 11/30/08 | Roughened up the rear of the canopy where the
fairing will be attached using SikaFlex.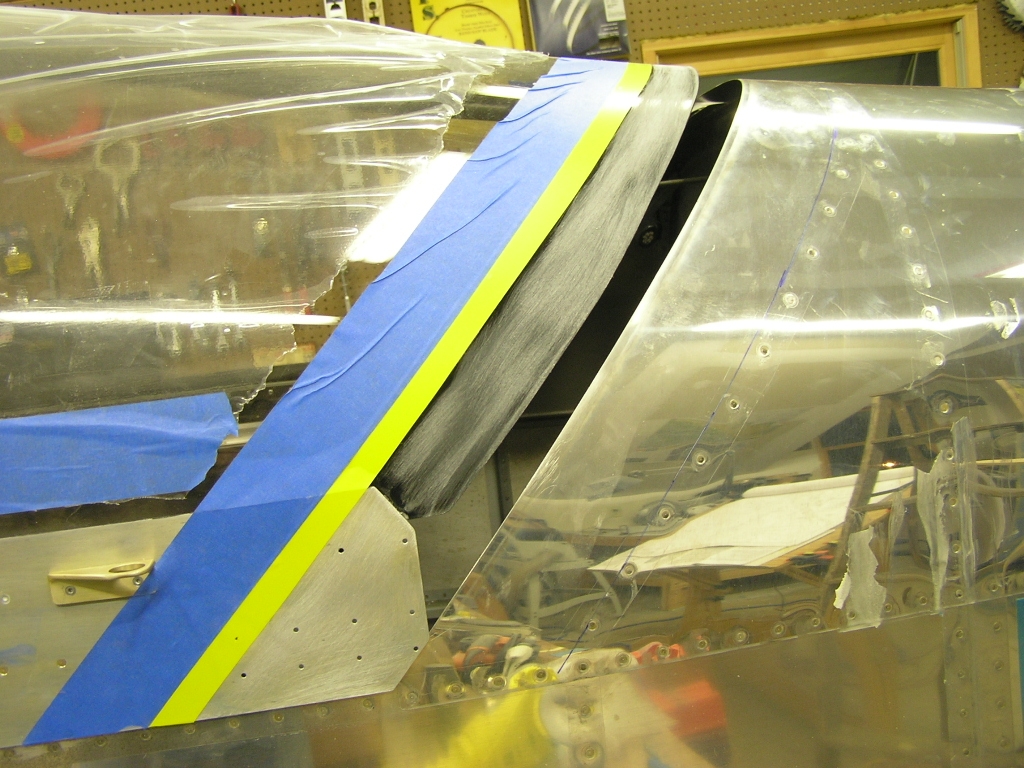 |
1.0 |
|
Gluing the Rear Skirt |
||
| 12/5/08 | Today I cleaned and primed the rear canopy
skirt and canopy in preparation for gluing. I applied
SikaFlex to the skirt and spread it out evenly where it would
contact the canopy evenly and clecoed the sides.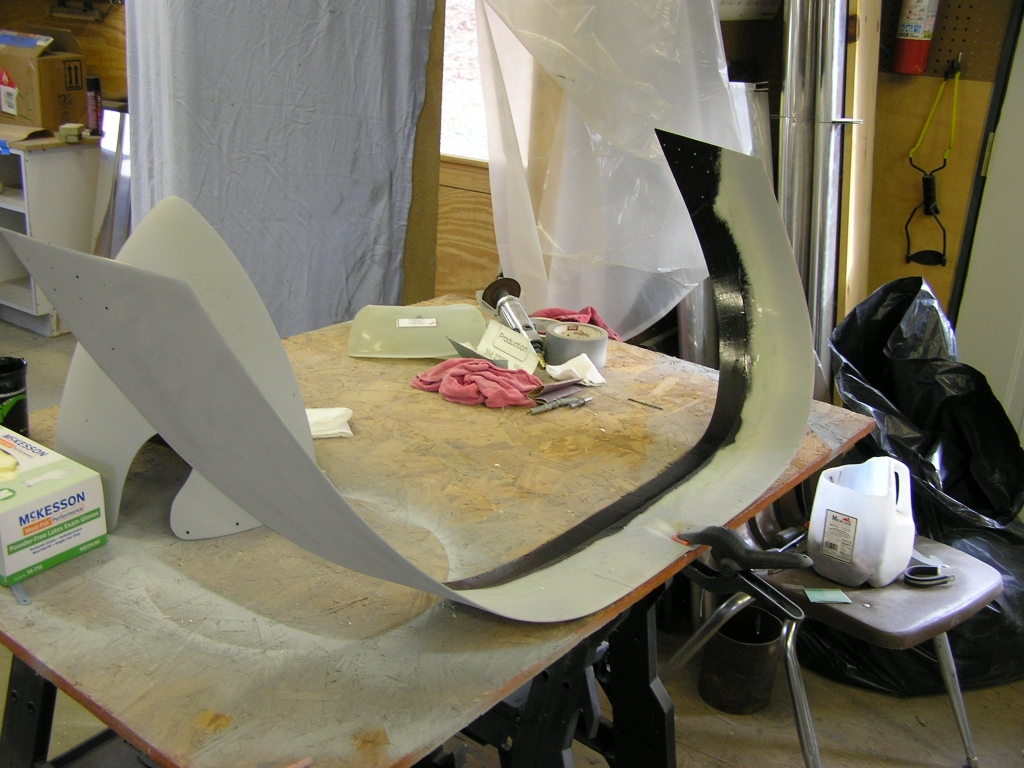 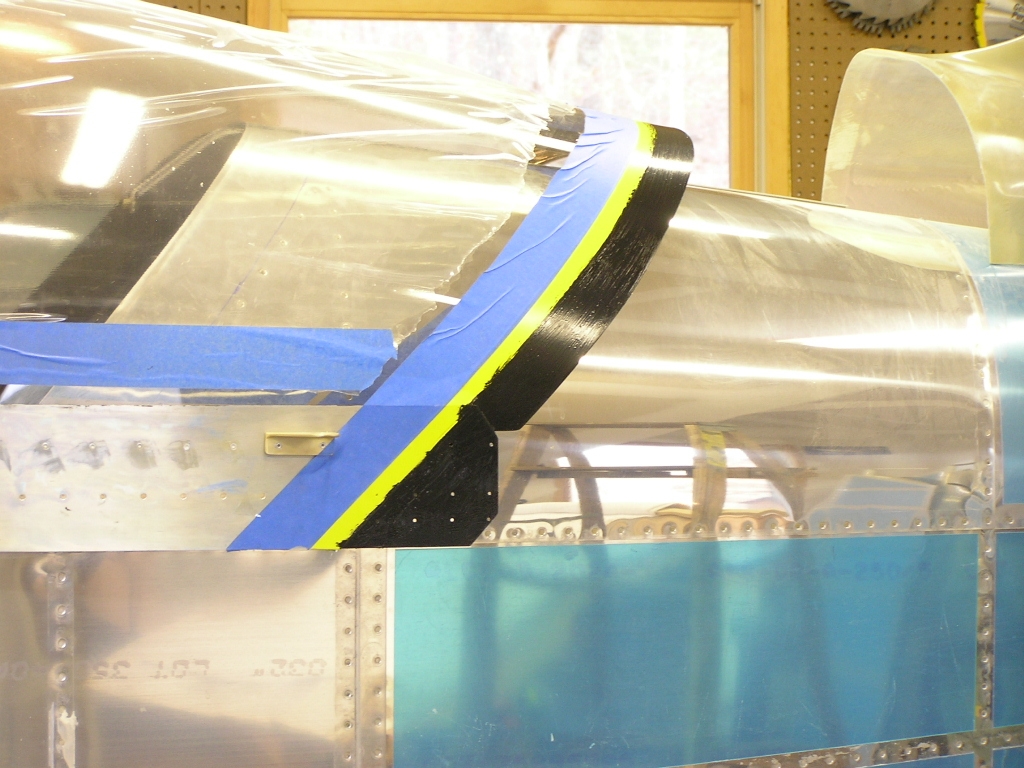 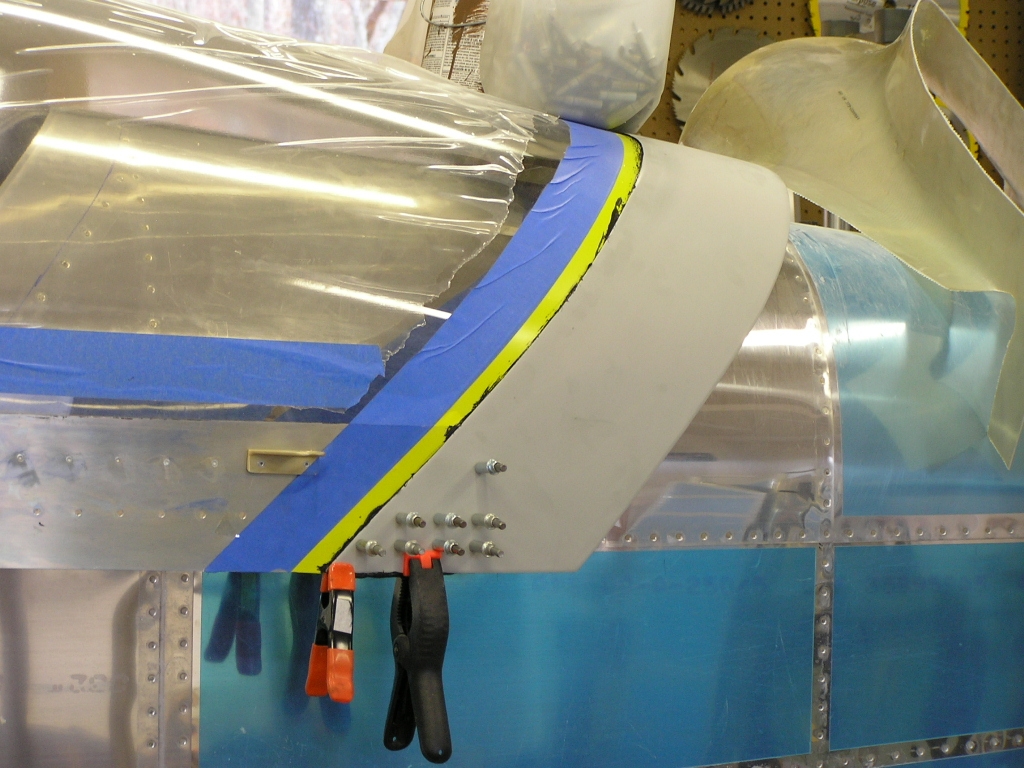 I also cleaned the sika on the roll bar and applied the final coat of
sika. I then smoothed it out. |
3.0 |
| 12/6/08 | I countersunk the rear skirt where it overlaps
the side skirts and riveted. I installed a pulled rivet in
the upper hole I could not reach with the squeezer.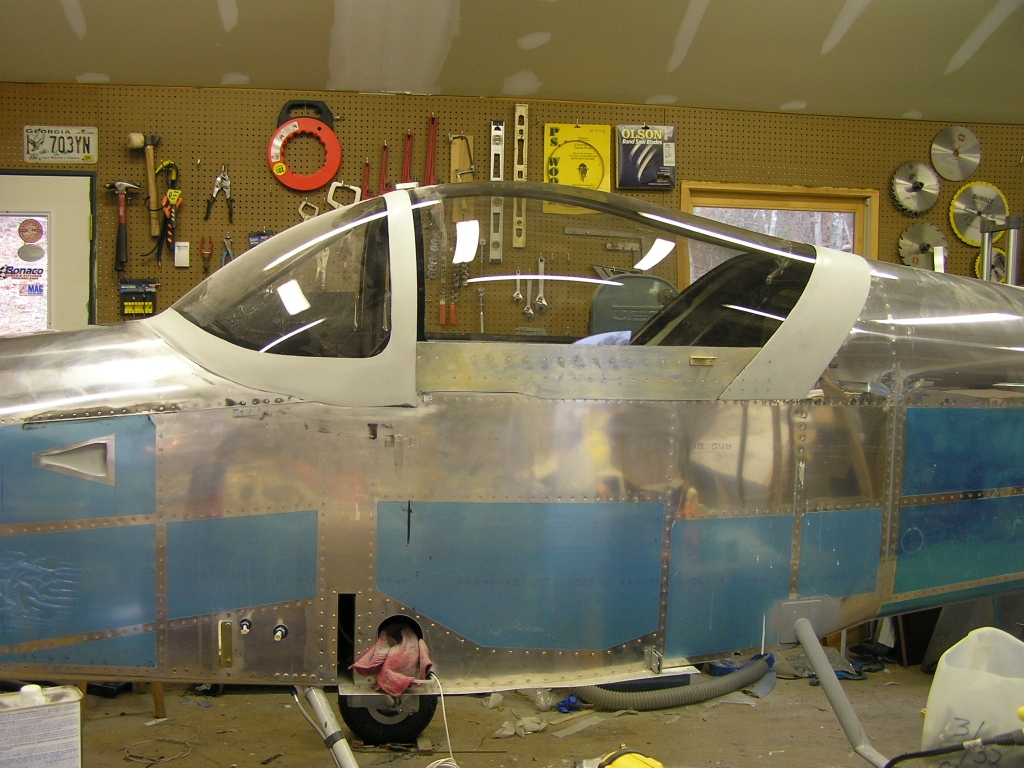 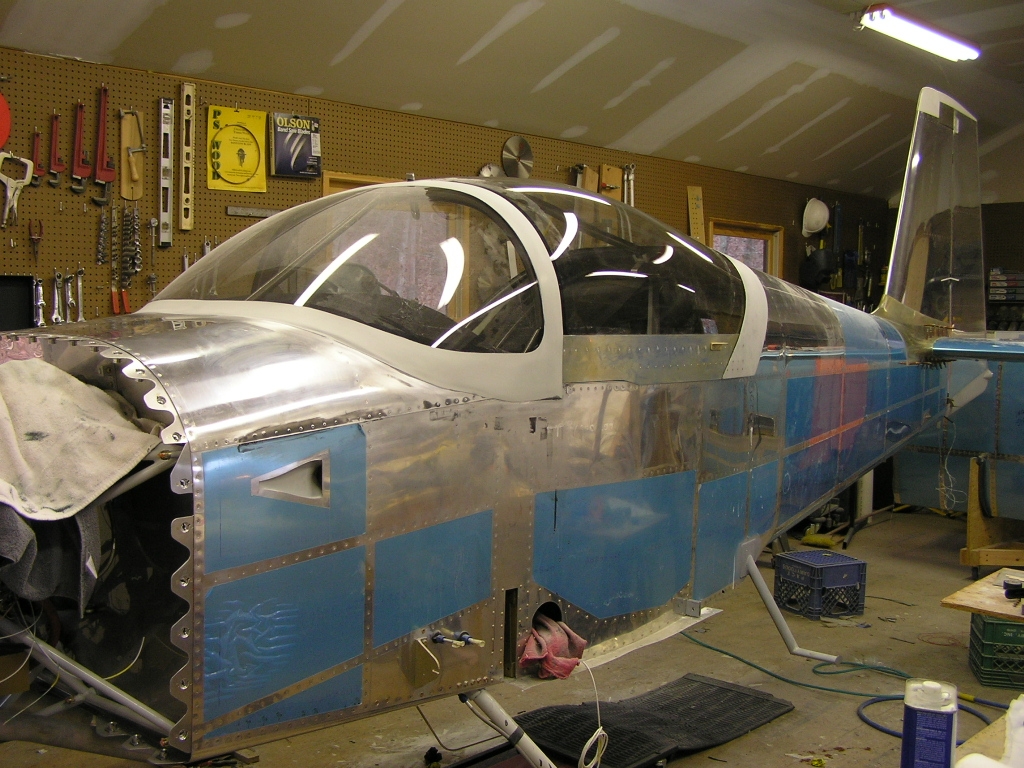 |
1.0 |
| Next: Firewall Forward | ||
|
Total hours |
||
|
Total Hours Canopy |


Copyright ©2005-09
Hosted by NTI Networks